How to Run Windows 11 on an iPhone with WindowsiOS (Step-by-Step Guide)
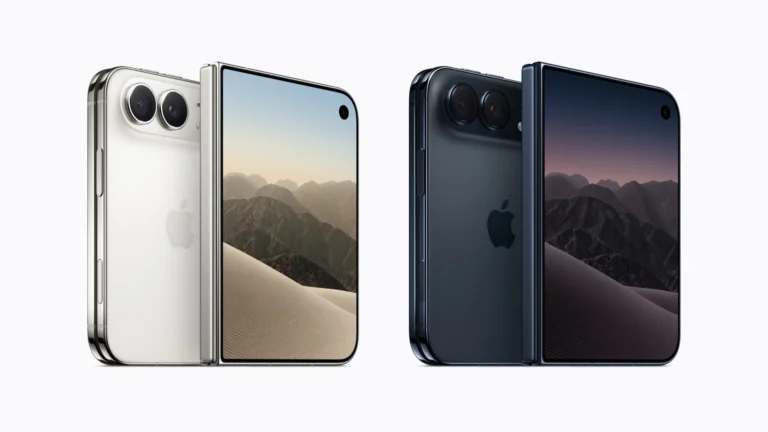
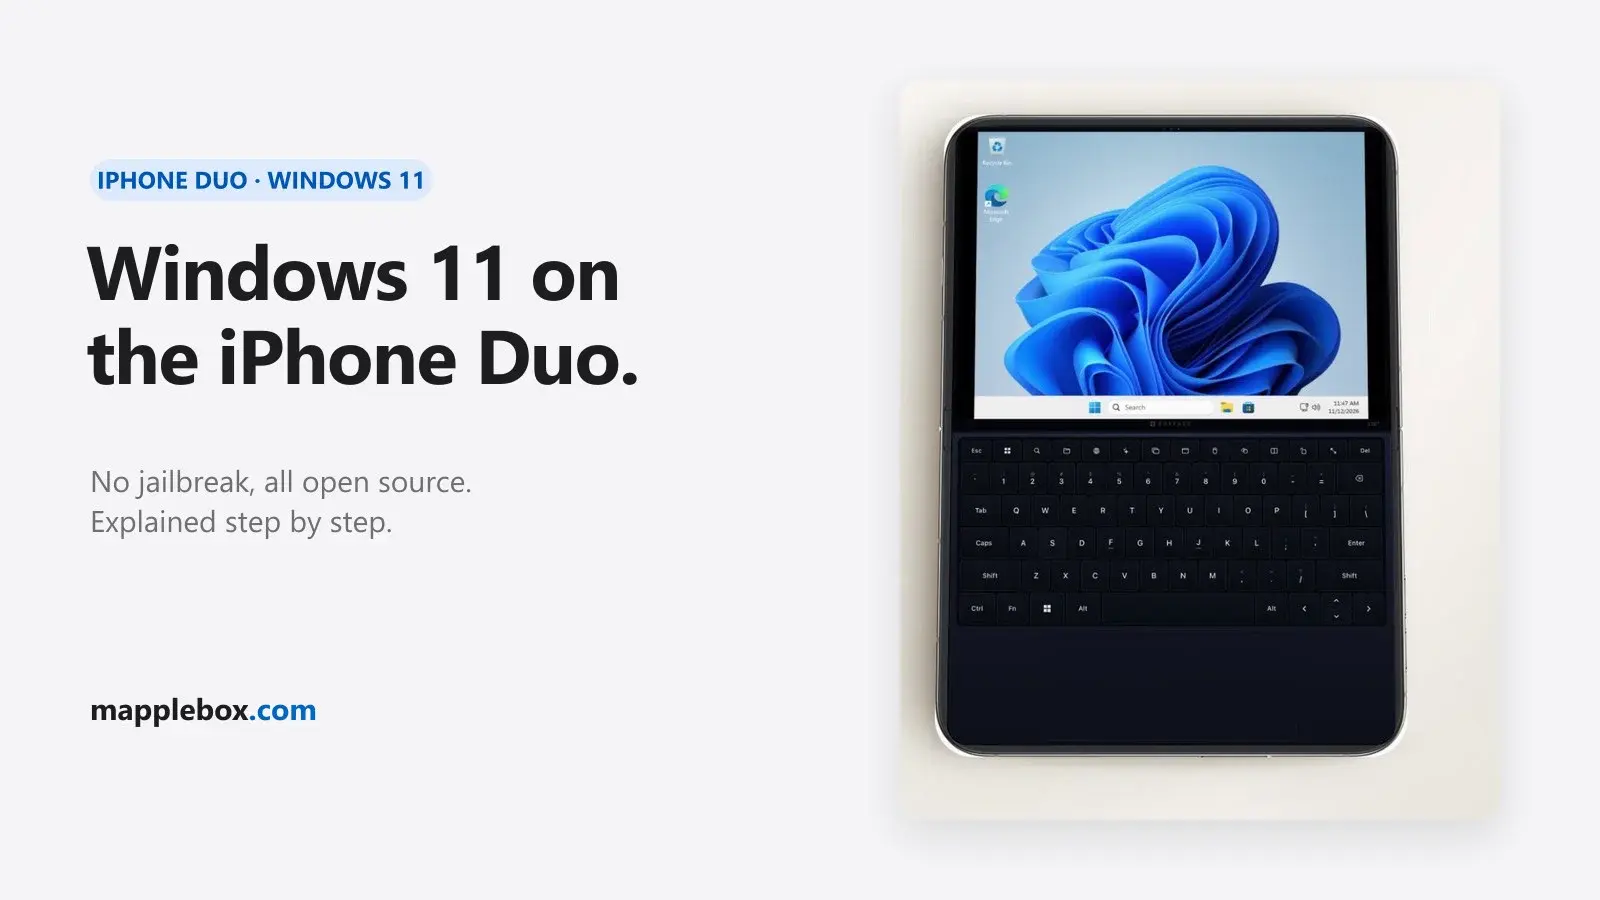
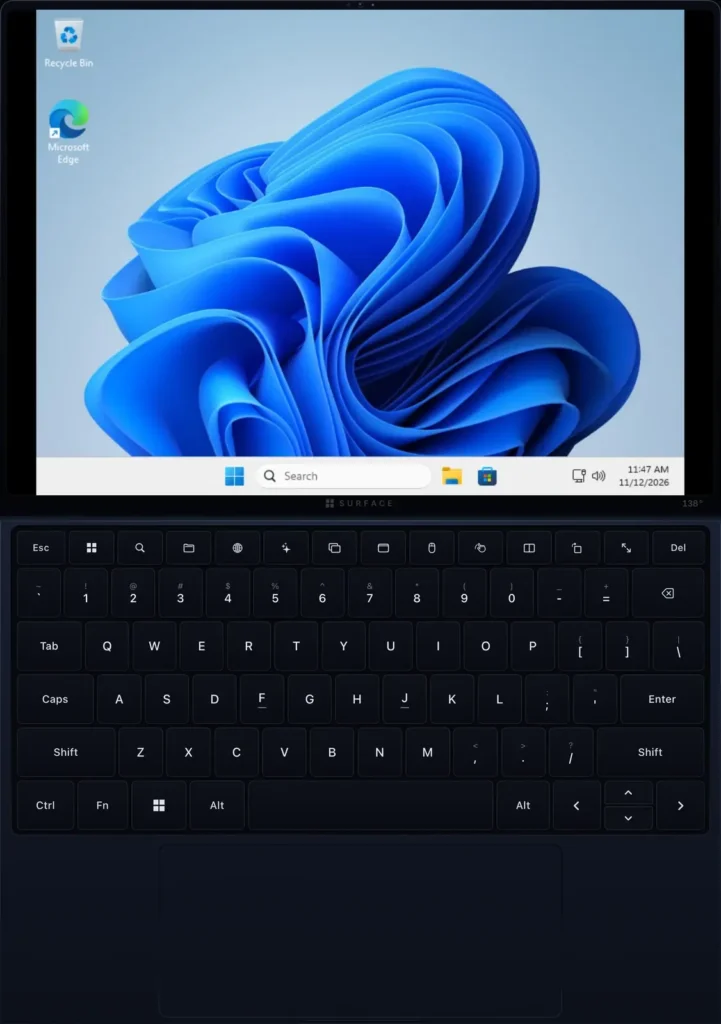
Windows 11 on an iPhone sounds like a joke, but it boots. WindowsiOS is an open-source project by Ammaar Reshi that runs the real ARM64 version of Windows 11 Pro inside an iPhone app. I set it up on my own iPhone Duo on 12 November 2026. This guide takes you through every step: building it on a Mac, getting Windows straight from Microsoft, putting it on the phone and starting it. It also lists every problem I hit and how I fixed it.
Quick explainer
- What it is: an iPhone app that acts like a small ARM PC. Windows 11 boots inside it, from the firmware logo to the desktop.
- How it works: Apple doesn’t let normal apps use the iPhone’s built-in virtualization. So WindowsiOS uses a JIT (“just-in-time” translator): it rewrites Windows’ processor code on the fly into code the iPhone is allowed to run.
- Why every start needs a debugger: iOS only allows that JIT while a debugger (a developer tool that attaches to a running app) is connected. Either a script on your Mac attaches it over the cable, or the StikDebug app does it on the iPhone itself. Both worked on my iPhone Duo. The debugger only stays for the start, then lets go.
- Sideloading: you install the app yourself, without the App Store, signed with your Apple developer account.
- Who this is for: you have a Mac with Apple silicon, an iPhone Duo and a paid Apple Developer account, and you’re fine copying commands into Terminal.
Before you start: the honest version
What you need
- A Mac with Apple silicon (M1 or newer). I used a Mac mini M4 with 16 GB RAM on macOS 27.2 with Xcode 27.2.
- About 45 GB of available disk space on the Mac while you build, plus the space for Xcode itself.
- An iPhone Duo. The author verified WindowsiOS on the iPhone Duo (iPhone19,4, A20 Pro), and I only tested it on my iPhone Duo with iOS 27.2. Other iPhones: untested by me, so don’t count on them.
- Room on the iPhone: the Windows file is 14.2 GB, and on the first start the app unpacks it into a disk image of up to 32 GB, then deletes the packed file. Plan for about 46 GB at that moment.
- A paid Apple Developer account. That’s what I used. I did not test a personal Apple ID without the paid membership, so I can’t tell you if that works.
- A USB-C cable between the Mac and the iPhone.
How long it takes
- The build itself took about 45 minutes on my Mac mini. Add the downloads: Xcode, about 4.5 GB for Windows and about 836 MB for the network driver.
- Copying Windows onto the phone ran at about 36 MB/s for me, so around 7 minutes.
- With the Mac script, every start of Windows takes about a minute of black screen while the debugger does its job. I didn’t time the start with StikDebug.
What doesn’t work yet (or wasn’t tested)
- Every start needs a debugger: either the launch script on the Mac with the cable (step 15) or StikDebug on the iPhone (section “Starting Windows without a Mac”). I verified both on my iPhone Duo. Close the app, and you go through one of the two again. StikDebug needs a one-time setup with the Mac.
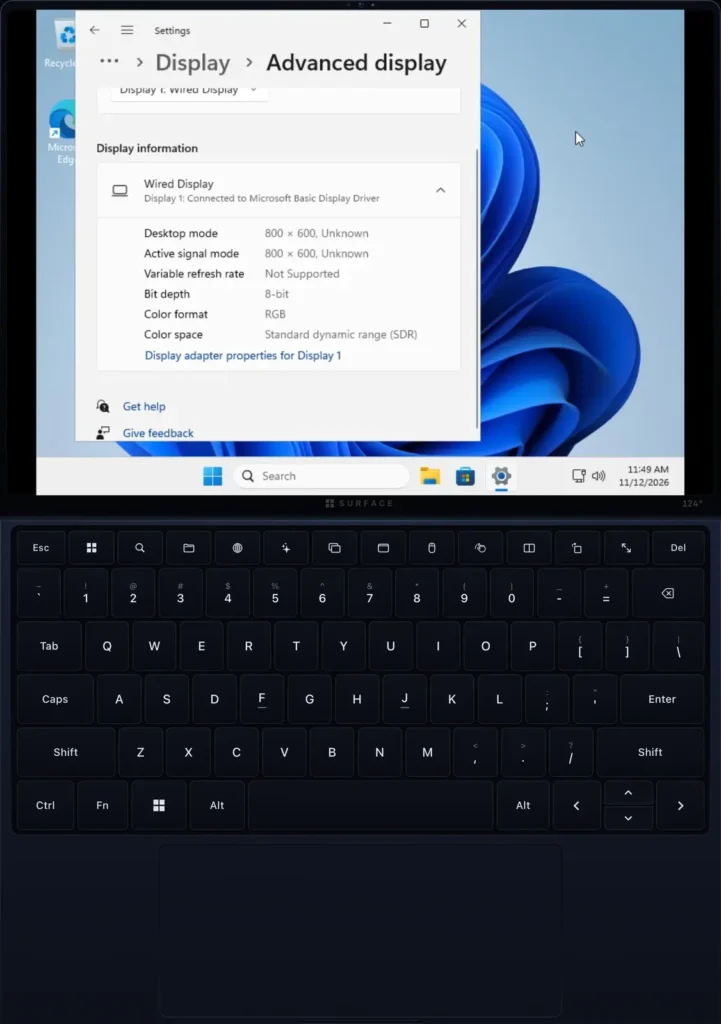
- The screen starts at 800 × 600. With one command inside Windows you get 1024 × 768, which is the maximum of this firmware (step 16).
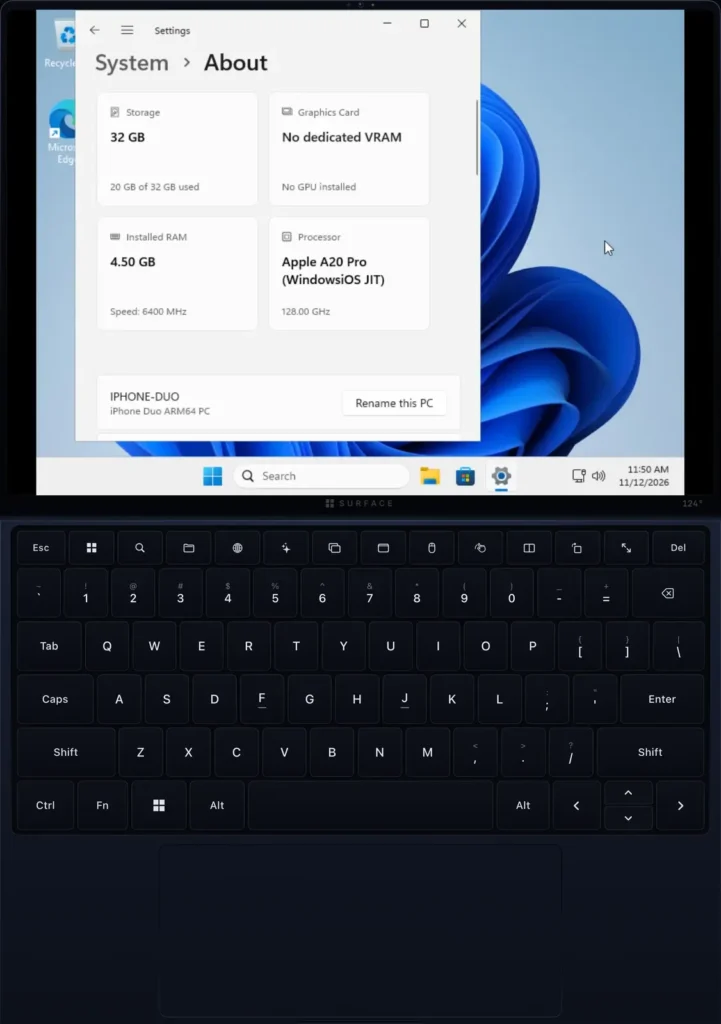
- Windows sees 4.5 GB RAM, a 32 GB disk and no graphics card.
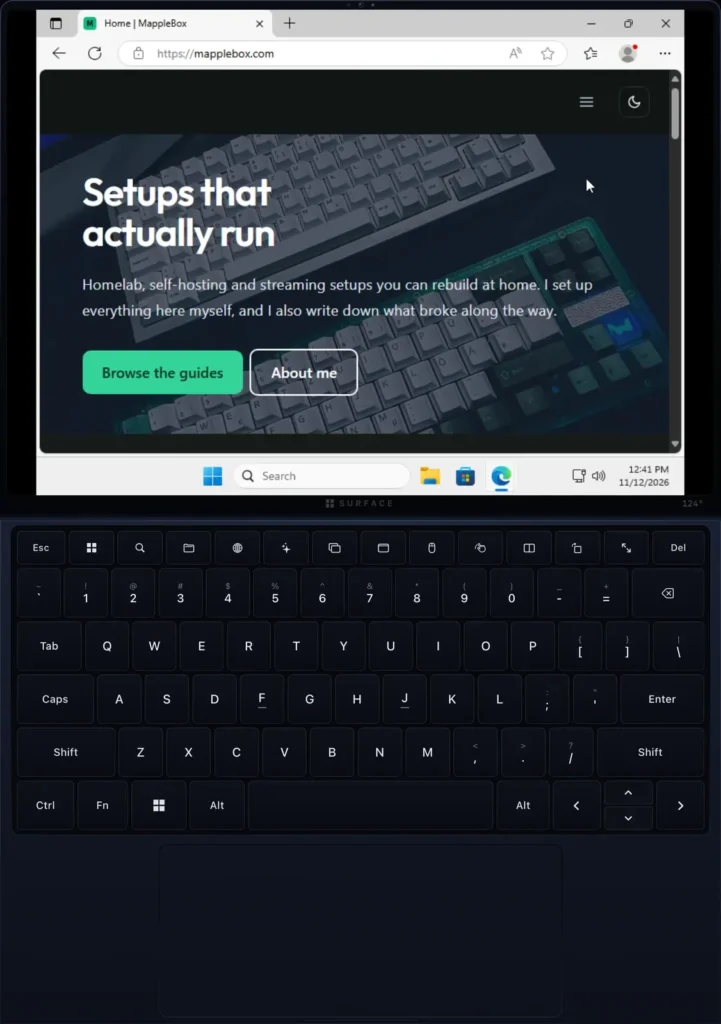
- Internet inside Windows works on my iPhone Duo (Edge loaded websites, tested 12 November 2026), but only with a small patch of mine that adds the network driver. The upstream scripts don’t include it. Step 6 shows you how to add it.
- The cleanup step that removes preinstalled apps failed on my run, so Edge and the Store stay. Windows runs fine anyway.
- The scripts don’t enter a product key, so Windows isn’t activated. For long-term use you need your own Windows 11 Pro license.
- I didn’t benchmark anything, so there are no speed numbers here.
- WindowsiOS is a young, experimental project (a handful of commits when I built it). Expect some fiddling.
Step 1: Prepare the Mac
You do everything in Terminal (Applications > Utilities > Terminal). Copy each block, paste it, press Enter, and wait until it’s done before the next one.
- Install Xcode (Apple’s developer app) from the Mac App Store and open it once. Let it install its extra components, and make sure the iOS platform is installed (Xcode > Settings > Components).
- Tell the command line tools to use the full Xcode. Without this, you get the error
xcodebuild requires Xcode. It asks for your Mac password:
sudo xcode-select -s /Applications/Xcode.app/Contents/Developer
sudo xcodebuild -license accept- Install Homebrew, the package manager most Mac developers use for command-line tools. The command comes from brew.sh. At the end, Homebrew prints two or three lines under “Next steps”. Run those too, so the
brewcommand works:
/bin/bash -c "$(curl -fsSL https://raw.githubusercontent.com/Homebrew/install/HEAD/install.sh)"- Install the build tools.
pythonprovides thepython3the scripts call,qemuis only there for its UEFI firmware file,wimlibreads the Windows download,llvmandlldbuild a small Windows helper, andlibimobiledeviceplusideviceinstallertalk to the iPhone over USB:
brew install python meson ninja pkgconf wimlib libslirp glib qemu llvm lld xcodegen libimobiledevice ideviceinstallerCheck: xcodebuild -version shows Xcode 27, and brew --version prints a version number.
Step 2: Get the code
This puts the project into a folder called WindowsiOS in your home folder. The second clone is Husk, a project WindowsiOS builds on. Its build script needs a patch from there.
git clone https://github.com/ammaarreshi/WindowsiOS.git ~/WindowsiOS
cd ~/WindowsiOS
git checkout 0a46e3f
mkdir -p work/refs
git clone https://github.com/Leviidev/Husk.git work/refs/Husk
git -C work/refs/Husk checkout 29abb51
git checkout 0a46e3f pins the exact version I built. Newer versions may change the scripts, and then the steps below might not match. Git prints a note about a “detached HEAD” here. That’s expected. The last line pins the Husk version I used.
Check: git log --oneline -1 starts with 0a46e3f, and ls work/refs/Husk/patches lists libslirp-v4.9.1.patch.
Step 3: Build the engine and the iOS library
The first command compiles three libraries (libffi, glib, libslirp) for the iPhone. The second builds the emulator for the Mac, the image packer and the iPhone library, and runs the built-in tests.
cd ~/WindowsiOS
HUSK_REF="$PWD/work/refs/Husk" ./scripts/build_ios_deps.sh
make -j8 all ios-lib test-core
ls -l build/winvm build/hvsparse build/ios/libwinvm.a
Check: the last command lists all three files. If a test fails, the make command stops with an error.
Step 4: Build the Windows helper tool
The optimizer script in step 8 needs a tiny Windows program called opt_hive_arm64.exe. Its source code is in the repo, but there’s no build script for it. This is the one I used:
cd ~/WindowsiOS
mkdir -p work/guest_tools/obj
cat > work/guest_tools/kernel32.def <<'EOF'
LIBRARY kernel32.dll
EXPORTS
  GetCurrentProcess
  GetStdHandle
  WriteFile
  ExitProcess
  GetCommandLineW
  GetModuleFileNameW
  GetTempPathW
  GetFileAttributesW
  WideCharToMultiByte
  MultiByteToWideChar
  CreateFileW
  CloseHandle
  CreateProcessW
  CreateThread
  WaitForMultipleObjects
  Sleep
  GetTickCount64
  GetProcessHeap
  HeapAlloc
  HeapFree
EOF
cat > work/guest_tools/advapi32.def <<'EOF'
LIBRARY advapi32.dll
EXPORTS
  OpenProcessToken
  LookupPrivilegeValueW
  AdjustTokenPrivileges
  RegOpenKeyExW
  RegCreateKeyExW
  RegSetValueExW
  RegCloseKey
EOF
/opt/homebrew/opt/llvm/bin/llvm-dlltool -m arm64 -d work/guest_tools/kernel32.def -l work/guest_tools/obj/kernel32.lib
/opt/homebrew/opt/llvm/bin/llvm-dlltool -m arm64 -d work/guest_tools/advapi32.def -l work/guest_tools/obj/advapi32.lib
xcrun clang --target=aarch64-pc-windows-msvc -ffreestanding -fno-builtin -fno-stack-protector -mno-stack-arg-probe -O2 \
  -c tools/opt_hive_arm64.c -o work/guest_tools/obj/opt_hive_arm64.obj
/opt/homebrew/opt/lld/bin/lld-link /nologo /machine:arm64 /nodefaultlib /subsystem:console /entry:mainCRTStartup \
  work/guest_tools/obj/opt_hive_arm64.obj work/guest_tools/obj/kernel32.lib work/guest_tools/obj/advapi32.lib \
  /out:build/opt_hive_arm64.exe
ls -l build/opt_hive_arm64.exe
Check: the last line shows build/opt_hive_arm64.exe.
Step 5: Download Windows 11 ARM64 from Microsoft
The scripts expect the Windows installation file in a fixed place. You get it from Microsoft’s own download catalog, the same list the official Media Creation Tool uses. The file is an ESD, a compressed Windows install image.
This block downloads the catalog, picks the English (US) ARM64 file, downloads it (about 4.5 GB) and checks it against the SHA1 checksum, a fingerprint that Microsoft lists in the catalog:
cd ~/WindowsiOS
mkdir -p work/downloads
cd work/downloads
curl -L --fail -o products.cab "https://go.microsoft.com/fwlink/?LinkId=2156292"
tar -xf products.cab
python3 - > esd.txt <<'EOF'
import xml.etree.ElementTree as ET
for f in ET.parse("products.xml").iter("File"):
    if f.findtext("Architecture") == "ARM64" and f.findtext("LanguageCode") == "en-us" and f.findtext("Edition") == "Professional":
        print(f.findtext("FilePath")); print(f.findtext("Sha1")); break
EOF
cat esd.txt
curl -L --fail -o Win11_24H2_ARM64_en-us.esd "$(sed -n 1p esd.txt)"
echo "$(sed -n 2p esd.txt)  Win11_24H2_ARM64_en-us.esd" | shasum -a 1 -c
cd ~/WindowsiOS
Check: the last line before cd says Win11_24H2_ARM64_en-us.esd: OK.
Good to know:
- The download link in the catalog is plain
http. That’s normal for Microsoft’s download servers (withhttpsI got a certificate error). The SHA1 check is what makes sure the file is genuine and complete. - I got build 26100.4349 with SHA1
c78fd344e845d3b17cb91c40bf4a856459da1b6c. If Microsoft has updated the catalog since, you get a newer build. In that case, run the check below: the scripts take image number 6 from the file, and it has to be Windows 11 Pro.
wimlib-imagex info work/downloads/Win11_24H2_ARM64_en-us.esd 6 | grep "^Name"Stick with English (US): the setup scripts are written for it.
Step 6: Add the network driver (for internet in Windows)
Without this step, Windows has no internet. The virtual PC has a VirtIO network card (a standard virtual network card that many emulators use), and Windows needs a driver for it called NetKVM. The upstream setup scripts never install that driver. I added a small patch that does, and with it, Edge loaded websites inside Windows on my iPhone Duo (tested 12 November 2026). Without the patch I can’t tell you anything about networking, because I never ran that combination on the phone.
The driver comes from Red Hat’s open-source virtio-win project. You need three things: the driver download, the ARM64 driver for Windows 11 copied into the project, and the patch.
- Download virtio-win 0.1.302, the version I used (about 836 MB). The project doesn’t publish a checksum for this file, so compare yours with the SHA256 of mine:
303f7ae40dad495d6ae474fdc571df58958a4dbc5c37a522d80f9a203867949d.
cd ~/WindowsiOS/work/downloads
curl -fL -o virtio-win-0.1.302.iso https://fedorapeople.org/groups/virt/virtio-win/direct-downloads/archive-virtio/virtio-win-0.1.302-1/virtio-win-0.1.302.iso
shasum -a 256 virtio-win-0.1.302.iso
cd ~/WindowsiOS- Copy the Windows 11 ARM64 driver into
work/drivers/NetKVM. The first command mounts the download (an ISO disk image) read-only, the last ones unmount it again:
cd ~/WindowsiOS
mkdir -p work/drivers/NetKVM
MNT=$(hdiutil attach -readonly -nobrowse -mountrandom /tmp work/downloads/virtio-win-0.1.302.iso | grep -o '/private/tmp/dmg\.[A-Za-z0-9]*' | head -1)
echo "$MNT"
cp "$MNT"/NetKVM/w11/ARM64/{netkvm.cat,netkvm.inf,netkvm.sys,netkvmco.exe,netkvmp.exe,Readme.md} work/drivers/NetKVM/
chmod u+w work/drivers/NetKVM/*
hdiutil detach "$MNT"
ls work/drivers/NetKVM
Check: the list shows netkvm.cat, netkvm.inf, netkvm.sys, netkvmco.exe, netkvmp.exe and Readme.md.
- Apply the patch. It only adds lines to the two setup scripts, nothing else:
- Both scripts look for
work/drivers/NetKVMand, if it’s there, copy it onto the virtual setup disk. - During the Windows install, DISM (Windows’ own tool for editing install images) adds the driver to the fresh Windows.
- The optimizer adds it a second time. If that fails, it leaves a one-time command (RunOnce) that installs the driver with
pnputilat the next login.
Copy the whole block, from cd to the last line:
cd ~/WindowsiOS
cat > work/netkvm.patch <<'EOF'
diff --git a/scripts/optimize_windows_lite.py b/scripts/optimize_windows_lite.py
index 315f242..5c68573 100755
--- a/scripts/optimize_windows_lite.py
+++ b/scripts/optimize_windows_lite.py
@@ -31,6 +31,7 @@ SRC_IMG = WORK / "windows11.img"
 LITE_IMG = WORK / "windows11_lite.img"
 PE_IMG = WORK / "_opt_pe.img"
 PE_VARS = WORK / "_opt_pe_vars.fd"
+NETKVM_DIR = WORK / "drivers" / "NetKVM"  # virtio-win NetKVM w11/ARM64 (optional)

 OPT_SYS_REG = r"""Windows Registry Editor Version 5.00

@@ -306,6 +307,20 @@ if "%WINDRV%"=="" (
 )

 echo [1/5] Found Windows 11 installation on %WINDRV%\ (ESP=%ESPDRV%) >> "%LOGFILE%"
+set "DRVSRC="
+for %%E in (C D E F G H I J K L M N O P Q R S T U V W Y Z) do (
+    if exist "%%E:\drivers\NetKVM\netkvm.inf" set "DRVSRC=%%E:\drivers\NetKVM"
+)
+set "NETKVM_FAIL=0"
+if not "%DRVSRC%"=="" (
+    echo [1b/5] Injecting NetKVM VirtIO network driver from %DRVSRC% >> "%LOGFILE%"
+    mkdir "%WINDRV%\Drivers\NetKVM" >nul 2>&1
+    xcopy /y /q "%DRVSRC%\*.*" "%WINDRV%\Drivers\NetKVM\" >> "%LOGFILE%" 2>&1
+    dism /Image:%WINDRV%\ /ScratchDir:X:\ /Add-Driver /Driver:"%DRVSRC%\netkvm.inf" >> "%LOGFILE%" 2>&1
+    if not "!errorlevel!"=="0" set "NETKVM_FAIL=1"
+)
+echo [1b/5] NetKVM DISM failed=!NETKVM_FAIL! >> "%LOGFILE%"
+
 echo [2/5] Stripping 25 consumer inbox Appx bloatware bundles... >> "%LOGFILE%"
 set /a REMOVED_COUNT=0
 for %%P in (
@@ -346,6 +361,10 @@ reg load HKLM\OFFSYS "%WINDRV%\Windows\System32\config\SYSTEM" >> "%LOGFILE%" 2>
 reg load HKLM\OFFSOFT "%WINDRV%\Windows\System32\config\SOFTWARE" >> "%LOGFILE%" 2>&1
 X:\Windows\System32\opt_hive_arm64.exe >> "%LOGFILE%" 2>&1
 reg import X:\Windows\System32\opt_soft.reg >> "%LOGFILE%" 2>&1
+if "!NETKVM_FAIL!"=="1" (
+    reg add "HKLM\OFFSOFT\Microsoft\Windows\CurrentVersion\RunOnce" /v InstallNetKVM /t REG_SZ /d "pnputil /add-driver C:\Drivers\NetKVM\netkvm.inf /install" /f >> "%LOGFILE%" 2>&1
+    echo [3b/5] Added RunOnce pnputil fallback for NetKVM >> "%LOGFILE%"
+)
 reg unload HKLM\OFFSOFT >> "%LOGFILE%" 2>&1
 reg unload HKLM\OFFSYS >> "%LOGFILE%" 2>&1

@@ -466,6 +485,10 @@ def build_opt_winpe():
             "opt_usr.reg": make_user_reg("OFFUSR"),
             "opt_def.reg": make_user_reg("OFFDEF"),
         }
+        if (NETKVM_DIR / "netkvm.inf").exists():
+            shutil.copytree(NETKVM_DIR, pe_root / "drivers" / "NetKVM", dirs_exist_ok=True)
+            subprocess.run(["dot_clean", "-m", str(pe_root / "drivers")], check=False)
+            print(f"Staged NetKVM driver from {NETKVM_DIR}", flush=True)
         opt_exe = ROOT / "build" / "opt_hive_arm64.exe"
         if not opt_exe.exists():
             raise RuntimeError(f"Missing {opt_exe}")
diff --git a/scripts/provision_windows_arm64.py b/scripts/provision_windows_arm64.py
index 1cf3868..3e88349 100755
--- a/scripts/provision_windows_arm64.py
+++ b/scripts/provision_windows_arm64.py
@@ -22,6 +22,7 @@ INST_IMG = WORK / "installer_v4.img"
 WIN_IMG = WORK / "windows11.img"
 CODE_FD = WORK / "code.fd"
 VARS_FD = WORK / "vars.fd"
+NETKVM_DIR = WORK / "drivers" / "NetKVM"  # virtio-win NetKVM w11/ARM64 (optional; injected if present)

 STARTNET_CMD = r"""@echo off
 wpeinit
@@ -69,6 +70,13 @@ if errorlevel 1 (
   exit /b 1
 )

+for %%l in (C D E F G H I J K L) do (
+  if exist %%l:\drivers\NetKVM\netkvm.inf (
+    echo [WIN11-PROVISION] Injecting NetKVM VirtIO network driver from %%l:\drivers\NetKVM
+    dism /Image:W:\ /ScratchDir:X:\ /Add-Driver /Driver:%%l:\drivers\NetKVM\netkvm.inf
+  )
+)
+
 echo [WIN11-PROVISION] Injecting unattend.xml and offline registry settings...
 mkdir W:\Windows\Panther
 copy /y X:\Windows\System32\unattend_panther.xml W:\Windows\Panther\unattend.xml
@@ -242,6 +250,10 @@ def build_two_partition_installer():
         # Export unsplit Windows 11 Pro (Index 6) directly onto ExFAT WINWIM!
         (wim_root / "sources").mkdir(parents=True, exist_ok=True)
         run(["/opt/homebrew/bin/wimlib-imagex", "export", ESD, "6", wim_root / "sources" / "install.wim", "--compress=LZX"])
+        if (NETKVM_DIR / "netkvm.inf").exists():
+            shutil.copytree(NETKVM_DIR, wim_root / "drivers" / "NetKVM", dirs_exist_ok=True)
+            subprocess.run(["dot_clean", "-m", str(wim_root / "drivers")], check=False)
+            print(f"Staged NetKVM driver from {NETKVM_DIR}", flush=True)
     finally:
         subprocess.run(["hdiutil", "detach", whole_disk], check=False)

EOF
git apply --check work/netkvm.patch && git apply work/netkvm.patch
grep -c NETKVM_DIR scripts/provision_windows_arm64.py scripts/optimize_windows_lite.py
Check: git apply prints nothing, and grep shows 4 for each file. If git apply --check complains, you’re probably not on commit 0a46e3f (step 2), or you applied the patch twice.
Step 7: Set your Windows account name
The scripts set up Windows fully automatically with an unattend file (answers for the Windows setup, so nobody has to click through it). The account name is written into two scripts, and upstream it’s the author’s name “Ammaar”. Replace it with yours. Use letters and numbers only, no spaces. In both lines, replace YourName with your name:
cd ~/WindowsiOS
sed -i '' 's/Ammaar/YourName/g' scripts/provision_windows_arm64.py scripts/optimize_windows_lite.py
grep -c "YourName" scripts/provision_windows_arm64.py scripts/optimize_windows_lite.py
Check: both files show a number above 0.
The account is an administrator with no password and logs in automatically. You can set a password later in Windows. The time zone is set to US Eastern in scripts/provision_windows_arm64.py (<TimeZone>Eastern Standard Time</TimeZone>). You can change it there before step 8, or later in Windows settings.
Step 8: Build the Windows image
Now the Mac installs Windows into a virtual disk, without a window and without any clicks from you. Three commands: install, slim down, pack.
Keep your Mac awake and on power, and don’t attach other disk images (USB sticks, DMG files) while this runs. The scripts create and partition their own disk images with diskutil, and they pick the device from the output of hdiutil.
cd ~/WindowsiOS
/opt/homebrew/bin/python3 scripts/provision_windows_arm64.py
/opt/homebrew/bin/python3 scripts/optimize_windows_lite.py
./build/hvsparse pack work/windows11_lite.img work/windows11.hvsparse
ls -lh work/windows11.hvsparse
What happens:
provision_windows_arm64.pyboots the Windows installer in the Mac emulator, installs Windows 11 Pro intowork/windows11.img, runs the first setup and shuts down cleanly. It also copies the UEFI firmware (the PC’s “BIOS”, here TianoCore from theqemupackage) towork/code.fdand saves the clean firmware settings aswork/vars_clean.fd.optimize_windows_lite.pyturns off background services in an offline copy,work/windows11_lite.img. On my run, the part that removes preinstalled apps failed with0x80004002. That’s harmless (see Troubleshooting).hvsparse packpacks the 32 GB disk into a sparse file: empty areas aren’t stored, so it shrinks to about 14 GB.
Check: the last command shows a file of about 14 GB (mine was 14.2 GB). If you did step 6, the output of the first two commands also contains Staged NetKVM driver from ….
Once you’ve copied everything to the phone (step 13), you can delete work/windows11.img and work/downloads/Win11_24H2_ARM64_en-us.esd to get space back.
Step 9: Optional test boot on the Mac
Before you copy 14 GB to your phone, you can check that the image boots. This starts Windows on the Mac without a window for three minutes and saves a screenshot after 170 seconds. It uses a copy of the firmware settings, so the clean file stays untouched for the phone:
cd ~/WindowsiOS
cp work/vars_clean.fd /tmp/vars-test.fd
./build/winvm --headless --code work/code.fd --vars /tmp/vars-test.fd --disk work/windows11_lite.img \
  --cpus 4 --ram 4096 --screenshot /tmp/win11-test.png --screenshot-after 170 --timeout 180
open /tmp/win11-test.png
Check: the screenshot shows the Windows 11 desktop.
Step 10: Prepare the iPhone and your Apple account
- Connect the iPhone to the Mac with the cable and unlock it. Tap Trust on “Trust This Computer?” and enter your passcode. If the Mac asks whether to allow the accessory to connect, click Allow.
- Check that the USB tools can talk to the phone. You should see
SUCCESS: Validated pairing. If not, runidevicepair pairand tap Trust on the phone again:
idevicepair validate- Turn on Developer Mode on the iPhone: Settings > Privacy & Security > Developer Mode (at the very bottom). The iPhone restarts. After the restart, confirm with “Turn On”. If the switch isn’t there yet, open Xcode once with the iPhone connected, then look again.
- Find your iPhone’s two IDs. The UDID is the phone’s hardware ID (it starts with
0000). The CoreDevice ID is the ID Xcode’s tools use for the phone (it looks like1A2B3C4D-1A2B-1A2B-1A2B-1A2B3C4D5E6F):
idevice_id -l
xcrun devicectl list devices
The first command prints the UDID. In the second, the CoreDevice ID is the value in the Identifier column next to your iPhone. Write both down. If the iPhone doesn’t show up there, or only with a long number (the ECID), unplug the cable and plug it back in.
Check: in xcrun devicectl list devices, your iPhone’s State is available, not unavailable. If not, run xcrun devicectl manage pair --device YOUR_UDID and tap Trust on the iPhone.
- Register the iPhone with Apple: on developer.apple.com/account, go to Certificates, IDs & Profiles > Devices, click +, choose iOS, enter a name and paste your UDID.
- Note your Team ID: on developer.apple.com/account, under Membership details. It’s 10 characters, like
ABCDE12345. - Sign in to Xcode with the same account: Xcode > Settings > Accounts > + > Apple Account.
Step 11: Build and sign the app
The project file is set up for the author’s Apple account. You override that on the command line with your Team ID and your own bundle ID, the unique app name in reverse domain style, for example com.yourname.windowsios. Xcode then creates a provisioning profile for you: Apple’s permission file that says “this app may run on this iPhone”.
Run this in Terminal on the Mac itself, not over SSH from another computer (see Troubleshooting). Replace YOUR_TEAM_ID and com.yourname.windowsios:
cd ~/WindowsiOS
xcodegen generate --spec ios/project.yml
xcodebuild -project ios/WindowsiOS.xcodeproj -scheme WindowsiOS -configuration Debug \
  -destination "generic/platform=iOS" -derivedDataPath ios/DerivedData \
  -allowProvisioningUpdates -allowProvisioningDeviceRegistration \
  DEVELOPMENT_TEAM=YOUR_TEAM_ID CODE_SIGN_STYLE=Automatic CODE_SIGN_IDENTITY="Apple Development" \
  PROVISIONING_PROFILE_SPECIFIER="" PRODUCT_BUNDLE_IDENTIFIER=com.yourname.windowsios \
  build
One difference to my run: I signed with an App Store Connect API key instead of the Xcode account sign-in. Signing in to Xcode (step 10) is Apple’s standard way and does the same job, but I didn’t run it in exactly this form.
If macOS asks for access to your keychain (the Mac’s password and certificate store), enter your Mac login password and click Always Allow.
Check: the output ends with ** BUILD SUCCEEDED **.
Step 12: Install the app
Replace YOUR_UDID:
cd ~/WindowsiOS
ideviceinstaller -u YOUR_UDID install ios/DerivedData/Build/Products/Debug-iphoneos/WindowsiOS.app
Check: ideviceinstaller -u YOUR_UDID list | grep -i windowsios prints a line with your bundle ID.
The app shows up on the Home Screen as “Windows 11”. Don’t open it from there. Without a debugger (step 15, or StikDebug further down), the JIT isn’t unlocked.
Step 13: Copy Windows onto the iPhone
The app looks for three files in its own folder under Documents/Machines/Win11: the firmware code.fd, the firmware settings vars.fd and the packed disk windows11.hvsparse. afcclient copies files straight into the app’s folder over USB. Keep the iPhone connected and unlocked until it’s done. Replace YOUR_UDID and com.yourname.windowsios:
cd ~/WindowsiOS
printf "mkdir Documents/Machines\nmkdir Documents/Machines/Win11\nput -f $PWD/work/code.fd Documents/Machines/Win11/code.fd\nput -f $PWD/work/vars_clean.fd Documents/Machines/Win11/vars.fd\nput -f $PWD/work/windows11.hvsparse Documents/Machines/Win11/windows11.hvsparse\nls -l Documents/Machines/Win11\nquit\n" \
  | afcclient -u YOUR_UDID --container com.yourname.windowsios
ls -l work/code.fd work/vars_clean.fd work/windows11.hvsparse
Note that vars_clean.fd is saved on the phone as vars.fd. put -f overwrites files that are already on the phone, which you need if you copy a rebuilt image later. If mkdir says the folder already exists, that’s fine.
Check: the list from the phone shows the same file sizes as the list from your Mac. The big file takes a few minutes.
Step 14: Point the launch script at your iPhone
The launch script asks Xcode’s tools for your phone’s CoreDevice ID. When that answer is missing, it falls back to a hardcoded ID: the author’s iPhone. Replace it with your CoreDevice ID from step 10 (replace YOUR_COREDEVICE_ID):
cd ~/WindowsiOS
sed -i '' 's/FB6341E2-5109-505C-9A11-CFF7BE9973C3/YOUR_COREDEVICE_ID/' scripts/launch_on_duo.sh
grep -n "YOUR_COREDEVICE_ID" scripts/launch_on_duo.sh
Of course you type your real ID in both lines. Check: grep prints one line containing your ID.
Step 15: Start Windows
Keep the iPhone connected and unlocked. Replace YOUR_UDID and com.yourname.windowsios:
cd ~/WindowsiOS
./scripts/launch_on_duo.sh YOUR_UDID com.yourname.windowsios
The script starts the app in a paused state, attaches the debugger LLDB, unlocks the JIT memory and detaches again. In Terminal you see lines with [txm-jit]. On my run, the key line was Blessed 384 MiB RX region ... in 58.35s, and at the end SUCCESS: ... debugger detached!
On the iPhone you see this:
- About a minute of black screen while the debugger works. That’s normal.
- On the very first start: “Unpacking Windows 11 NVMe image” with a progress bar. This only happens once.
- The TianoCore logo: the virtual PC’s firmware is starting Windows.
- The Windows login screen, then the desktop.
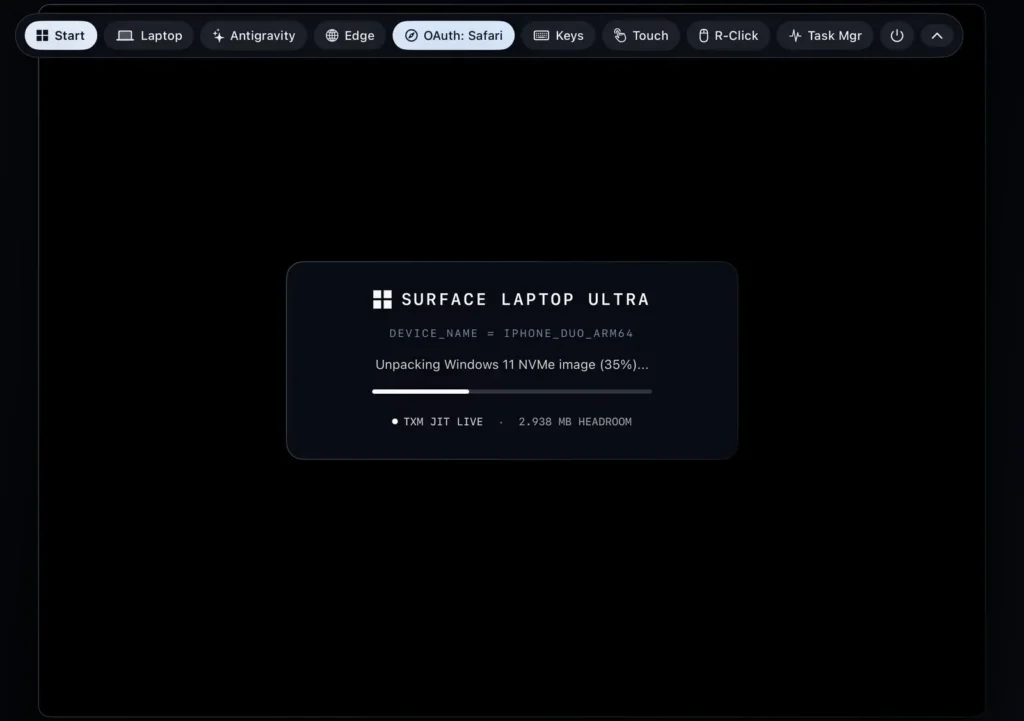
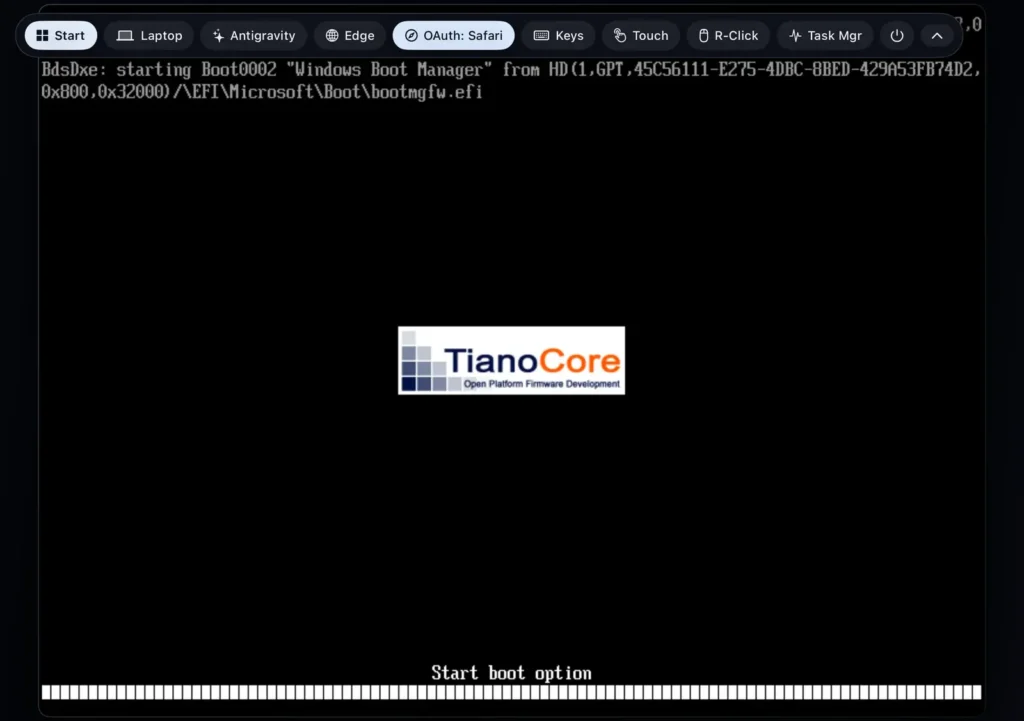
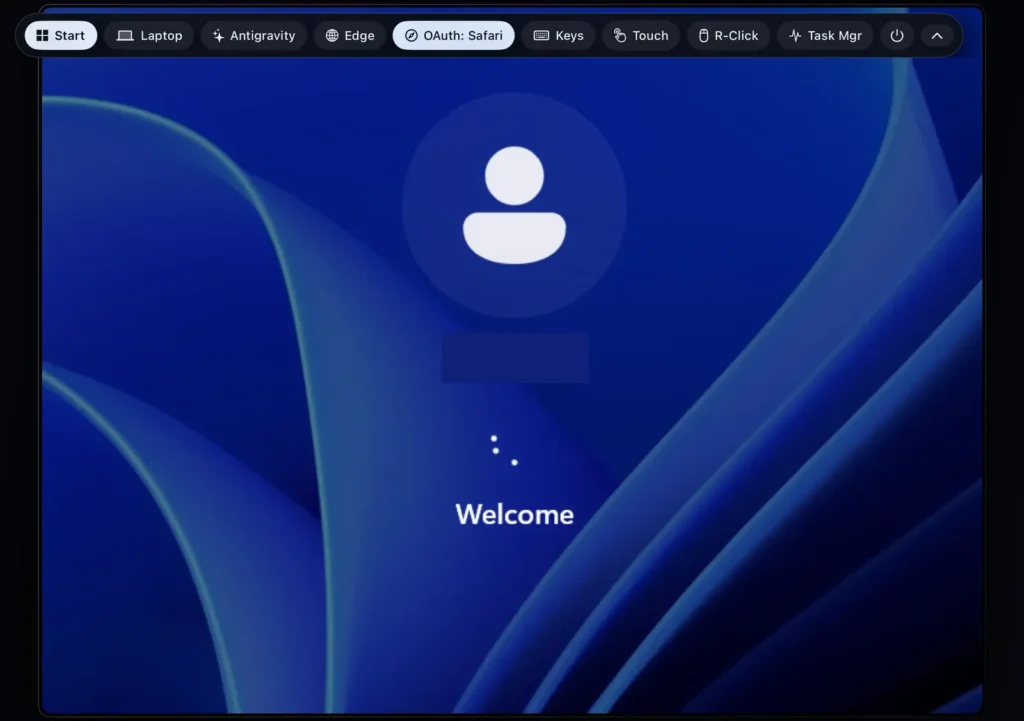
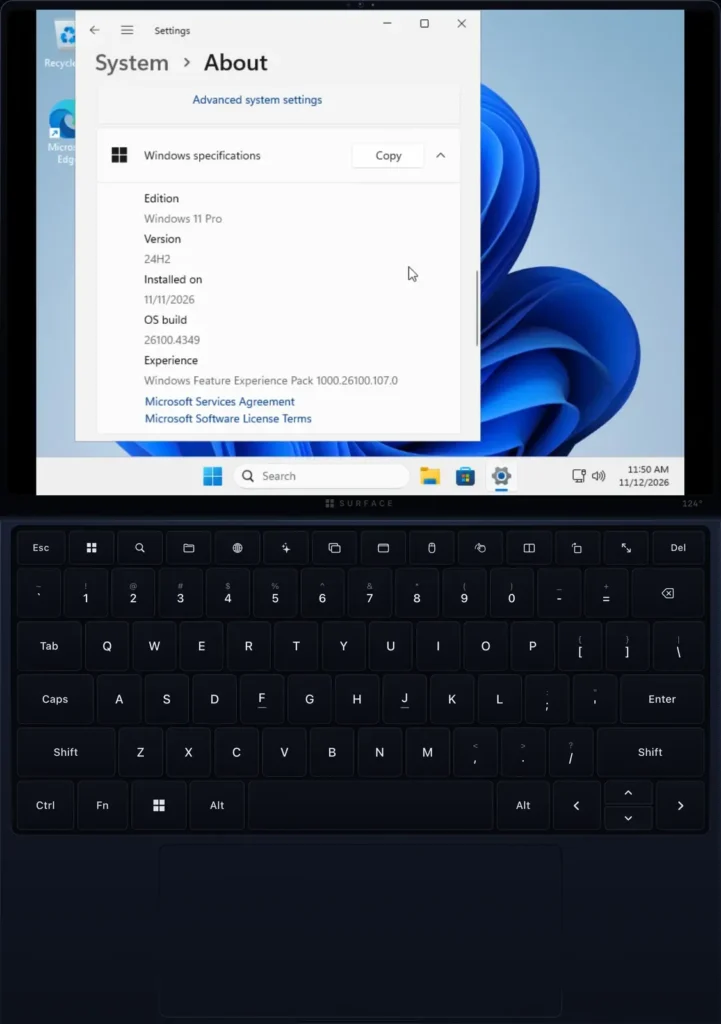
Check: in Windows, open Settings > System > About. You should see Windows 11 Pro and an Apple A20 Pro.
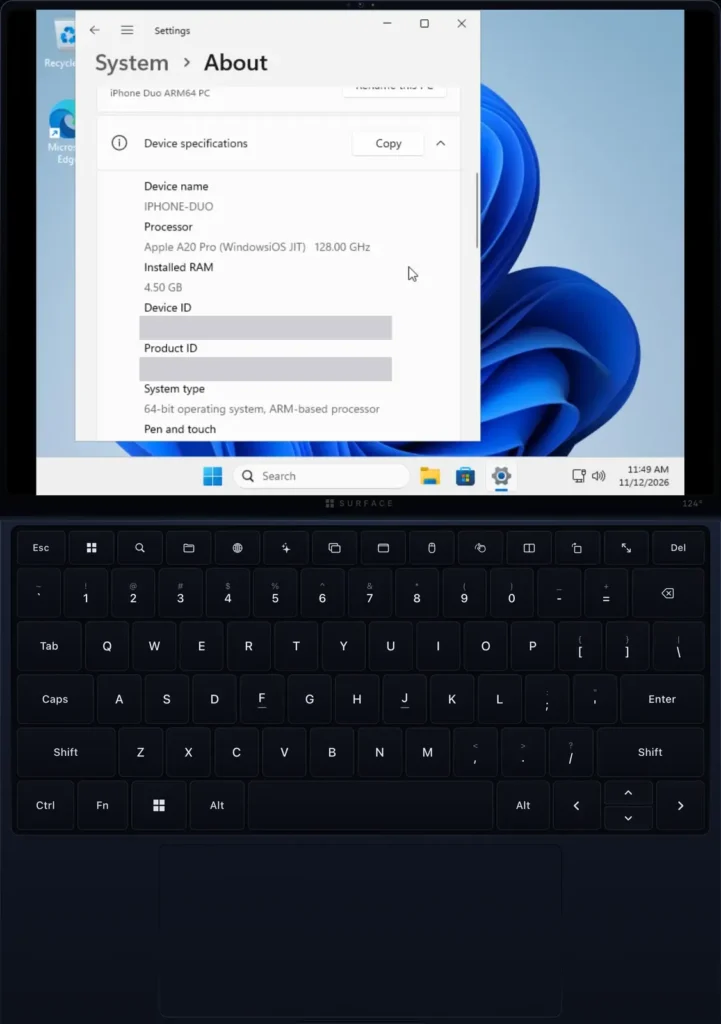
If you added the network driver in step 6, open Edge and load any website.
Starting Windows without a Mac (StikDebug)
The launch script from step 15 needs the Mac and the cable at every start. Once it’s set up, there’s a second way that runs on the iPhone alone: StikDebug, an open-source app that works as a debugger on the iPhone itself. It does the same job as LLDB on the Mac: it attaches to WindowsiOS for a moment, unlocks the JIT and lets go again.
To reach the iPhone’s own developer services, StikDebug uses LocalDevVPN from the App Store. It’s a “loopback” VPN: the tunnel leads from the iPhone back to the iPhone, so StikDebug can talk to the phone the way a Mac would over the cable.
I tested this route on my iPhone Duo with iOS 27.2 on 12 November 2026, with StikDebug 3.2.2 built from the official repo. You still need the Mac once to build and install StikDebug, and again when its signature runs out (see the notes below).
Build and install StikDebug (once, on the Mac)
StikDebug isn’t in the App Store any more. You build it the same way as WindowsiOS, signed with your own Apple team. Version 3.2.2 needs Xcode 27.
- Get the code at the version I used:
git clone https://github.com/StikDebug/StikDebug.git ~/StikDebug
cd ~/StikDebug
git checkout 3.2.2
Check: git log --oneline -1 starts with 0393dca. Git prints a note about a “detached HEAD” here. That’s expected.
- Remove the app group. The project asks for an app group (a shared storage area) that is registered to the original developer’s Apple team, so your team can’t use it. I removed it before building. This command deletes exactly that entry:
cd ~/StikDebug
/usr/libexec/PlistBuddy -c "Delete :com.apple.security.application-groups" StikDebug/StikDebug.entitlements
grep -c application-groups StikDebug/StikDebug.entitlements
Check: grep prints 0.
- Build StikDebug with your Team ID and your own bundle ID, for example
com.yourname.stikdebug. ReplaceYOUR_TEAM_IDandcom.yourname.stikdebug, and run it in Terminal on the Mac itself, like step 11:
cd ~/StikDebug
xcodebuild -project StikDebug.xcodeproj -scheme StikDebug -configuration Release \
  -destination "generic/platform=iOS" -derivedDataPath build/DD \
  -allowProvisioningUpdates -allowProvisioningDeviceRegistration \
  DEVELOPMENT_TEAM=YOUR_TEAM_ID CODE_SIGN_STYLE=Automatic CODE_SIGN_IDENTITY="Apple Development" \
  PROVISIONING_PROFILE_SPECIFIER="" PRODUCT_BUNDLE_IDENTIFIER=com.yourname.stikdebug \
  build
Check: the output ends with ** BUILD SUCCEEDED **. As in step 11, I signed with an App Store Connect API key instead of the Xcode sign-in.
- Install it with the iPhone connected and unlocked (replace
YOUR_UDID):
cd ~/StikDebug
ideviceinstaller -u YOUR_UDID install build/DD/Build/Products/Release-iphoneos/StikDebug.app
ideviceinstaller -u YOUR_UDID list | grep -i stikdebug
Check: the second command prints a line with your StikDebug bundle ID.
Set it up on the iPhone (once)
- Install LocalDevVPN from the App Store, open it, allow it to add the VPN configuration and switch it on. iOS runs only one VPN at a time, so turn off Tailscale or any other VPN first.
- Create the pairing file: the trust record that allows StikDebug to use the iPhone’s developer services, like the “Trust This Computer” pairing with your Mac. In StikDebug, go to Settings > Pair a Device > Pair iPhone or iPad. On iOS 27 this works without a computer.
- With LocalDevVPN on and the iPhone on Wi-Fi with internet, open StikDebug once and let it finish connecting. On first use it downloads and mounts the Developer Disk Image, Apple’s package of developer tools for the iPhone that contains the debugger.
Check: StikDebug shows “Device connected”, and “Windows 11” appears under Apps with get-task-allow (apps that allow a debugger to attach, like your self-built WindowsiOS).
Start Windows from the iPhone (every time)
- Switch on LocalDevVPN. Tailscale and other VPNs have to stay off while you enable JIT.
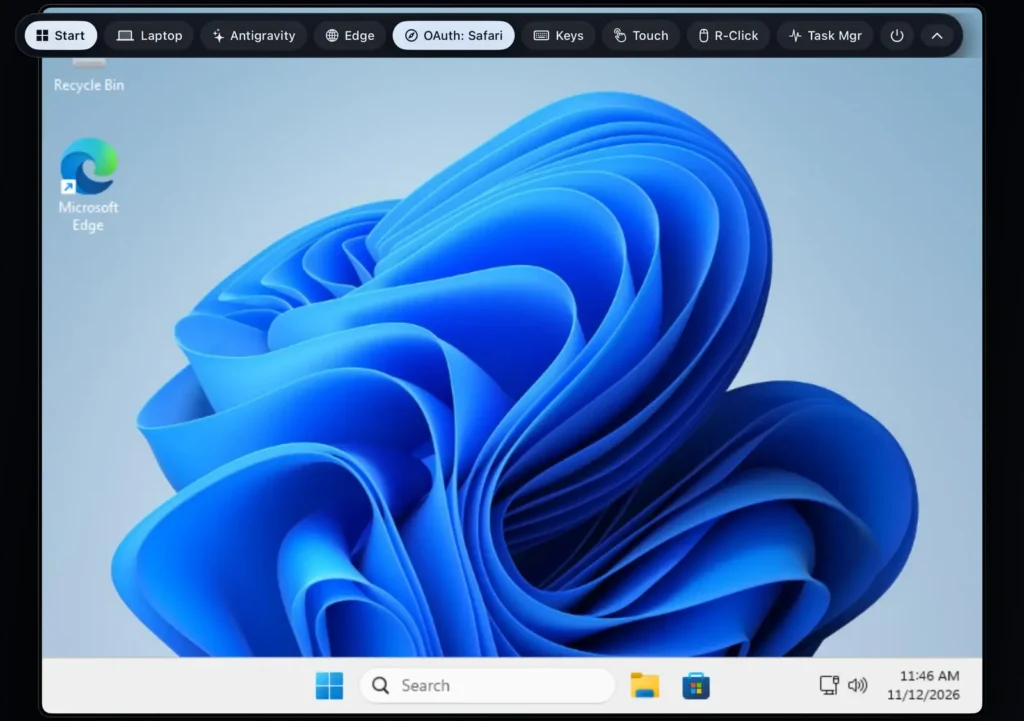
- Open StikDebug. It opens on the JIT tab, titled Enable JIT. At the top it should say “Device connected”.
- In the list Apps with get-task-allow, pick “Windows 11”, your WindowsiOS app.
- StikDebug starts WindowsiOS, unlocks the JIT and lets go. Then you see the TianoCore logo and Windows starts.
Check: Windows boots while the iPhone isn’t connected to any computer.
Good to know:
- Tested by me: iPhone Duo, iOS 27.2, StikDebug 3.2.2, 12 November 2026. Other versions and other iPhones I haven’t tried.
- Keep the pairing file private. It gives full access to your iPhone: installing apps, reading files, debugging apps. Don’t share it, don’t upload it anywhere, and don’t put it in a bug report. According to StikDebug’s docs, changing or resetting your passcode makes it invalid; then create a new one in step 2.
- Signatures run out. Apps you sign yourself only run while their developer profile is valid, about a year with a paid account. After that, rebuild and reinstall StikDebug and WindowsiOS on the Mac (steps 11 and 12 for WindowsiOS, the build and install steps above for StikDebug).
- Other ways to install StikDebug exist: its AltSource
https://stikdebug.xyz/index.json(an app list for the sideloading apps SideStore or AltStore), and the IPA file (the packed app) on the GitHub releases page. I haven’t tested those. - The ENABLE JIT button inside WindowsiOS also hands off to StikDebug. I only tested starting from StikDebug’s own list, as above.
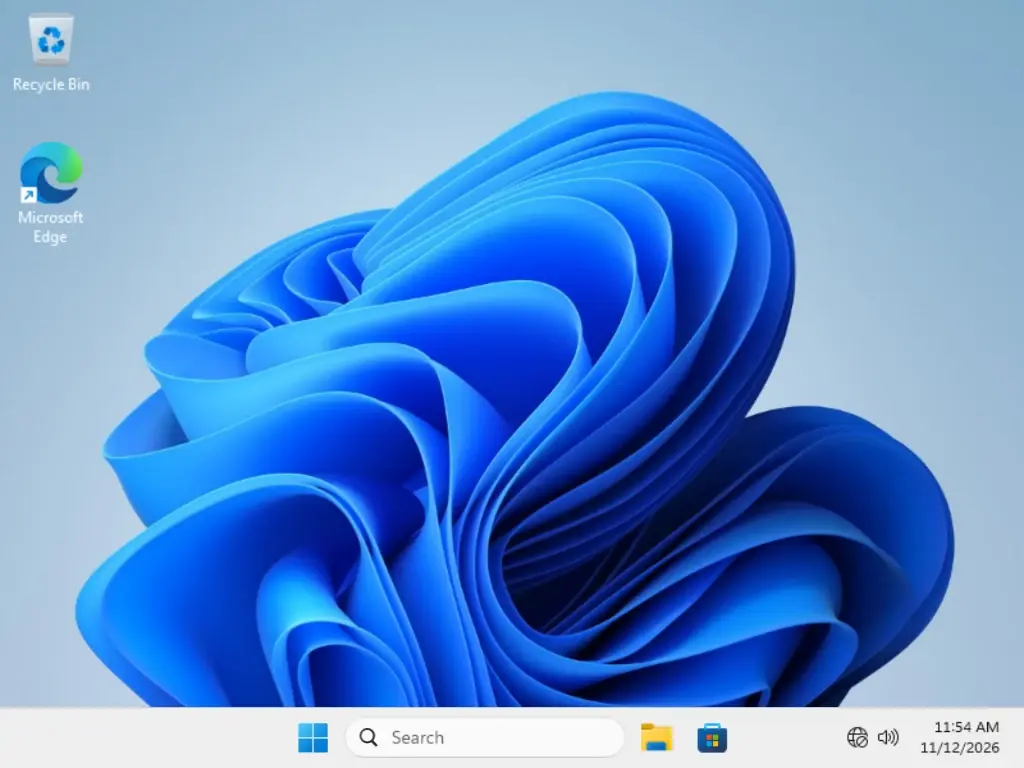
Step 16: Raise the resolution to 1024 × 768
Windows starts at 800 × 600. One boot setting lets it use the highest mode the firmware offers, which is 1024 × 768:
- Click Start, type
cmd, right-click Command Prompt and choose Run as administrator. Confirm with Yes. - Run this command. It should answer “The operation completed successfully.”:
bcdedit /set {default} highestmode on- Restart Windows (Start > Power > Restart). If Windows doesn’t come back on its own, close the app and start it again with the launch script from step 15 or from StikDebug.
Check: Settings > System > Display > Advanced display shows 1024 × 768. I tested this fix on a Mac test boot of the same image.
Starting Windows again later
Every time you want Windows, start it one of two ways: connect the iPhone to the Mac, unlock it and run the command from step 15 again, or switch on LocalDevVPN and use the JIT tab in StikDebug (section “Starting Windows without a Mac”). Windows keeps its files between starts, and the unpacking from the first start doesn’t happen again. Deleting the app from the Home Screen also deletes the Windows image inside it.
Troubleshooting
xcode-select: error: tool 'xcodebuild' requires Xcode
The command line points to the small Command Line Tools instead of the full Xcode. Run sudo xcode-select -s /Applications/Xcode.app/Contents/Developer (step 1).
Signing fails when you build over SSH
Over SSH, the Mac’s login keychain is locked, so xcodebuild can’t reach your signing certificate. Run the build in Terminal on the Mac itself while you’re logged in (step 11).
Signing is blocked by an old “Created via API” certificate
A failed build can leave behind an “Apple Development” certificate whose private key isn’t on your Mac. On developer.apple.com, open Certificates, find the one labeled “Created via API”, revoke it, then run step 11 again. Xcode creates a fresh certificate.
Install fails with “A valid provisioning profile for this executable was not found”
Your iPhone isn’t registered with your account, or Xcode still uses an old cached profile. Register the UDID under Devices (step 10). Then move the cached profiles out of the way and repeat steps 11 and 12:
mkdir -p ~/old-profiles
mv ~/Library/Developer/Xcode/UserData/Provisioning\ Profiles/* ~/old-profiles/
The iPhone doesn’t show up, or the install is refused
The iPhone has to trust the Mac (“Trust This Computer?”) and have Developer Mode on (step 10).
xcrun devicectl list devices only shows a long number (the ECID)
Unplug the cable and plug it back in. That fixed it for me. In Xcode 27, the device window is a separate app called DeviceHub (in Xcode: Product > Destination > Manage Devices…).
The launch script picks the wrong device or fails at device select
The script fell back to the author’s CoreDevice ID. Do step 14 with your own ID from xcrun devicectl list devices.
The optimizer reports DISM error 0x80004002
On my run, removing the preinstalled apps failed with this error. Edge and the Store stay installed, everything else works. You can ignore it.
The app says “Place code.fd, vars.fd, and windows11.hvsparse in Documents/Machines/Win11”
The files are missing or in the wrong place. Repeat step 13 and check the bundle ID: it must be the one you used in step 11.
The app shows “Waiting for TXM JIT” and an ENABLE JIT button
You opened the app from the Home Screen, so no debugger is attached. Close the app and start it with the launch script from step 15, or from StikDebug (the JIT tab, then pick the app). The ENABLE JIT button inside the app also hands off to StikDebug, but I only tested starting from StikDebug’s own list.
StikDebug shows connection or heartbeat errors
A heartbeat is the regular “still there” signal between StikDebug and the iPhone. Check that LocalDevVPN is on, that the iPhone is on Wi-Fi, and that no other VPN is running. StikDebug’s own docs name these first. If it keeps failing, create a new pairing file (Settings > Pair a Device) with the iPhone unlocked.
Signing StikDebug reports an app group error
The app group entry is still in the project. Run the PlistBuddy command from the StikDebug section again, then build again.
Black screen for about a minute after launch
That’s the debugger unlocking the JIT. Wait. After that, the TianoCore logo shows up, then Windows.
No internet inside Windows
The network driver is missing. It only gets into Windows while the image is built, so do step 6, build the image again (step 8), copy it over (step 13) and start it (step 15). On the next start, the app unpacks the new image and replaces the old one, so anything you saved inside the old Windows is gone. If you deleted the ESD after step 8, download it again first (step 5).
The picture is small (800 × 600)
That’s the default. Do step 16 for 1024 × 768.
Credits and license
WindowsiOS is made by Ammaar Reshi: github.com/ammaarreshi/WindowsiOS, licensed under GPL-2.0-or-later. It builds on Leviidev’s Henge and Husk, the JIT approach from StikDebug, the TianoCore EDK2 firmware and libslirp. The NetKVM network driver comes from Red Hat’s virtio-win project. According to its README, it was built with the help of an AI model.
Before I built it, I read through the code. I found no telemetry and nothing that uploads your data. The build script downloads libffi, glib and libslirp from their public sources without checking checksums, and it copies a prebuilt StikJIT framework from the Husk repo.
Want to know more about the phone itself? Here’s my iPhone Duo unboxing and first day.
Did this guide help you? You can buy me a coffee on Ko-fi. It keeps MappleBox ad-free.