Plesk Kernel Update: Patch a Live Server After a Year
Your server has been running for months without a restart, the automatic updates run like clockwork, and yet the kernel is out of date? Here’s how to do a kernel update on a live server with as little risk as possible: with a backup check, an SSD check and fixed steps, after each of which you confirm everything still works. My example is my dedicated server with AlmaLinux 9 and Plesk Obsidian, which hosts 22 websites, including some for friends.
Quick summary
- Automatic updates do install new kernel packages, but the new kernel only becomes active after a reboot. This guide shows you a process for doing that reboot on a live server in small steps you can check one by one.
- The commands are written for AlmaLinux, Rocky Linux and RHEL with
dnf. You’ll find the differences for Ubuntu and Debian in the next section. - You need root access over SSH, admin access to Plesk, and access to your hosting provider’s remote console in case the server can’t be reached over SSH after the reboot.
- SMART is the self-diagnosis built into SSDs and hard drives. With
smartmontoolsyou read it out before a worn-out disk causes trouble during the reboot.
Ubuntu or Debian instead of AlmaLinux?
The process stays the same, only some commands have different names. Instead of dnf you use apt. To see whether a reboot is due, check for the file /var/run/reboot-required. If it exists, a restart is pending. Plesk’s DNS service is called bind9 on Ubuntu and Debian instead of named-chroot. /proc/mdstat, smartctl and the Plesk commands work the same way.
ls /var/run/reboot-required
systemctl is-active bind9
Before you start: check whether a reboot is due
First, check the state of your server. On mine, uptime showed 1 year and 17 weeks. The userspace packages had been updated automatically the whole time, but the kernel only becomes active after a reboot. needs-restarting -r tells you whether a restart is due, and dnf updateinfo lists the open security advisories. I had around 500, most of them for the kernel.
uptime
needs-restarting -r
dnf updateinfo summary
dnf updateinfo list --security
If the shell says “command not found” for needs-restarting, install the yum-utils package, which includes the command:
dnf install yum-utilsA reboot after such a long uptime isn’t a routine job. If something goes wrong, every website goes offline at once, possibly including other people’s. So work in fixed steps and check that everything still runs after each one before moving on.
Step 1: Check your backups
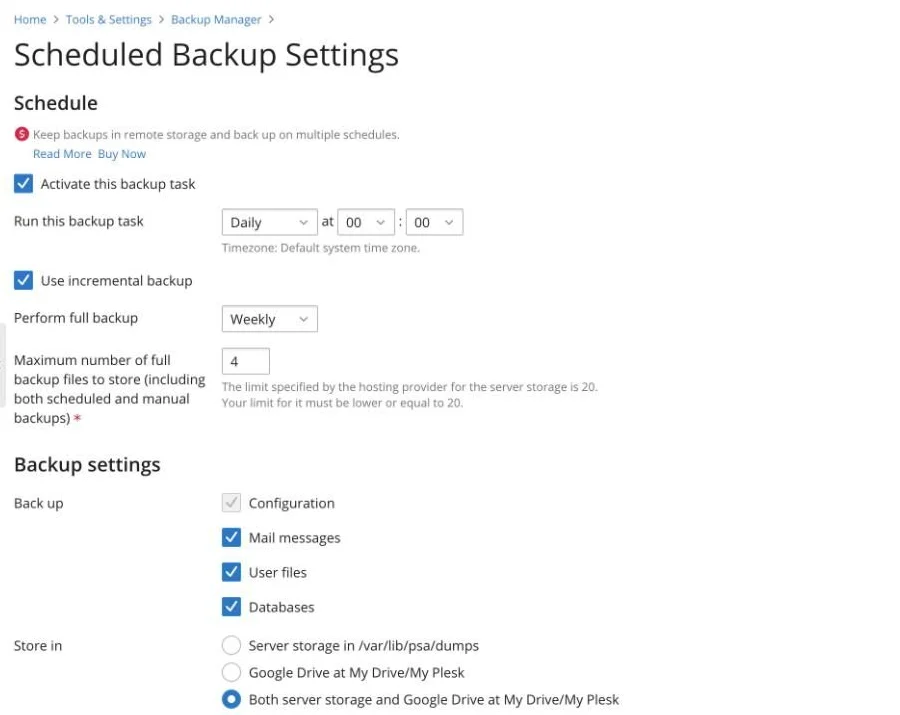
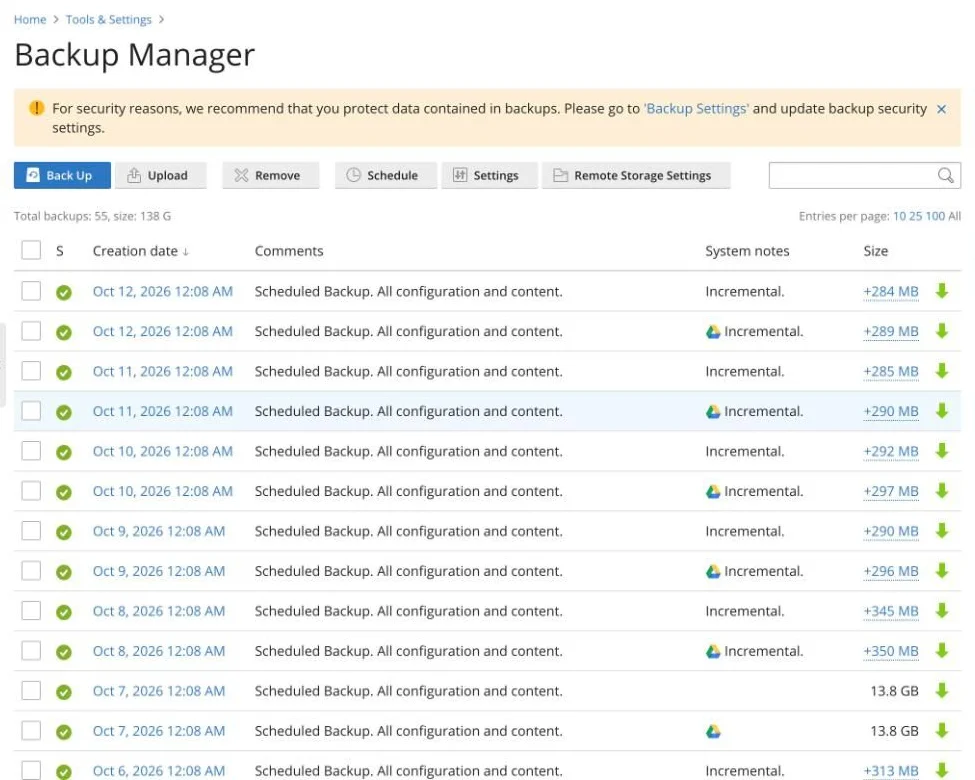
Before you touch anything, you should know that you can get back. Look at what already exists before you build something new. In Plesk you’ll find this under Tools & Settings > Backup Manager. There you see the existing backups, and under Schedule the settings for automatic backups. A tip from my own setup: I was convinced there was no offsite backup and wanted to set one up. In Plesk it turned out that the “Google Drive Backup” extension was already running daily and storing a copy outside the server.
Also run at least one test restore, for example for an unimportant test domain or a single database, so you know that restoring really works.
Step 2: Check your SSDs
After such a long uptime, a reboot is also the moment when a tired disk might not come back up. If smartmontools isn’t installed yet, install it and enable smartd permanently right away. smartctl --scan shows you which disks are in your server:
dnf install smartmontools
systemctl enable --now smartd

smartctl --scan

smartctl -H /dev/sda
smartctl -A /dev/sda
smartctl -H /dev/sdb
smartctl -A /dev/sdb
Replace /dev/sda and /dev/sdb with the devices from smartctl --scan. NVMe SSDs are named something like /dev/nvme0n1. If your server uses a hardware RAID controller, you can’t see the individual disks directly. With a MegaRAID controller you query them with -d megaraid,N, where N is the number of the disk on the controller:
smartctl -a /dev/nvme0n1
smartctl -a -d megaraid,0 /dev/sda
Look at the health status and the remaining lifespan. On SATA SSDs, wear shows up in an attribute like Wear_Leveling_Count or Media_Wearout_Indicator, depending on the manufacturer. On NVMe SSDs it’s the Percentage Used value. My server has two Samsung PM883 drives in a software RAID1 (two disks that mirror each other). Both reported “PASSED”, 94% lifespan left and around 33,800 power-on hours. So I could move on.
Step 3: Update Plesk first
Next, install the Plesk minor upgrade. It doesn’t touch the kernel, and your websites stay online the whole time. Only the Plesk panel itself is unavailable for a few minutes. That way you have one less thing to worry about during the reboot later.
In the panel, go to Tools & Settings > Updates (“Updates and Upgrades” in older versions). In the shell, this command brings Plesk and all installed components up to date:
plesk installer --select-release-latest --upgrade-installed-componentsAfterwards, run plesk version to check which version is running.
Step 4: Everything except the kernel
Then install all updates that don’t need a reboot. If something breaks now, you know the kernel isn’t the cause:
dnf upgrade --exclude='kernel*'Step 5: Kernel update and reboot
Before you restart, figure out how you’ll reach the server if SSH stops working. On a rented server you can only see the boot menu through your hosting provider’s remote console. At IONOS, for example, that’s the remote console in the Cloud Panel. Log in there once beforehand and make sure the console works.
For the actual reboot, pick a quiet time window when the sites get little traffic. Then install the kernel and restart:
dnf upgrade
reboot
My server was reachable again after 219 seconds. The old kernels stay installed. If the new one doesn’t boot cleanly, pick an old one from the boot menu through the remote console.
If you can’t get to the boot menu, start the server in your host’s rescue system, mount the root file system, switch into it with chroot and set the old kernel as the default with grubby. With software RAID, first assemble the array in the rescue system with mdadm --assemble --scan, then mount /dev/md… and, if separate, /boot, and bind-mount /dev, /proc and /sys before you run chroot. grubby also shows you the installed kernels and the current default:
grubby --info=ALL | grep ^kernel
grubby --default-kernel
grubby --set-default /boot/vmlinuz-<old-version>
Step 6: Check that everything works after the reboot
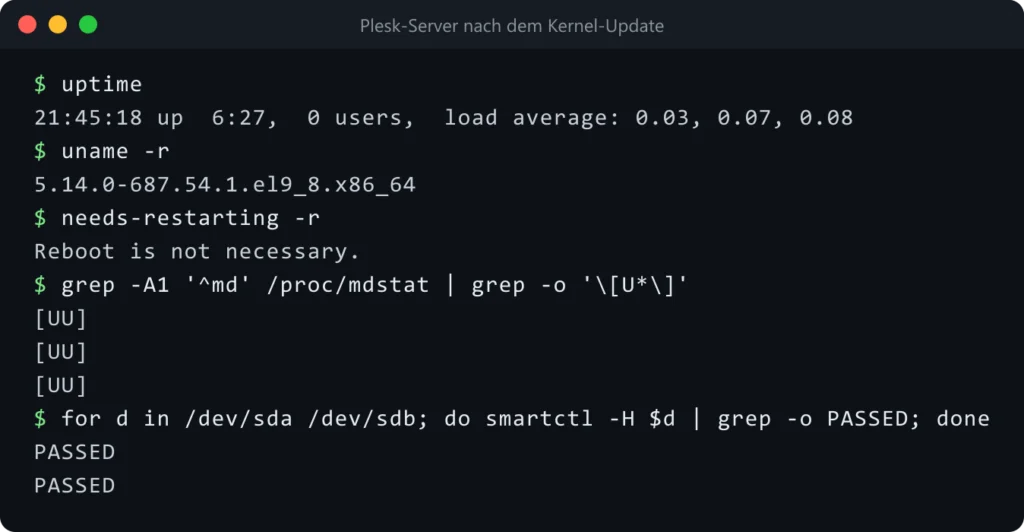
Look at the RAID first. In /proc/mdstat every array has to show [UU], meaning both disks are active:
uname -r
cat /proc/mdstat
needs-restarting -r
systemctl --failed
uname -r shows the version of the running kernel. needs-restarting -r should now report that no reboot is needed, and systemctl --failed should come back empty. Both were true for me. One trap: on Plesk with AlmaLinux, the DNS server runs under the service name named-chroot. If you query named first like I did, you’ll get the wrong picture:
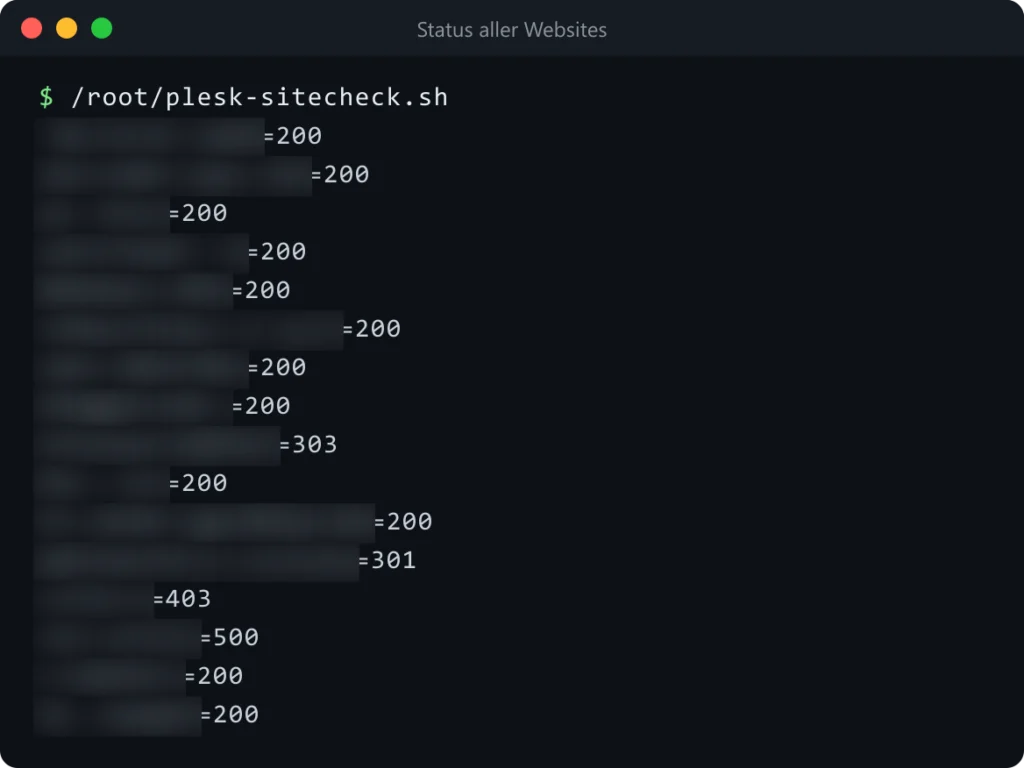
systemctl is-active named-chrootFinally, you don’t have to open every site by hand in the browser. You can get the list of all domains straight from Plesk, and a small loop checks the HTTP status of each one:
plesk bin domain --list > domains.txt

for d in $(cat domains.txt); do
  code=$(curl -s -o /dev/null -L --max-time 15 -w '%{http_code}' "https://$d")
  echo "$code  $d"
done
Afterwards, domains.txt contains one domain per line. You can delete domains that only redirect or have no hosting at all from the file beforehand. Look at anything that doesn’t come back with 200 individually. A 000 means no HTTP response came back at all. The connection failed, the DNS record points somewhere else, the certificate is invalid or the 15 seconds ran out.
Bonus: fix an expired certificate from the CLI
My loop turned up one site with an expired certificate. You can also call Plesk’s Let’s Encrypt extension from the command line. Add the www variant with a second -d, otherwise the certificate only covers the domain without www:
plesk bin extension --exec letsencrypt cli.php -d example.com -d www.example.com -m admin@example.comAfter that, the site has a valid certificate again. Run the loop from above once more. The domain should now respond with 200.
How to secure root access for automation
For maintenance like this, a dedicated SSH key with root access is worth having. So that the key alone isn’t enough, restrict it to your home IP in authorized_keys. It will then be rejected from any other address:
from="<your-home-ip>" ssh-ed25519 AAAA... automationIf your internet provider gives you a dynamic IP, it changes regularly, and the key will stop working. In that case, enter a range in CIDR notation instead of a single address, for example from="203.0.113.0/24", matching your provider’s address range. Also always keep a second way in, such as another key without this restriction or your host’s remote console, so you don’t lock yourself out.
Wrapping up
Automatic updates keep your packages current, but only a reboot loads the new kernel. With the order backup check, SSD check, Plesk upgrade, updates without the kernel and finally the reboot, you keep the risk low, because after each step you know what caused it if something goes wrong. For me the process went without a hitch: the server runs on the new kernel, the RAID shows [UU], and smartd now monitors both SSDs permanently.
How often do you restart your servers? Let me know in the comments.
Did this guide help you? You can buy me a coffee on Ko-fi. It keeps MappleBox ad-free.