Caddy Reverse Proxy in Your Homelab: Automatic HTTPS
Once more than two services run in your homelab, keeping track of IP addresses and ports gets messy fast. A reverse proxy solves that: you open https://cloud.example.com, and the proxy forwards the request to the right container. Caddy is my favorite for this, because it gets and renews HTTPS certificates entirely on its own. In this guide you’ll set up Caddy in an LXC container on Proxmox, with valid certificates for public sites and for internal hostnames that are only reachable from your home network and through Tailscale.
Quick summary
- Caddy is a web server and reverse proxy. A reverse proxy accepts requests under a hostname and passes them on to a service on your network.
- Caddy gets certificates from Let’s Encrypt automatically. For public sites it uses the HTTP challenge, for internal sites the DNS challenge.
- This guide is for anyone with Proxmox and their own domain who wants to reach their services cleanly over HTTPS.
- You need a small LXC, a domain with a DNS provider that has an API, and for public sites, ports 80 and 443 forwarded on your router.
HTTP challenge and DNS challenge
Let’s Encrypt only issues a certificate when you prove that you own the domain. With the HTTP challenge, Let’s Encrypt fetches a file from your server over port 80. That only works if the hostname publicly points to your internet connection and the port is open. With the DNS challenge (also called DNS-01), Caddy briefly creates a TXT record at your DNS provider. For that, the server doesn’t have to be reachable from the internet at all. That’s exactly why the DNS challenge is the way to go for internal services like proxmox.int.example.com that only run on your home network.
What you need
- A Proxmox host. I run Caddy in its own LXC at each of my two locations, one of them on a Minisforum MS-A2.
- Your own domain, here
example.com, whose DNS is hosted with a provider that has an API and a Caddy module. You’ll find the list on GitHub atgithub.com/caddy-dns. - An API key from your DNS provider.
- For public sites: port forwarding for 80 and 443 to the IP of the Caddy LXC, for example
192.168.1.20.
Step 1: Create the LXC
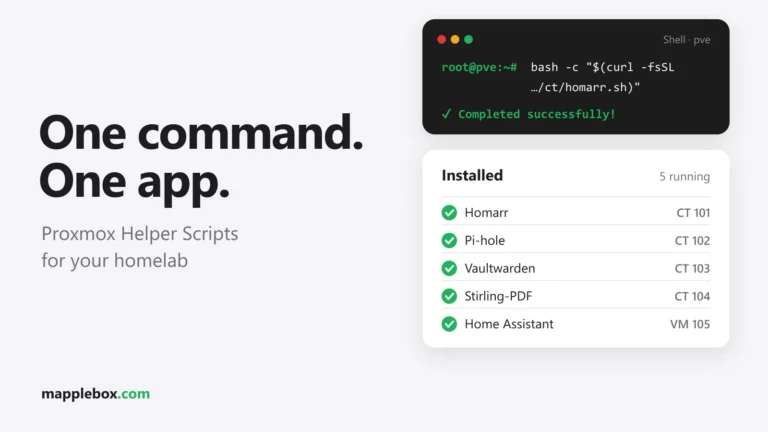
The easiest way is with the community’s Proxmox VE Helper-Scripts. Run this in the shell of your Proxmox host:
bash -c "$(curl -fsSL https://raw.githubusercontent.com/community-scripts/ProxmoxVE/main/ct/caddy.sh)"As with any script from someone else, it’s worth looking at the code first. The script first asks for the operating system. Choose Debian 13, because all commands in this guide assume Debian with systemd. The Alpine version uses OpenRC, which has no systemctl. With Debian, the script creates an unprivileged LXC with 1 core, 512 MB of RAM and a 6 GB disk and installs Caddy as a systemd service. Caddy doesn’t need more. My two proxies run with 1 core and 512 MB and 1 GB of RAM respectively. At the end, the script asks whether you want to install xCaddy. That’s a tool for building Caddy yourself with extra modules. You don’t need it for this guide, see step 3.
Give the LXC a fixed IP, ideally through a DHCP reservation in your router. All port forwards and DNS records will point to this address later.
Step 2: A public site with the HTTP challenge
At your DNS provider, create an A record for app.example.com pointing to your public IP, and set up port forwarding for 80 and 443 to the Caddy LXC on your router. The configuration lives in /etc/caddy/Caddyfile. Open it with nano /etc/caddy/Caddyfile and replace the example content (a :80 block with file_server) completely. At the very top goes a global block with your email address, which Let’s Encrypt uses for notices about your certificates:
{
	email admin@example.com
}

(access_log) {
	log {
		output file /var/log/caddy/access.log {
			roll_size 50MiB
			roll_keep 5
		}
		format json
	}
}

app.example.com {
	import access_log
	reverse_proxy 192.168.1.30:8080
}
Replace 192.168.1.30:8080 with the IP and port of your service. That’s all a public site needs. Load the configuration with systemctl reload caddy (in step 6 I’ll show you the safe routine with a check first). As soon as Caddy loads the configuration, it gets the certificate through the HTTP challenge, redirects HTTP to HTTPS and renews the certificate in time. The block in parentheses is a snippet. You define it once and pull it into every site with import. Snippets have to appear in the Caddyfile before the first site that uses them. This snippet writes an access log in JSON format, which CrowdSec can also analyze later.
Step 3: Add the DNS module
The standard version of Caddy doesn’t know any DNS providers. You add the module for your provider with caddy add-package. The command downloads a new Caddy build with all existing modules plus the new one and replaces the binary. The Caddy docs mark it as experimental. It fetches the new binary from the download page on caddyserver.com, so it only works while that service is up. It worked without problems for me. Still, back up the current binary first with cp /usr/bin/caddy /root/caddy.bak. If something goes wrong, copy it back with cp /root/caddy.bak /usr/bin/caddy and restart Caddy. I use IONOS as my DNS provider, so here’s that as an example:
caddy add-package github.com/caddy-dns/ionos
systemctl restart caddy
caddy list-modules | grep dns.providers
For a different provider, swap ionos for the name from the caddy-dns repository, such as cloudflare or hetzner. The last line should then print something like dns.providers.ionos. A systemctl reload isn’t enough after replacing the binary. The process has to restart once.
Alternatively, you can build Caddy yourself with xCaddy, for example xcaddy build --with github.com/caddy-dns/ionos. The Caddy docs explain under “Build from source” how to install your own binary cleanly next to the package with dpkg-divert. For getting started, add-package is simpler. If add-package fails for you, xCaddy is the route that doesn’t depend on the download page.
Step 4: Store the API key safely
The API key doesn’t belong in the Caddyfile. Put it in a separate file that only root can read:
echo 'DNS_API_TOKEN=<your-api-token>' > /etc/caddy/caddy.env
chmod 600 /etc/caddy/caddy.env
systemctl edit caddy
With IONOS, the key consists of a public prefix and a secret part, which you join with a dot: prefix.secret. In the systemctl edit editor, enter:
[Service]
EnvironmentFile=/etc/caddy/caddy.env
Save and close the editor. Then run systemctl restart caddy so the variable gets loaded. Write values in this file without quotes. In the Caddyfile you then access it with {env.DNS_API_TOKEN}.
Step 5: Internal hostnames for LAN and Tailscale only
For internal services I use a separate subdomain, here *.int.example.com. At your DNS provider, create a wildcard A record *.int pointing to the internal IP of the Caddy LXC, so 192.168.1.20. This address isn’t reachable from the internet, but it is from your home network and through Tailscale. So that nobody gets to these hostnames by a roundabout route, a snippet blocks everything outside your networks:
(int_only) {
	tls {
		dns ionos {env.DNS_API_TOKEN}
	}
	@outside not remote_ip private_ranges 100.64.0.0/10
	respond @outside 403
}

proxmox.int.example.com {
	import access_log
	import int_only
	reverse_proxy https://192.168.1.10:8006 {
		transport http {
			tls_insecure_skip_verify
		}
	}
}

ha.int.example.com {
	import access_log
	import int_only
	reverse_proxy 192.168.1.50:8123
}
Add the int_only block below the site from step 2. It only has to come before the first site that uses it with import. Replace the IPs with those of your services. If you use a different DNS provider, swap dns ionos {env.DNS_API_TOKEN} for the line from the README of that module in the caddy-dns repository, for Cloudflare for example dns cloudflare {env.DNS_API_TOKEN}.
What happens here:
- The
tlsblock makes exactly these sites get their certificate through the DNS challenge. Public sites stay with the HTTP challenge. If you want all sites to use the DNS challenge, writeacme_dns ionos {env.DNS_API_TOKEN}in the global block instead. remote_ipchecks the address the connection comes from.private_rangesis a shortcut for all private IPv4 and IPv6 ranges like192.168.0.0/16and10.0.0.0/8.100.64.0.0/10is the address range Tailscale assigns to your devices.- Everyone else gets a 403 Forbidden.
Proxmox only serves a self-signed certificate on port 8006. tls_insecure_skip_verify tells Caddy not to check the backend’s certificate. That’s convenient, but the Caddy docs advise against it. A cleaner way is to copy the backend’s CA certificate into the LXC and use tls_trust_pool file /etc/caddy/backend-ca.pem in the transport http block instead. On Proxmox, this CA lives on the host at /etc/pve/pve-root-ca.pem. That’s how I do it with my Proxmox hosts. WebSockets, which Home Assistant and the Proxmox console use, are passed through by reverse_proxy without any extra setting. For Home Assistant you still have to add Caddy’s IP as trusted_proxies. I show that in Install Home Assistant on Proxmox.
Step 6: Check, format, reload
Before you activate a changed configuration, back up the old file and check the new one:
cp /etc/caddy/Caddyfile /etc/caddy/Caddyfile.bak-$(date +%Y%m%d-%H%M)
caddy fmt --overwrite /etc/caddy/Caddyfile
caddy validate --config /etc/caddy/Caddyfile --envfile /etc/caddy/caddy.env
systemctl reload caddy
caddy fmt indents the file consistently. caddy validate loads the configuration as a test without starting it. With --envfile it also knows your API key. systemctl reload caddy applies the new configuration without interruption. If it’s broken, the old one simply keeps running. I make a dated copy before every change, so a single cp gets me back if something goes wrong.
Caddy’s own logs, meaning certificates, errors and reloads, go to the journal. Requests are in the access log:
journalctl -u caddy -f
tail -f /var/log/caddy/access.log
Caddy and CrowdSec
As soon as a site is publicly reachable, scanners come knocking. The JSON access log from step 2 is the basis for reacting to that. CrowdSec reads the log, detects scans and brute-force attempts, and has the IPs blocked through a firewall bouncer. You don’t need a custom Caddy build for this. How I set it up on the same LXC is covered in CrowdSec with Caddy and the nftables bouncer.
Check that it works
systemctl status caddyshows “active (running)”.- In the journal you can see for each new domain that a certificate was obtained. Search for it with
journalctl -u caddy | grep -i certificate. curl -I https://app.example.comreturns a response without certificate errors.- An internal hostname opens on your home network. Then test it once over mobile data without Tailscale. There it shouldn’t be reachable.
- An uptime check for your most important hostnames tells you when a certificate or backend fails. More on that in Uptime Kuma and ntfy in the homelab.
Common problems
The HTTP challenge fails
Check whether port 80 really reaches the Caddy LXC and whether the A record points to your current public IP. Many internet connections behind CGNAT or DS-Lite (setups where your provider shares one public IPv4 address among many customers) have no public IPv4 of their own. Then the HTTP challenge over IPv4 won’t work, and you use the DNS challenge instead.
“unknown module” or “module not registered: dns.providers…”
The DNS module is missing from the binary. This mostly happens after an update that replaced Caddy with the standard version, for example when you run the helper script’s update command in the LXC. It reinstalls the official package. After every update, check with caddy list-modules whether the module is still there, and run add-package again if needed.
Internal hostnames don’t resolve on your home network
Some routers have DNS rebind protection, which blocks public names that point to private IPs. On those routers, add your domain to the exceptions for DNS rebind protection. Alternatively, create the records on a local DNS server.
An internal site returns 403 even though you’re at home
Your device is probably talking to Caddy over a public IPv6 address that isn’t in private_ranges. In that case, add your IPv6 prefix, or set only an A record without AAAA for *.int. If there’s another proxy in front of Caddy, remote_ip only sees that proxy’s address. Then you need trusted_proxies in the global block and the client_ip matcher.
The access log stays empty
If you run caddy validate as root before the log file exists, Caddy creates it as root. The service runs as the user caddy, though, and then isn’t allowed to write to it. chown caddy:caddy /var/log/caddy/access.log fixes that.
Too many failed attempts
Let’s Encrypt limits failed validations. If a challenge keeps failing, fix the cause first before you reload again.
Wrapping up
Caddy needs a tiny LXC and a tidy Caddyfile, and after that you don’t have to think about certificates anymore. Public sites use the HTTP challenge, internal services the DNS module and the int_only snippet. For me, Caddy replaced Nginx Proxy Manager, because everything can be maintained and backed up in one text file. You can read how my locations work together in My homelab across two sites. Once your first site is public, CrowdSec is the next thing worth setting up.
Did this guide help you? You can buy me a coffee on Ko-fi. It keeps MappleBox ad-free.