CrowdSec with Caddy: Secure Your Proxy with nftables
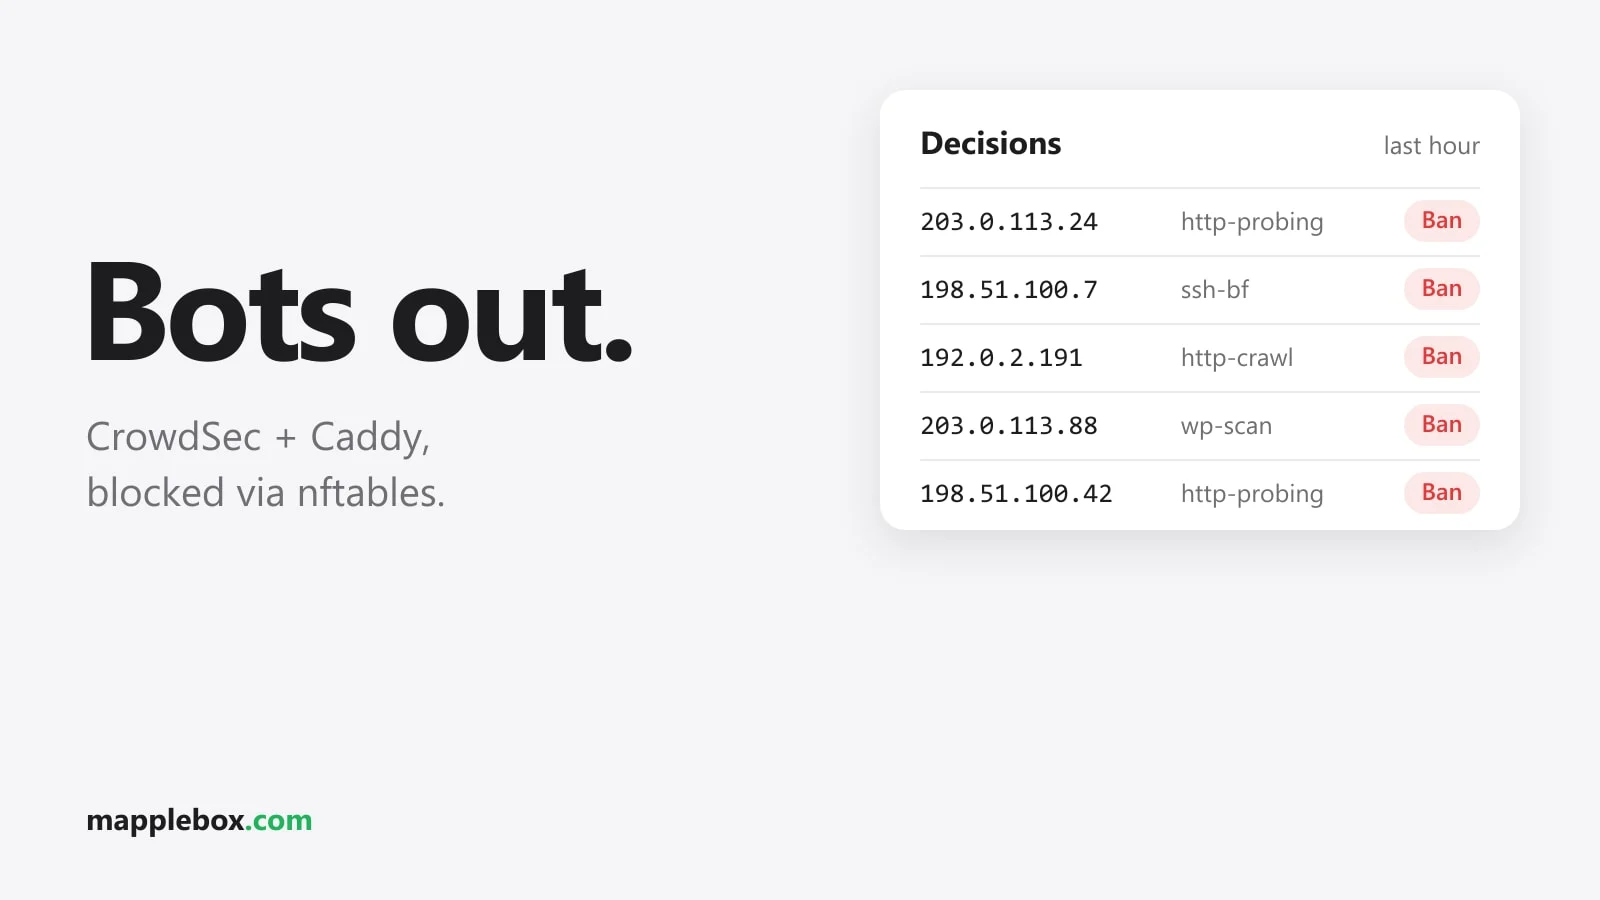
As soon as you create a new public subdomain, the first unknown requests often show up in the log within minutes. Most of them are 401s from scanners working through login pages. With CrowdSec on your Caddy reverse proxy, those IPs never even reach your services. That’s exactly how it went for me: new subdomain, and a few minutes later the first scanners.
In this guide you install CrowdSec directly in the container that runs Caddy, together with the firewall bouncer for nftables. The bouncer blocks IPs at the firewall level, so you don’t need a custom Caddy build with a bouncer module. In my setup, Caddy runs in its own LXC on Proxmox at each site.
Quick summary
- CrowdSec reads log files, spots attack patterns in them (called scenarios) such as scans or brute force, and decides which IPs get blocked.
- A bouncer carries out those decisions. The nftables bouncer adds the IPs to the Linux firewall, so their packets are dropped before they ever reach Caddy.
- This guide is for anyone who exposes homelab services to the internet through Caddy and wants to lock out scanners automatically.
- You need a Debian host or container with Caddy, root access, and some basic systemd knowledge.
- Installing CrowdSec alone doesn’t finish the job, and the order matters: first put your own networks on the whitelist (step 3), then connect the Caddy logs to CrowdSec (step 4). Otherwise CrowdSec can lock you out.
What you need
- Caddy from the official Debian package. The paths in this guide (
/etc/caddy/Caddyfile, usercaddy, systemd servicecaddy) come from that package. - Caddy has to see your visitors’ real IPs. If your traffic goes through a proxy like Cloudflare with the orange cloud turned on, the firewall only sees Cloudflare’s IPs, and the nftables bouncer can’t block the attackers. So your domains should point directly (DNS only) at your home connection.
- Root access to the host or container that runs Caddy.
Step 1: Install CrowdSec and the bouncer
On a Debian LXC, first install the tools the repository script needs, then add the official repository and install both packages. I’m running CrowdSec 1.8.1. Run all commands as root.
apt update
apt install -y curl gnupg apt-transport-https debian-archive-keyring
curl -s https://install.crowdsec.net | sh
apt install crowdsec crowdsec-firewall-bouncer-nftables
When the bouncer is installed on the same machine as CrowdSec, it registers itself with the local API during installation. You can check that it worked with:
cscli bouncers listYou should see an entry for the firewall bouncer there. If it’s missing, check with systemctl status crowdsec-firewall-bouncer whether the service is running. Then install the collections:
cscli collections install crowdsecurity/caddy crowdsecurity/http-cve \
  crowdsecurity/base-http-scenarios crowdsecurity/whitelist-good-actors
systemctl reload crowdseccrowdsecurity/caddybrings the parser for Caddy’s logs.crowdsecurity/http-cvedetects requests that try to exploit known vulnerabilities.crowdsecurity/base-http-scenarioscontains the general scenarios like scans and brute force over HTTP.crowdsecurity/whitelist-good-actorsmakes sure well-known good bots don’t get blocked.
Your instance receives the community blocklist (IPs that other CrowdSec users have already reported) automatically from the moment you install it, through the Central API (CAPI). You don’t have to do anything for it. How big the list is depends on whether your instance regularly contributes signals of its own.
My tip: also enroll the instance in the CrowdSec Console. It’s optional and gives you a web interface with an overview of alerts and instances. You’ll find the enroll key in the Console after you log in:
cscli console enroll <your-enroll-key>Then confirm the enrollment in the Console.
Step 2: Make Caddy write JSON logs
CrowdSec can only analyze what’s in the access log. So you don’t have to copy the log block into every site, create it as a snippet in the Caddyfile and pull it into each site with import:
(access_log) {
	log {
		output file /var/log/caddy/access.log
		format json
	}
}

app.example.com {
	import access_log
	reverse_proxy 192.168.1.20:8080
}

cloud.example.com {
	import access_log
	reverse_proxy 192.168.1.21:8443
}
The snippet has to come before the first site that imports it in the Caddyfile. If it sits further down, Caddy doesn’t know it yet at that point.
You don’t have to create the /var/log/caddy folder. The official Debian package creates it during installation and gives it to the caddy user. If you installed Caddy some other way, create it yourself: mkdir -p /var/log/caddy && chown caddy:caddy /var/log/caddy.
Pay attention to who owns the log file. If you run caddy validate as root before the file exists, Caddy creates it as root. The actual Caddy process, which runs as user caddy, then can’t write to it, and no more logs arrive. That’s exactly what happened to me. The fix:
chown caddy:caddy /var/log/caddy/access.logStep 3: Whitelists so you don’t lock yourself out
Before CrowdSec starts blocking, your own networks should be on the whitelist. Create a file in /etc/crowdsec/parsers/s02-enrich/ for this, for example my-whitelist.yaml:
name: local/my-whitelist
description: "Never block my own networks"
whitelist:
  reason: "LAN, Tailscale and my own static IP"
  ip:
    - "203.0.113.10"
  cidr:
    - "192.168.0.0/16"
    - "10.0.0.0/8"
    - "172.16.0.0/12"
    - "100.64.0.0/10"
Add the private address ranges, the Tailscale range 100.64.0.0/10, and the static public IP of your home connection. The 203.0.113.10 above is only a placeholder. Put your own IP there.
Do this step before you connect the Caddy logs to CrowdSec in step 4. Only from then on does CrowdSec analyze your traffic and start blocking. After creating the file, reload CrowdSec and check that the whitelist was loaded:
systemctl reload crowdsec
cscli parsers list | grep my-whitelist
How to whitelist a site with a dynamic IP
If your second site has a dynamic IP and is only reachable through a DDNS hostname (dynamic DNS, a name that follows your changing IP), a static whitelist doesn’t help much because the IP changes. That’s my situation. The answer is a second whitelist file that a small script rewrites every 15 minutes:
#!/bin/sh
HOST="site2.example.com"
FILE="/etc/crowdsec/parsers/s02-enrich/ddns-whitelist.yaml"

IP=$(getent ahostsv4 "$HOST" | awk 'NR==1 {print $1}')
[ -n "$IP" ] || exit 1

cat > "$FILE.tmp" <<EOF
name: local/ddns-whitelist
description: "Dynamic IP of the second site"
whitelist:
  reason: "second site via DDNS"
  ip:
    - "$IP"
EOF

if ! cmp -s "$FILE.tmp" "$FILE"; then
  mv "$FILE.tmp" "$FILE"
  systemctl reload crowdsec
else
  rm "$FILE.tmp"
fi
Save the script somewhere like /usr/local/bin/crowdsec-ddns-whitelist.sh. CrowdSec only reloads when the IP has actually changed. A systemd timer runs it. You need two files for that. The first is the service that runs the script once, /etc/systemd/system/crowdsec-ddns-whitelist.service:
[Unit]
Description=Update CrowdSec whitelist for DDNS site

[Service]
Type=oneshot
ExecStart=/usr/local/bin/crowdsec-ddns-whitelist.sh
The second is the timer that starts the service every 15 minutes, /etc/systemd/system/crowdsec-ddns-whitelist.timer:
[Unit]
Description=CrowdSec DDNS whitelist every 15 minutes

[Timer]
OnBootSec=2min
OnCalendar=*:0/15

[Install]
WantedBy=timers.target
chmod +x /usr/local/bin/crowdsec-ddns-whitelist.sh
systemctl daemon-reload
systemctl enable --now crowdsec-ddns-whitelist.timer
systemctl list-timers crowdsec-ddns-whitelist.timerStep 4: Set up the acquisition
Now tell CrowdSec which file to read and which parser belongs to it. This is called the acquisition, and it goes in /etc/crowdsec/acquis.d/caddy.yaml:
filenames:
  - /var/log/caddy/access.log
labels:
  type: caddy
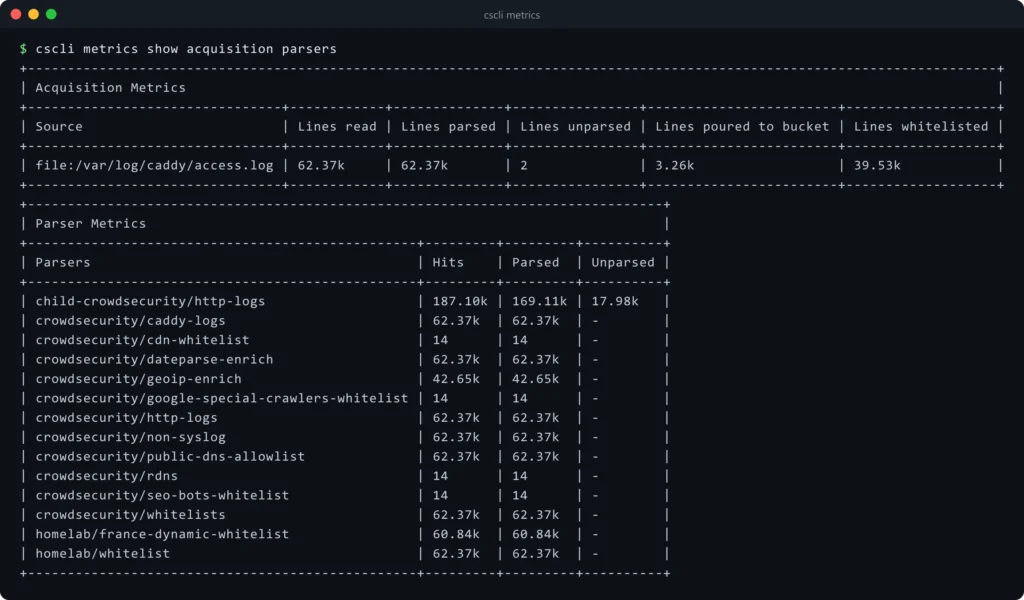
After a systemctl reload crowdsec, cscli metrics shows you whether lines from the access log are being read and parsed.
Common problems and fixes
1. Caddy stuck in “reloading”
For me, systemctl reload caddy timed out after the Caddyfile changes, and the systemd unit got stuck in the “reloading” state. If that happens to you, reload directly through Caddy’s admin API:
caddy reload --config /etc/caddy/Caddyfile --forceThat makes the new config active. Later, at a quiet moment, do a real restart of the service so systemd gets back to a clean state too.
2. 512 MB of RAM is too tight
My Caddy LXC had 512 MB of RAM until then, which was enough for Caddy alone. With CrowdSec added, give the container more. I raised it to 1 GB.
Check what CrowdSec is doing
These five commands give you the overview:
| Command | Shows |
|---|---|
cscli decisions list | Currently blocked IPs with reason and time remaining |
cscli alerts list | Which scenarios triggered and when |
cscli metrics | Log lines read, parsers, bouncer activity |
cscli collections list | Installed collections and whether they’re up to date |
cscli bouncers list | Registered bouncers and when they last checked in |
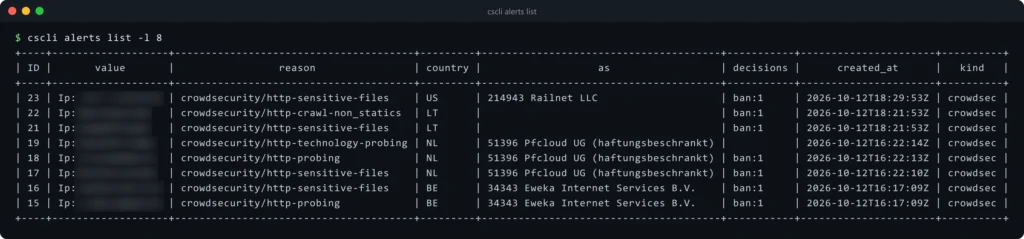
If you want to test whether the whitelist works, make a few failed attempts from your own LAN and then look at cscli decisions list. Your own IP should never show up there.
Wrapping up
With this setup, CrowdSec reads Caddy’s JSON logs, the nftables bouncer blocks detected scanners right at the firewall, and the community blocklist keeps known bad IPs out before they even try. Caddy itself stays a standard build without extra modules.
Do you already use CrowdSec, or do you rely on Fail2ban? Let me know in the comments.
Did this guide help you? You can buy me a coffee on Ko-fi. It keeps MappleBox ad-free.