Proxmox in Claude: Manage Your Hosts from Chat with a Self-Hosted MCP Server
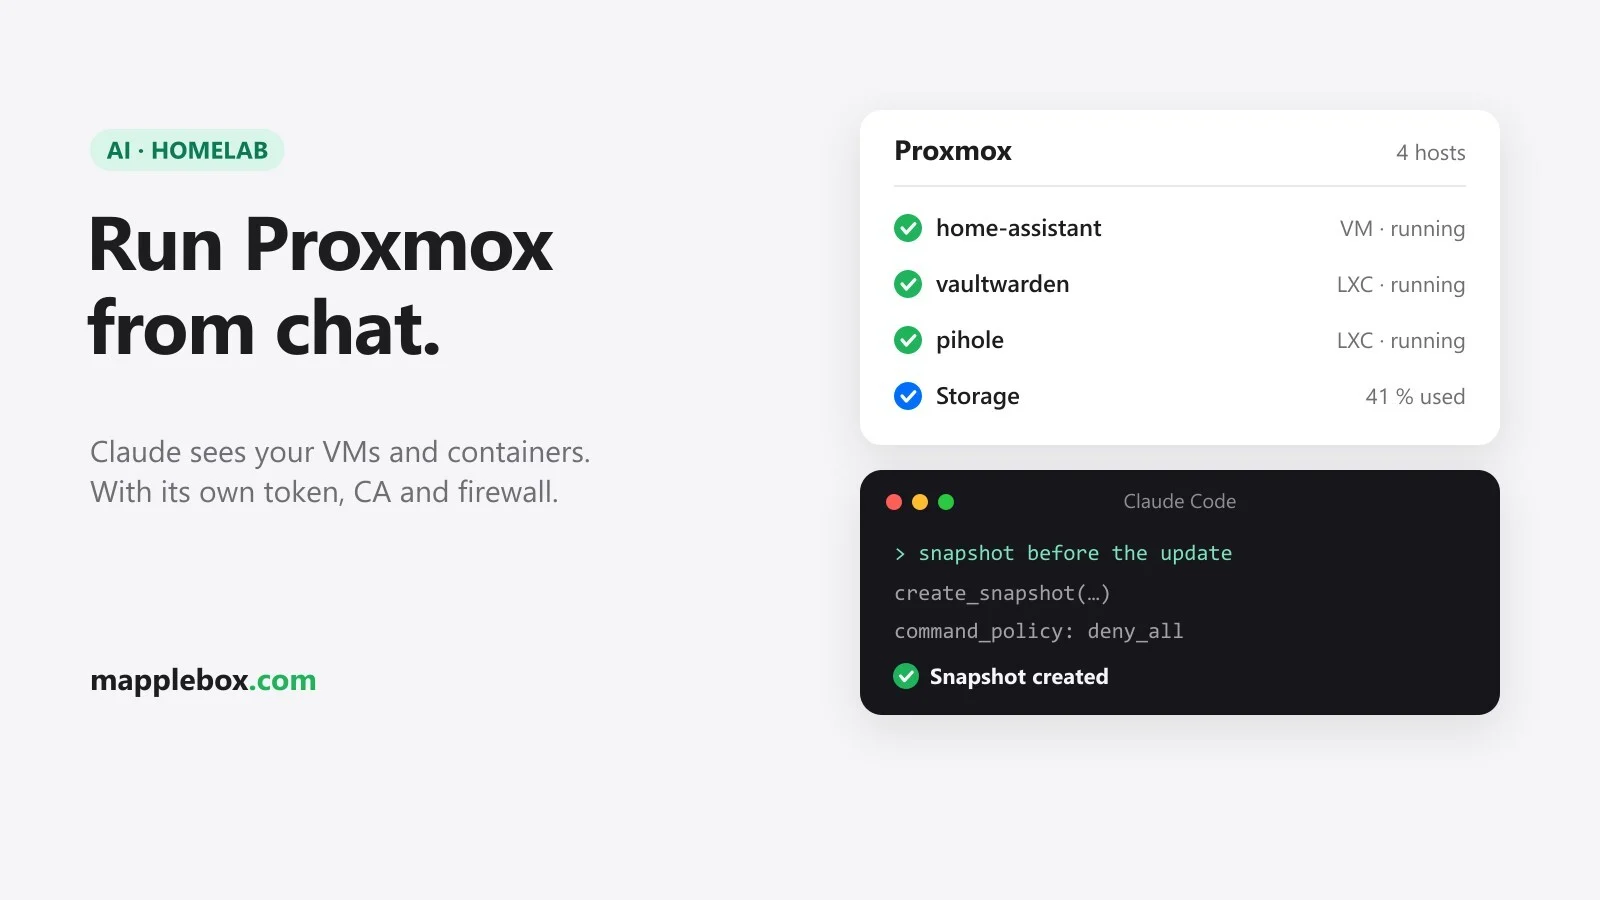
With your own MCP server (Model Context Protocol, an interface that lets an AI assistant use tools) you can manage your Proxmox hosts straight from a chat with Claude. You can ask which containers are running, how full your storage is, or have Claude take a snapshot before an update. In this guide you set up ProxmoxMCP-Plus in a small LXC for that, with its own API token, guest shell commands blocked and reachable only from inside your network. This is how Claude manages my four Proxmox hosts: it lists VMs and containers, checks storage, reads container configs and takes snapshots before upgrades. Along the way I ran into a TLS problem with Python 3.13, and the fix is in Step 6.
Quick summary
- ProxmoxMCP-Plus is an open source server that exposes the Proxmox API as tools for Claude: list VMs and containers, show storage, take snapshots, start and stop guests.
- It runs in its own unprivileged LXC (a lightweight Linux container on Proxmox) as a systemd service (systemd starts and supervises services on Linux) and logs in with a dedicated API token you can revoke at any time.
- Shell commands inside your guests are fully blocked with
deny_all. The server is only reachable internally through Caddy, and it requires a bearer token itself (a secret key sent in the HTTP header). - With Python 3.13 the server rejects the default certificate of older Proxmox installs. You fix that with a small CA (certificate authority) of your own, and certificate checks stay on.
- All files from this guide (systemd unit, env and config templates, nftables file for the firewall,
make-ca.shand short notes for the Proxmox user and the certificate) are in the repo mapplebox/homelab-mcp-stack in theproxmox/folder.
What Claude can do with it
ProxmoxMCP-Plus comes with a lot of tools. These are the ones I use day to day:
- List nodes, VMs and containers with status, CPU and RAM (
get_nodes,get_vms,get_containers). - Show storage, meaning how full your pools and disks are (
get_storage). - Read VM and container configs (
get_vm_config,get_container_config). - List, create and roll back snapshots (
list_snapshots,create_snapshot,rollback_snapshot). - Start, shut down and stop guests (
start_container,shutdown_vm,stop_vmand so on).
There are also tools for creating and deleting VMs, for backups and for running commands inside guests. That is why it pays to decide up front what Claude may do. My rules:
- A dedicated Proxmox user with its own API token. If something goes wrong, you delete the token and access is gone. Your root login stays untouched.
- The command policy is set to
deny_all, so Claude can’t run shell commands in your VMs or containers. - Every change starts with a snapshot. I tell Claude that in the prompt, too.
- The server is internal only, reachable from the LAN and over Tailscale (a VPN that joins your devices into one private network). It is never exposed to the internet.
- I confirm anything that can break things (stop, delete, roll back) myself. Claude Code asks before every tool call unless you have allowed that tool permanently. I only allowed read-only tools permanently.
How to secure MCP servers in general is covered in more detail in Claude in your homelab: connect MCP servers securely. This guide is about the concrete Proxmox setup.
What you need
- At least one Proxmox VE host with root shell access.
- Room for a small LXC: 1 core, 512 MB RAM and 4 GB disk are enough.
- A reverse proxy (a server that accepts requests and passes them on to internal services). I use Caddy, which gets certificates for internal hostnames through the DNS challenge. With the DNS challenge, Caddy proves you own the domain through a short-lived DNS record, so the hostname doesn’t have to be reachable from the internet.
- A DNS record in your LAN (router, Pi-hole or similar) that points the internal hostname to Caddy’s IP.
- Claude Code on your computer.
- OpenSSL 3 for your own CA.
openssl versionshows what you have. On Linux it’s usually there already. A Mac ships with LibreSSL, so install OpenSSL 3 withbrew install openssl@3. On Windows, use WSL or Git Bash. In Git Bash, runexport MSYS_NO_PATHCONV=1first, otherwise Git Bash turns/CN=…into a Windows path.
I use placeholders throughout: Proxmox host 192.168.1.5 with the node name pve1 and the hostname pve1.example.com, Caddy on 192.168.1.10, the MCP LXC on 192.168.1.25 and the internal hostname mcp-proxmox.int.example.com. Replace them with your own values everywhere.
Step 1: Create a Proxmox user and API token
Start with a dedicated user for the MCP server. The pve realm is Proxmox’s built-in user database. The user needs no password because it only ever logs in with a token. On the Proxmox host as root:
pveum user add mcp@pve --comment "MCP server for Claude"Now decide how much Claude may do. Roles in Proxmox are predefined bundles of privileges:
PVEAuditoris read-only. Claude can look at everything but can’t start, stop or snapshot anything. This is the right place to start if you only want to look around.PVEAdmincan do almost everything. According to the Proxmox docs it can’t change system settings or permissions. You need it for snapshots, starting and stopping. I usePVEAdminbecause I wanted exactly those write permissions.
Then you create the token. Privilege separation matters here. When it’s on, which is the default, the token has no permissions of its own. It only gets what you grant it explicitly through an ACL (access control list, a permission assigned on a path), and only as far as the user itself is allowed. So you assign the role twice, once to the user and once to the token. The path / means everything in the cluster.
pveum user token add mcp@pve mcp --comment "ProxmoxMCP-Plus" --privsep 1
pveum acl modify / --roles PVEAdmin --users mcp@pve
pveum acl modify / --roles PVEAdmin --tokens 'mcp@pve!mcp'
The token is called mcp, and its full ID is mcp@pve!mcp. Keep the single quotes around the ID: without them, bash can read the ! as a reference to earlier commands in your history. For read-only access, replace PVEAdmin with PVEAuditor in both places.
The first command prints the token value (value), a long ID in UUID format. Proxmox shows it exactly once. Copy it straight into your password manager and never paste it into a chat, not even with Claude. pveum user token permissions mcp@pve mcp shows which permissions the token really ends up with.
You can do the same in the web UI under Datacenter → Permissions → API Tokens, where the checkbox is called “Privilege Separation”. When you no longer need the access, revoke it with pveum user token delete mcp@pve mcp. In a cluster you create the user and token only once. They apply to all nodes.
Step 2: Create a small LXC
First download the Debian 13 template. In the Proxmox web UI, click your local storage, then CT Templates and Templates, and pick debian-13-standard. On the shell it works like this:
pveam update
pveam available --section system | grep debian-13
pveam download local <name-from-the-list>
Then use Create CT to make a new container: Debian 13 template, unprivileged (the “Unprivileged container” checkbox is on by default), 1 core, 512 MB RAM and 4 GB disk. On the Network tab, set IPv4 to “Static” with 192.168.1.25/24 and your router as the gateway. You can also leave it on “DHCP” and reserve the address in your router, as long as it never changes. You don’t need Docker for this server. It runs directly as a Python service. If you’d rather not build containers by hand, have a look at the Proxmox helper scripts.
One MCP server covers a single host or a whole cluster. For a cluster you enter any one node in the config, and its API knows about all the others. That’s why I run three instances for four hosts: one for the cluster and one each for the two standalone hosts.
Inside the LXC, install the base packages, create a system user mcp without a login shell for the service to run as, and create its folders with the right permissions:
apt update && apt install -y python3 curl ca-certificates nftables
useradd --system --home /var/lib/proxmox-mcp --shell /usr/sbin/nologin mcp
install -d -o mcp -g mcp -m 750 /var/lib/proxmox-mcp
install -d -o root -g mcp -m 750 /etc/proxmox-mcp
Step 3: Install ProxmoxMCP-Plus with uv
The server is available as the Python package proxmox-mcp-plus, and the code lives on GitHub at RekklesNA/ProxmoxMCP-Plus. I install it with uv, a fast Python package manager, into its own venv (a self-contained Python environment) at /opt/proxmox-mcp. That keeps it separate from Debian’s Python packages.
curl -LsSf https://astral.sh/uv/install.sh | sh
source ~/.local/bin/env
uv venv --python /usr/bin/python3 /opt/proxmox-mcp
uv pip install --python /opt/proxmox-mcp/bin/python "proxmox-mcp-plus==0.5.27"
--python /usr/bin/python3 makes the venv use Debian’s Python. Without it, uv might put its own Python into root’s home directory, and the service wouldn’t see it later because the systemd unit hides home directories. Afterwards the start command is at /opt/proxmox-mcp/bin/proxmox-mcp-plus.
I run version 0.5.27 and pinned it so an update doesn’t catch me off guard. At the time of writing there are newer releases (0.6.2, for example). Read the release notes in the GitHub repo before you switch, then change the version number and run the command again.
Step 4: Write config.json
The configuration lives in /etc/proxmox-mcp/config.json. It holds the token value, so first create the file empty with the right permissions: only root may write it, only the mcp group may read it. Then open it in an editor:
install -m 640 -o root -g mcp /dev/null /etc/proxmox-mcp/config.json
nano /etc/proxmox-mcp/config.json
Mine looks like this, with placeholders instead of real values:
{
    "proxmox": {
        "host": "192.168.1.5",
        "port": 8006,
        "verify_ssl": true,
        "service": "PVE"
    },
    "auth": {
        "user": "mcp@pve",
        "token_name": "mcp",
        "token_value": "<token-secret-from-pveum>"
    },
    "logging": {
        "level": "INFO"
    },
    "mcp": {
        "host": "0.0.0.0",
        "port": 8000,
        "transport": "STREAMABLE"
    },
    "jobs": {
        "sqlite_path": "/var/lib/proxmox-mcp/proxmox-jobs.sqlite3"
    },
    "command_policy": {
        "mode": "deny_all",
        "allow_patterns": [],
        "deny_patterns": [
            "(^|\\s)rm\\s+-rf(\\s|$)",
            ":\\(\\)\\{:\\|:\\&\\};:"
        ],
        "require_approval_token": false,
        "approval_token": null
    }
}
What the blocks mean:
proxmox: address and port of the Proxmox API.verify_sslstaystrue, more on that in Step 6.auth: user, token name and the token value from Step 1. You type the value in yourself in the editor.logging: without a log file the server writes to the console, and systemd collects that in its journal. You read it later withjournalctl.mcp: the server listens on port 8000 on all IPv4 addresses of the LXC (0.0.0.0) and speaks Streamable HTTP, the current HTTP transport of MCP. The endpoint is/mcp.jobs: the server tracks longer-running tasks in a small SQLite database. It sits in the only folder the service is allowed to write to.command_policy:deny_allblocks every guest command that doesn’t matchallow_patterns. The list is empty, so everything is blocked. Thedeny_patternsare the defaults from the project’s example config and apply on top. Withdeny_allyou don’t need an approval token for commands (approval_token).
The code also has a command_policy.high_risk_mode option for operations like deleting and rolling back. The default is audit_only, which only logs those calls. With enforce the locks really apply. I rely on Claude Code’s confirmation prompt for that. If you want to be stricter, look the option up in the project’s docs.
Step 5: Env file with the bearer key
In HTTP mode, ProxmoxMCP-Plus requires a key in the MCP_API_KEY variable by default. Every request without Authorization: Bearer <key> gets a 401. The key only protects the MCP server itself and is separate from the Proxmox token. Generate a long random value:
openssl rand -hex 32Then create the env file the same way, with the right permissions, and fill in the values:
install -m 640 -o root -g mcp /dev/null /etc/proxmox-mcp/proxmox-mcp.env
nano /etc/proxmox-mcp/proxmox-mcp.env
MCP_API_KEY=<your-long-random-value>
PROXMOX_MCP_CONFIG=/etc/proxmox-mcp/config.json
REQUESTS_CA_BUNDLE=/etc/proxmox-mcp/homelab-ca.pemPROXMOX_MCP_CONFIG tells the server where the config is. You need REQUESTS_CA_BUNDLE for Step 6. You’ll add the same key to Claude Code later, which sends it with every request.
Step 6: Fix the TLS problem with Python 3.13
Debian 13 ships Python 3.13. Since that version, Python sets the VERIFY_X509_STRICT flag by default when it checks certificates, and urllib3, the library underneath the Proxmox connection, does the same on Python 3.13 from version 2.4 on. Strict checking means certificates that don’t follow the RFC 5280 standard closely get rejected. For a long time, the CA that Proxmox creates during installation had no keyUsage extension (a field that says what a key may be used for). For me, every connection failed with this message:
certificate verify failed: CA cert does not include key usage extensionFirst check whether this affects you at all. On the Proxmox host:
openssl x509 -in /etc/pve/pve-root-ca.pem -noout -ext keyUsageIf the output has no Key Usage line, the extension is missing and you need the rest of this step. At the time of writing, Proxmox creates new CAs with keyUsage from the pve-cluster package 9.1.2 on (bug #6701). Existing installs keep their old CA. If the command shows Certificate Sign, CRL Sign, you can skip your own CA. In that case copy /etc/pve/pve-root-ca.pem into the LXC as /etc/proxmox-mcp/homelab-ca.pem (as described below) and test with the TLS check under “Check that it works”.
The lazy way would be verify_ssl: false. Then the server no longer checks who it’s talking to, with a token that has admin rights. Judging by the code, ProxmoxMCP-Plus even blocks that (0.5.27 included) unless you also turn on a developer mode. So I built a small CA of my own and used it to issue a certificate for each Proxmox node with all the required extensions. You do this once on your computer. The keys are ECDSA P-256, a modern, compact key type that Proxmox and Python handle without trouble.
The easiest way is make-ca.sh from the repo. You pass the hostname, the IP and an output folder. On the first run the script creates the CA. Later runs reuse it, and it never overwrites an existing key or certificate. The files are named after the hostname:
./make-ca.sh pve1.example.com 192.168.1.5 ./pki
# creates ./pki/homelab-ca.pem, ./pki/homelab-ca.key,
#         ./pki/pve1.example.com.pem, ./pki/pve1.example.com.key
If you’d rather type every command yourself, you can do it by hand. First the CA, valid for 10 years, allowed only to sign certificates and to have no further CAs below it (pathlen:0):
openssl req -x509 -newkey ec -pkeyopt ec_paramgen_curve:P-256 -nodes \
  -keyout homelab-ca.key -out homelab-ca.pem -days 3650 \
  -subj "/CN=Homelab Proxmox CA" \
  -addext "basicConstraints=critical,CA:TRUE,pathlen:0" \
  -addext "keyUsage=critical,keyCertSign,cRLSign"
Then a small file with the extensions for each node. The SAN list (Subject Alternative Names, every name and IP the host is reachable under) contains the node’s IP, its hostname, localhost and 127.0.0.1. Save it as pve1.example.com.ext:
basicConstraints = critical,CA:FALSE
keyUsage = critical,digitalSignature,keyEncipherment
extendedKeyUsage = serverAuth
subjectAltName = IP:192.168.1.5,DNS:pve1.example.com,DNS:localhost,IP:127.0.0.1
subjectKeyIdentifier = hash
authorityKeyIdentifier = keyid
With that file you create the key and certificate for the node. I issue host certificates for 825 days:
openssl req -new -newkey ec -pkeyopt ec_paramgen_curve:P-256 -nodes \
  -keyout pve1.example.com.key -out pve1.example.com.csr -subj "/CN=pve1.example.com"
openssl x509 -req -in pve1.example.com.csr -CA homelab-ca.pem -CAkey homelab-ca.key \
  -CAcreateserial -out pve1.example.com.pem -days 825 -sha256 -extfile pve1.example.com.ext
openssl verify -x509_strict -CAfile homelab-ca.pem pve1.example.com.pem
The last command has to print pve1.example.com.pem: OK. homelab-ca.key is the most valuable part: whoever has it can issue certificates your devices will trust. Keep it offline or encrypted and never copy it to a server.
Now install the certificate on the node. pveproxy is the service that serves the Proxmox web UI and the API on port 8006. According to the Proxmox docs, it uses pveproxy-ssl.pem and pveproxy-ssl.key in /etc/pve/local/ for custom certificates. That folder is a link to /etc/pve/nodes/<node>/. Run hostname on the node to see its node name. Leave the Proxmox-generated files pve-ssl.pem and pve-root-ca.pem alone.
scp ./pki/pve1.example.com.pem root@192.168.1.5:/etc/pve/nodes/pve1/pveproxy-ssl.pem
scp ./pki/pve1.example.com.key root@192.168.1.5:/etc/pve/nodes/pve1/pveproxy-ssl.key
ssh root@192.168.1.5 systemctl restart pveproxy
Restarting pveproxy only affects the web UI and the API. Your VMs and containers keep running. In a cluster, repeat this for every node with its own certificate and the same CA. To go back to the Proxmox certificate, run pvenode cert delete 1 on the node. That removes both pveproxy-ssl files and restarts pveproxy.
Only the public CA certificate homelab-ca.pem goes into the LXC. Copy it to the Proxmox host and push it into the container from there with pct push. <ct-id> is the ID of your MCP LXC:
scp ./pki/homelab-ca.pem root@192.168.1.5:/root/homelab-ca.pem
ssh root@192.168.1.5 pct push <ct-id> /root/homelab-ca.pem /etc/proxmox-mcp/homelab-ca.pem --perms 644
You can also open homelab-ca.pem on your computer, copy the text from -----BEGIN CERTIFICATE----- to -----END CERTIFICATE----- and paste it in the LXC with nano /etc/proxmox-mcp/homelab-ca.pem. Through REQUESTS_CA_BUNDLE from Step 5 the server trusts exactly this CA. If you also import homelab-ca.pem into your browser or operating system, the certificate warning in the Proxmox web UI goes away as well.
Step 7: Firewall with nftables, port 8000 for Caddy only
Lock down the port before you start the service. The server listens on all IPv4 addresses of the LXC. So nobody on the LAN can skip Caddy and go straight to port 8000, you only let Caddy’s IP through there. Debian 13 uses nftables for this, the successor to iptables in the Linux kernel. Replace the contents of /etc/nftables.conf in the LXC with this file and set CADDY_IP to your Caddy’s IP:
#!/usr/sbin/nft -f

flush ruleset

define CADDY_IP = 192.168.1.10    # your Caddy host
define MCP_PORT = 8000            # ProxmoxMCP-Plus

table inet filter {
	chain input {
		type filter hook input priority filter; policy accept;

		iifname "lo" accept
		tcp dport $MCP_PORT ip saddr $CADDY_IP accept
		tcp dport $MCP_PORT drop    # everyone else, IPv4 and IPv6
	}
	chain forward {
		type filter hook forward priority filter; policy accept;
	}
	chain output {
		type filter hook output priority filter; policy accept;
	}
}
These rules only restrict port 8000. Everything else, SSH included, stays open, so you can’t lock yourself out with this file. flush ruleset only replaces the rules inside the LXC, because the container has its own network stack. The Proxmox host isn’t affected. The inet table covers IPv4 and IPv6 at once, so the last rule blocks port 8000 over IPv6 as well. Loopback (lo) stays allowed so you can test with localhost inside the container.
nft -c -f /etc/nftables.conf
systemctl enable --now nftables
nft list ruleset
nft -c only checks the file and changes nothing. If you made a typo, it points to the line. systemctl enable --now nftables loads the rules right away and at every boot. If you change the file later, reload it with nft -f /etc/nftables.conf.
Step 8: A hardened systemd unit
systemd starts the server at boot and restarts it after a crash. The unit below is my real one. The lines from NoNewPrivileges on lock the service in: it can’t gain extra privileges, sees the file system read-only, can’t see home directories and can only write to /var/lib/proxmox-mcp. Save it as /etc/systemd/system/proxmox-mcp.service:
[Unit]
Description=ProxmoxMCP-Plus HTTP server
After=network-online.target
Wants=network-online.target

[Service]
User=mcp
Group=mcp
EnvironmentFile=/etc/proxmox-mcp/proxmox-mcp.env
WorkingDirectory=/var/lib/proxmox-mcp
ExecStart=/opt/proxmox-mcp/bin/proxmox-mcp-plus
Restart=on-failure
RestartSec=5
NoNewPrivileges=true
ProtectSystem=strict
ProtectHome=true
ReadWritePaths=/var/lib/proxmox-mcp
PrivateTmp=true

[Install]
WantedBy=multi-user.target
systemctl daemon-reload
systemctl enable --now proxmox-mcp
journalctl -u proxmox-mcp -fStep 9: Caddy with int_only
First add a record to your LAN DNS that points mcp-proxmox.int.example.com to Caddy’s IP (192.168.1.10). In the Caddyfile I use one shared snippet (a reusable block) for all internal MCP servers. It gets the certificate through the DNS challenge and rejects everything that doesn’t come from private networks or the Tailscale range 100.64.0.0/10. The repo uses IONOS as the example DNS provider. For that you need a Caddy build with the caddy-dns/ionos module and the API token in the IONOS_API_TOKEN variable. For another provider, swap the dns line and the module.
(int_only) {
	tls {
		dns ionos {env.IONOS_API_TOKEN}
	}
	@outside not remote_ip private_ranges 100.64.0.0/10
	respond @outside 403
}

mcp-proxmox.int.example.com {
	import int_only
	reverse_proxy 192.168.1.25:8000
}
ProxmoxMCP-Plus checks the bearer token itself through MCP_API_KEY. Caddy simply passes the Authorization header through, so the Caddyfile holds no secret for this server. Then run systemctl reload caddy.
Step 10: Add the server to Claude Code
On your computer, add the server to Claude Code. With --scope user it’s available in all your projects:
 claude mcp add --transport http --scope user proxmox \
  https://mcp-proxmox.int.example.com/mcp \
  --header "Authorization: Bearer <your-long-random-value>"
The space before claude is on purpose. In many bash setups (with HISTCONTROL=ignorespace or ignoreboth, the default on Debian and Ubuntu) a command that starts with a space doesn’t end up in your history, and neither does the key. In zsh you need setopt HIST_IGNORE_SPACE for that. Claude Code still stores the key in plain text in ~/.claude.json, so treat that file like a password.
If you have several hosts with their own instances, give each one its own name, for example proxmox-pve1 and proxmox-pve2. That way Claude knows which host you mean.
First prompts to try
Start a new session in Claude Code and try prompts like these. Begin with the read-only ones:
- “Show me all VMs and containers with status, CPU and RAM.”
- “How full is my storage? Is anything running low?”
- “Show me the config of CT 120 and explain what the options mean.”
- “I want to update CT 120. Take a snapshot called pre-upgrade first, then show me the snapshot list.”
For the snapshot, Claude Code asks before it calls the tool. Take a second to read the parameters, especially the guest ID. I do the same for stopping and restarting.
Check that it works
- In the LXC,
systemctl status proxmox-mcpshows “active (running)”. Follow the logs withjournalctl -u proxmox-mcp -f. - The node serves your certificate:
openssl s_client -connect 192.168.1.5:8006 -CAfile ./pki/homelab-ca.pem -verify_return_error </dev/null 2>/dev/null | grep "Verify return code"on your computer showsVerify return code: 0 (ok). - Python in the LXC accepts the certificate if this command prints
401(the API wants a login, but the certificate was accepted):REQUESTS_CA_BUNDLE=/etc/proxmox-mcp/homelab-ca.pem /opt/proxmox-mcp/bin/python -c "import requests; print(requests.get('https://192.168.1.5:8006/api2/json/version').status_code)". If you get anSSLErrorinstead, something is off with the certificate. - The server requires the key:
curl -i http://127.0.0.1:8000/mcpinside the LXC returns 401. - The firewall works: from another machine on the LAN (not the Caddy host),
curl -m 5 http://192.168.1.25:8000/mcptimes out. - The route through Caddy works:
curl -i https://mcp-proxmox.int.example.com/mcpwithout the header returns 401 from the server, and 403 from Caddy when you’re on an outside network. claude mcp listshows the server as connected. In a running session,/mcpshows its status and tools.
Common problems
“CA cert does not include key usage extension”
That’s the Python 3.13 problem from Step 6. Check that REQUESTS_CA_BUNDLE is in the env file, that homelab-ca.pem is readable for the mcp user and that pveproxy was restarted after copying. The openssl s_client check above shows which certificate the node is serving right now.
Hostname mismatch
The value of proxmox.host has to be in the certificate’s SAN list. If you use an IP, the certificate needs an IP: entry with exactly that address. For a hostname it needs the matching DNS: entry.
The service doesn’t start
Look at journalctl -u proxmox-mcp. If MCP_API_KEY is missing, the server exits in HTTP mode. The key must not contain spaces. A hex value from openssl rand is fine. If the log complains about write permissions, a path in the config points outside /var/lib/proxmox-mcp.
Claude sees nothing or gets a 403 from Proxmox
Usually the token’s ACL is missing. With privilege separation the token needs its own role. The role on the user alone isn’t enough. pveum user token permissions mcp@pve mcp shows what actually arrives.
Claude Code shows “Failed to connect”
claude mcp get proxmox shows the server’s status and configuration. A 401 means the key in Claude Code doesn’t match MCP_API_KEY. A 502 from Caddy usually means the nftables file has a different IP than Caddy’s, or the service isn’t running.
Wrapping up
With this setup you can ask Claude about the state of your Proxmox hosts the way you’d ask a colleague who has access to the web UI. Access hangs on a token you can revoke with one command. Guest shell commands are blocked, and nobody outside your network can reach the server. The Python 3.13 TLS problem took me the most time. My own CA fixed it cleanly, and the browser certificate warning disappeared along the way. If you’re unsure, start with PVEAuditor and only grant write access once you trust the workflow. All files are in the repo mapplebox/homelab-mcp-stack.
Are you already using Claude for your homelab? Tell me in the comments what you let it do.
Did this guide help you? You can buy me a coffee on Ko-fi. It keeps MappleBox ad-free.