Run real Linux on your iPhone: install Ubuntu with a desktop using crate
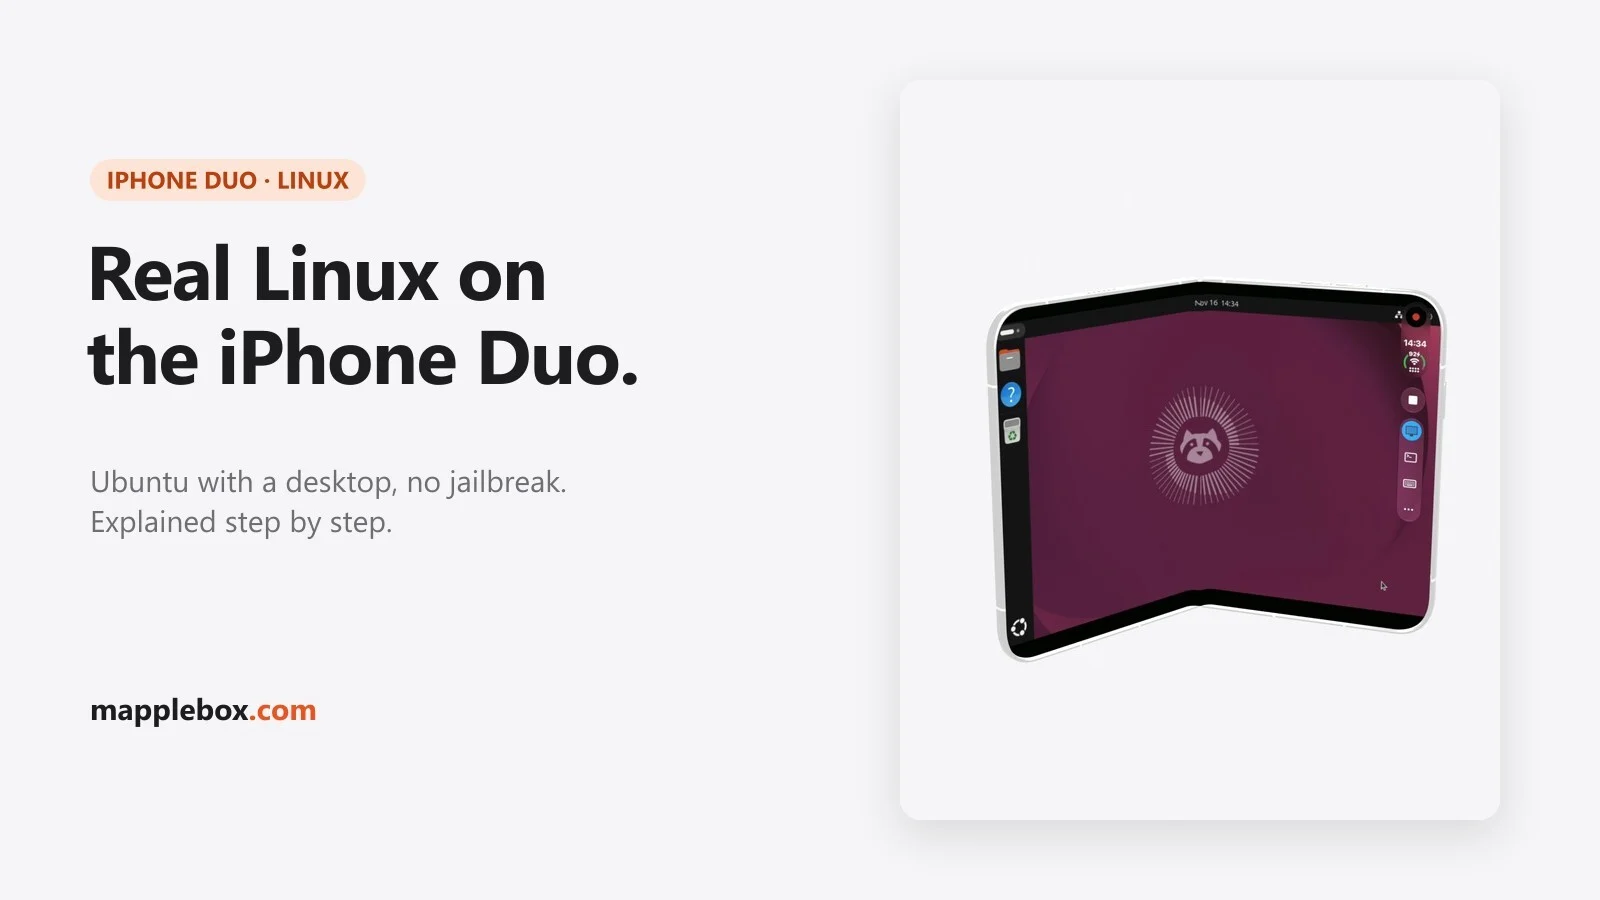
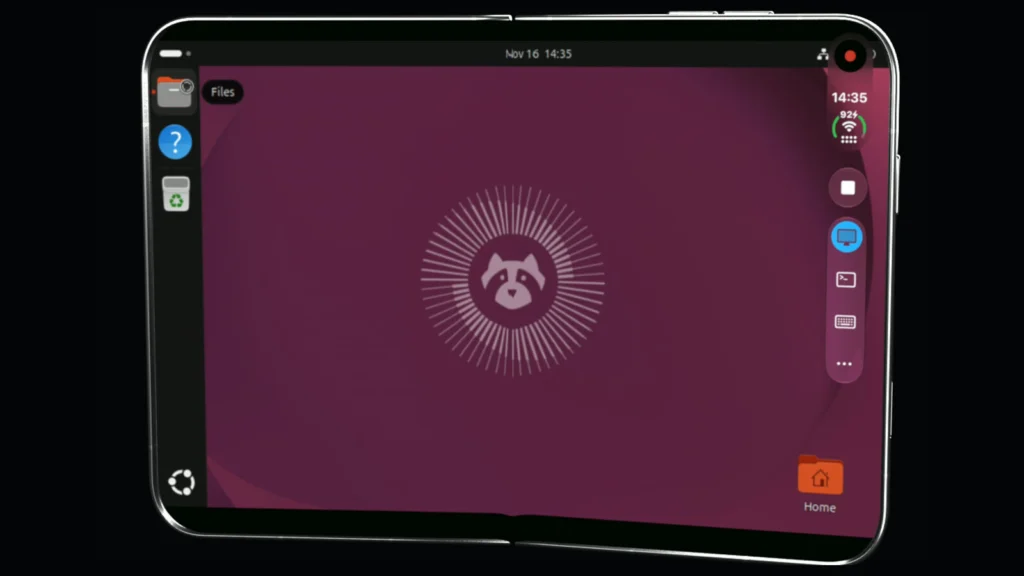
Your iPhone can run real Linux: Ubuntu with the GNOME desktop, a terminal and a package manager. The whole system runs on the phone itself. There’s no jailbreak and no server doing the work somewhere else. The open-source app crate makes it possible. It isn’t in the App Store, so you install it yourself from a Mac. This guide walks you through the whole setup, from the download to your first command in the Linux terminal.
Quick explainer
- crate: a free, open-source app (MPL-2.0 license) that runs Linux distributions on iPhone and iPad. A distribution is a ready-made flavor of Linux, like Ubuntu or Debian. The code is on GitHub at oneamendez/crate-ios.
- VM (virtual machine): a computer that an app simulates. Linux runs inside it as if it had its own hardware, while crate decides how much memory, disk and screen it gets.
- JIT (just-in-time): crate generates new code while it runs, and the iPhone’s processor runs that code directly. iOS only allows this when a debugger is attached to the app. A debugger is a developer tool for finding bugs. That’s why crate can’t be in the App Store.
- IPA and signing: an IPA is an iPhone app packed into a single file, like an APK on Android. iOS only opens apps that carry a digital signature tied to an Apple account. crate ships as an unsigned IPA, and you sign it with your own Apple account.
- Who it’s for: you have an iPhone or iPad, a Mac, and you want Linux in your pocket. You don’t need to code, but you will paste a few commands into the Mac’s Terminal.
What you end up with
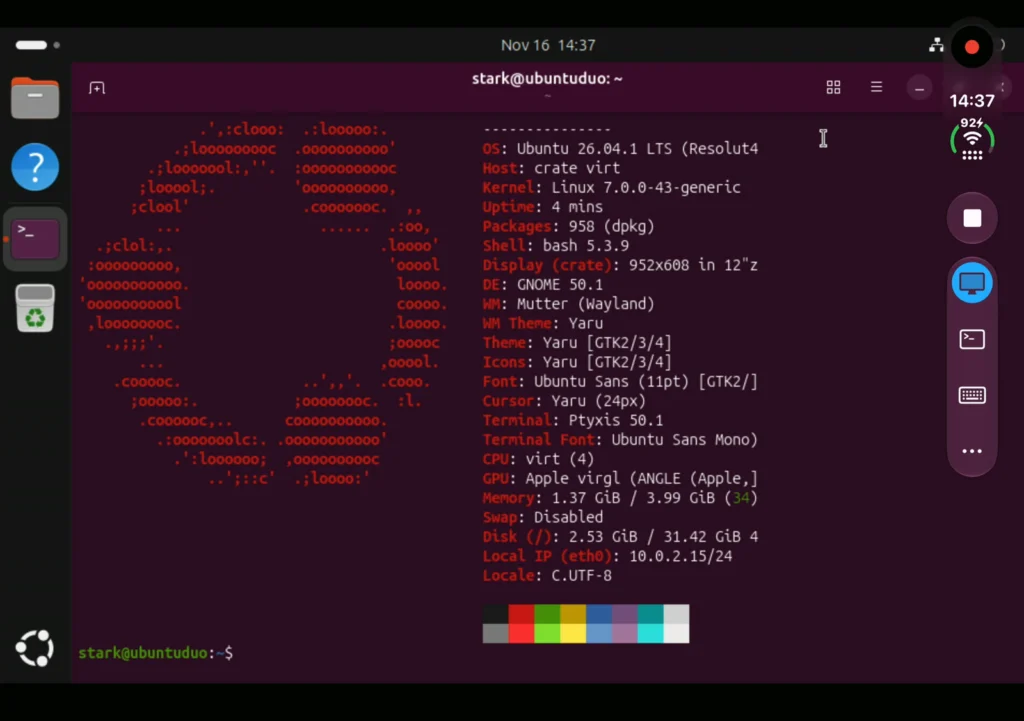
My iPhone Duo on iOS 27.2.1 runs Ubuntu with GNOME. Here’s what the fastfetch tool reports in the Linux terminal. You’ll install it yourself further down.
| Item | What it shows on my iPhone Duo |
|---|---|
| OS | Ubuntu 26.04.1 LTS |
| Desktop | GNOME 50.1 on Wayland |
| Kernel | Linux 7.0 |
| CPU | 4 cores |
| Memory | 3.99 GiB (I picked 6 GB, step 5 explains the gap) |
| GPU | Apple virgl (ANGLE) |
| Disk | 32 GB, 2.5 GB used |
The GPU line means the iPhone’s graphics chip draws the desktop. crate passes Linux’s OpenGL calls through virglrenderer, ANGLE and MoltenVK to the iPhone’s GPU.
What you need
You can’t do this without a Mac: the official instructions require one with Xcode.
- A Mac with Xcode. Xcode is Apple’s developer tool, available in the Mac App Store. If Xcode offers extra iOS components on first launch, install them.
- A cable to connect your iPhone or iPad to the Mac. The first time you plug it in, the iPhone asks whether to trust the computer. Tap “Trust”.
- An Apple account signed in to Xcode under Xcode → Settings → Accounts. A free account works, with one catch: the signature only lasts 7 days. After that crate won’t open until you sign it again. Your VMs survive that. With a paid Apple Developer Program membership the signature lasts a year.
- Developer Mode turned on on the iPhone. It’s an iOS switch that unlocks developer features, such as installing apps straight from a Mac and letting a debugger attach. You’ll find it under Settings → Privacy & Security → Developer Mode. If it isn’t there, see “Common pitfalls”.
- Free storage on the iPhone. Ubuntu with GNOME is an 891 MB download, and crate says it needs 4.4 GB.
- Optionally, the GitHub CLI (the
ghcommand), to check where the IPA came from.
This guide follows crate’s official INSTALL.md for v0.1.5. If you think something may have changed since, check there.
The shortcut: Claude Code
INSTALL.md offers a shortcut. You start Claude Code, an AI assistant that works in the terminal, on your Mac and paste the ready-made request from the section “The quick way”. Claude Code downloads the IPA, checks it, signs it and installs it. It only asks you for the parts that need you, like signing in to Xcode. The five steps below are exactly what it follows. If you’d like to know what’s going on, or you don’t use Claude Code, just do them by hand.
Step 1: Download the IPA
On the Mac, open Terminal (Applications → Utilities → Terminal). Terminal is a window where you type commands instead of clicking through menus. Make a working folder and download the latest crate release:
mkdir ~/crate
cd ~/crate
curl -LO https://github.com/oneamendez/crate-ios/releases/latest/download/crate-unsigned.ipa
gh attestation verify crate-unsigned.ipa --repo oneamendez/crate-ios
curl downloads the file. The last command checks that the file really was built by the crate repository’s GitHub workflow. If gh asks you to sign in first, run gh auth login once.
If you don’t have gh installed, skip the last line. Every release page lists the IPA’s SHA-256 checksum, a kind of fingerprint for the file. Compare it with the output of:
shasum -a 256 crate-unsigned.ipaStep 2: Make development profiles for your bundle ID
A bundle ID is an app’s unique name, written like a reversed web address, for example com.yourname.crate. A provisioning profile is a small file from Apple that says which app may run on which devices with which certificate. A development profile also lets a debugger attach to the app, and that’s what JIT needs.
Pick a bundle ID with your name in it, such as com.yourname.crate. crate has a JIT helper inside it, which then becomes com.yourname.crate.jithelper. Your Mac needs a development profile for both. The easiest way is to let Xcode make them:
- In Xcode: File → New → Project → iOS App. Enter
crateas the Product Name andcom.yournameas the Organization Identifier, which makes the Bundle Identifiercom.yourname.crate. Pick your account as the Team. Then check under Signing & Capabilities that the project shows exactly that bundle ID. You can also edit it there. - Optional, but it lets VMs use more memory: under Signing & Capabilities, add Increased Memory Limit and Extended Virtual Address Space. Capabilities are extra permissions that end up in the profile. If your account can’t add them, leave them out. crate runs without them.
- Plug in your iPhone, pick it as the run destination at the top of the Xcode window, and click Run (the play button) once. Xcode registers the bundle ID and creates the profile. You can delete the test app from the phone afterwards.
- Do the same with a second project for
com.yourname.crate.jithelper, this time with no capabilities. Type that bundle identifier in by hand under Signing & Capabilities. You can only skip this one if Xcode has already made your team a wildcard profile (“iOS Team Provisioning Profile: *”). The signing script then uses that.
Keep both Xcode projects. On a free account you need them again every 7 days to renew the profiles.
With a paid membership you can use the developer portal instead. Create an App ID for each bundle ID (with the two capabilities on crate’s, if you want them). Then create an iOS App Development profile for each one that includes your device. Download them and double-click to install.
Step 3: Sign and install
Stay in Terminal in the ~/crate folder. Get the signing script and your iPhone’s identifier:
curl -LO https://raw.githubusercontent.com/oneamendez/crate-ios/main/Scripts/sign-ipa.sh
chmod +x sign-ipa.sh
xcrun devicectl list devices
chmod +x makes the script runnable. The last command lists connected devices. Copy the long value in the Identifier column for your iPhone. Then sign and install in one go:
BUNDLE_ID=com.yourname.crate ./sign-ipa.sh crate-unsigned.ipa --install <your device's identifier>Swap com.yourname.crate for your bundle ID from step 2, and the placeholder, angle brackets included, for the identifier. Keep the iPhone unlocked and plugged in. If macOS asks whether codesign may use your keychain, enter your Mac password and allow it.
The script tells you which profiles it used and whether the memory entitlements went in. Those are the two memory permissions from step 2. If it says without, crate still runs, just with less memory. It also leaves crate-signed.ipa in the folder, which you can install any other way. If you have more than one profile or certificate, pick the right one with the PROFILE, HELPER_PROFILE and IDENTITY variables.
Step 4: Turn on JIT
Open crate on the iPhone and go to the Settings tab. There are two ways to get JIT:
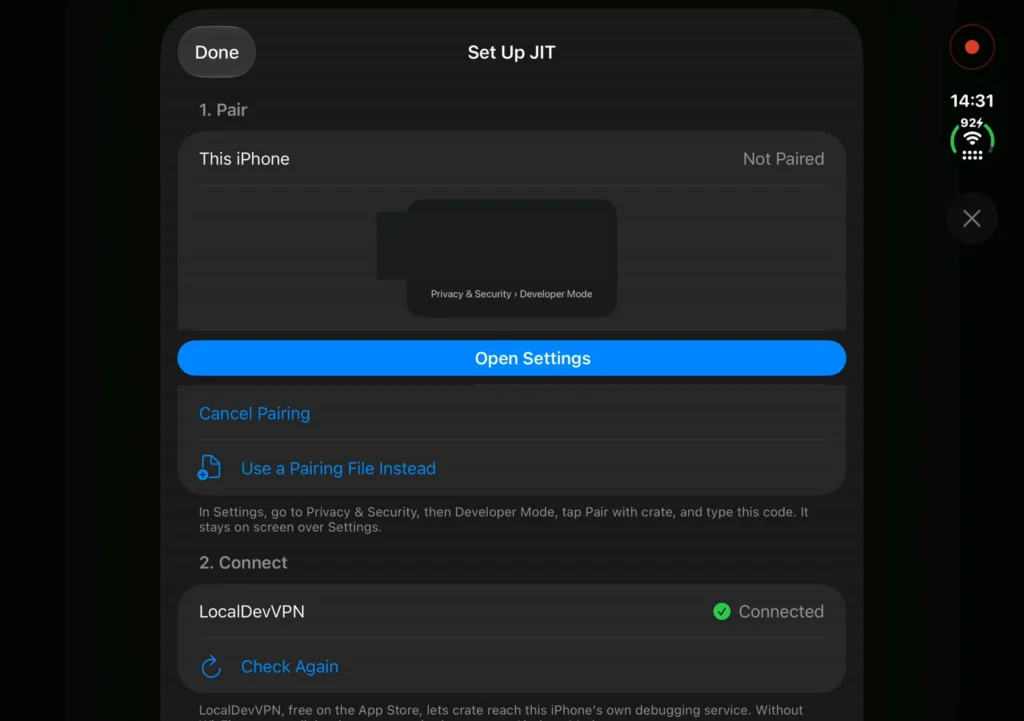
- Built-in StikJIT (the default): tap Set Up JIT. crate pairs itself with the iPhone and walks you through LocalDevVPN, an App Store app it needs for this. Then turn on Turn on JIT when crate opens. From then on, JIT comes on by itself every time you open crate.
- StikDebug, if you already use it: Turn On JIT opens StikDebug, which attaches and jumps back to crate.
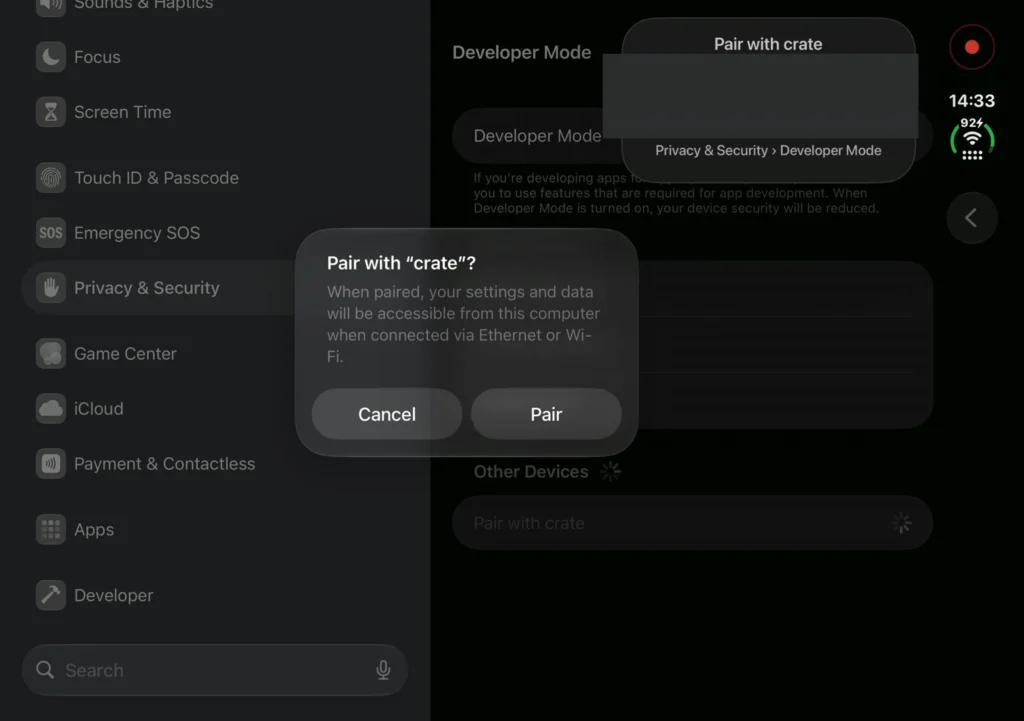
Here’s how the built-in pairing went for me. In crate, Set Up JIT first walks you through LocalDevVPN; once it says Connected, crate shows a 6-digit code in a small floating card. Then open the iPhone’s Settings → Privacy & Security → Developer Mode, tap “Pair with crate” under Other Devices, type the code from crate and confirm with your iPhone passcode. Back in crate, tap Turn On JIT, and the desktop boots. According to the README, crate pairs by itself on iOS 27. On older versions it needs a pairing file, or you use StikDebug.
JIT lasts until you close crate. It has to come on again the next time you open it, which the switch above handles for you.
Step 5: Install Linux
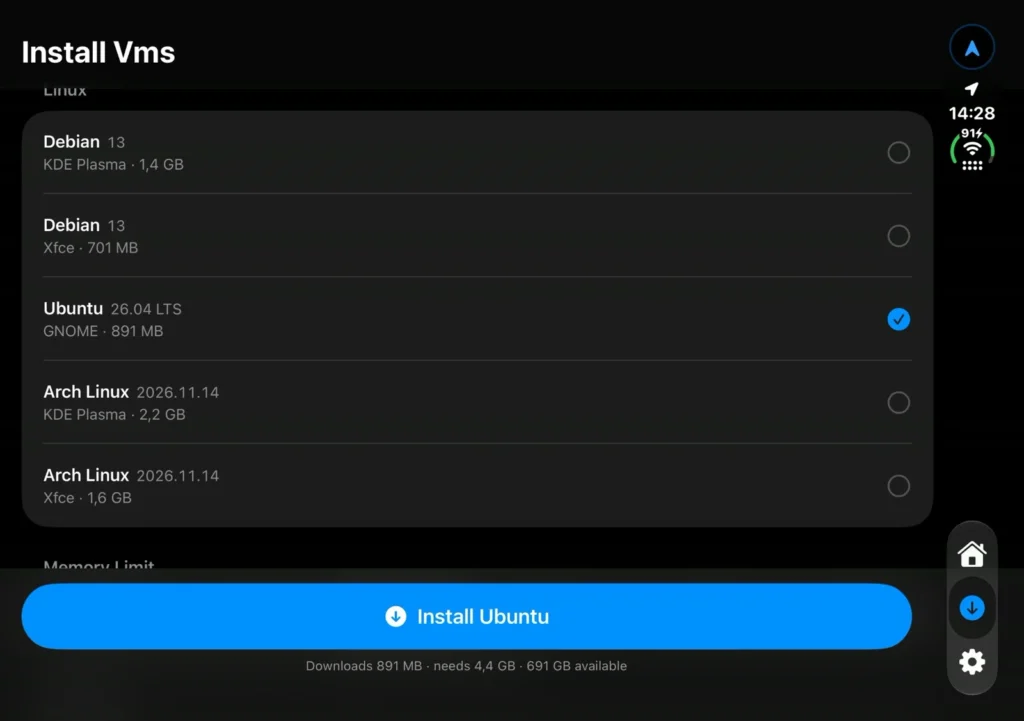
In the Install tab (the README calls it “Install Vms”) you pick a distribution, set memory and disk size, and tap Install.
Which Linux should I pick?
The desktop is the part you see: windows, panels and menus. This is what crate offered me:
| Distribution | Desktop | Download |
|---|---|---|
| Ubuntu 26.04 LTS | GNOME | 891 MB |
| Debian 13 | KDE Plasma | 1.4 GB |
| Debian 13 | Xfce | 701 MB |
| Arch Linux ARM | KDE Plasma | 2.2 GB |
| Arch Linux ARM | Xfce | 1.6 GB |
For your first try, go with Ubuntu with GNOME. It’s what runs on my phone, and it’s the setup the README shows off. The README also calls GNOME the heaviest of the desktops. If memory gets tight, pick an Xfce version, since Xfce is a lightweight desktop. Omarchy with the Hyprland desktop is listed as “coming soon” in the README and isn’t in the catalog yet.
Memory and disk
- Memory: you can choose from 2 to 12 GB. The v0.1.5 release notes say iPhones let crate use about 6 GB, so a VM there gets about 4 GB at most, whatever you pick. That’s why my Ubuntu shows 3.99 GiB even though I chose 6 GB. The same notes say 2 GB leaves the most room for the desktop and apps. You can change this later in the VM’s settings.
- Without the memory entitlements: if you left out the two capabilities from step 2, iOS gives crate less memory, so pick a smaller size. Settings → Memory in crate shows the limit iOS gave it.
- Disk: from 16 GB up to whatever your iPhone has free. You can’t change it after the install. According to the README, empty space on the virtual disk takes no room on the phone. Mine is 32 GB with 2.5 GB used.
Create your account and start
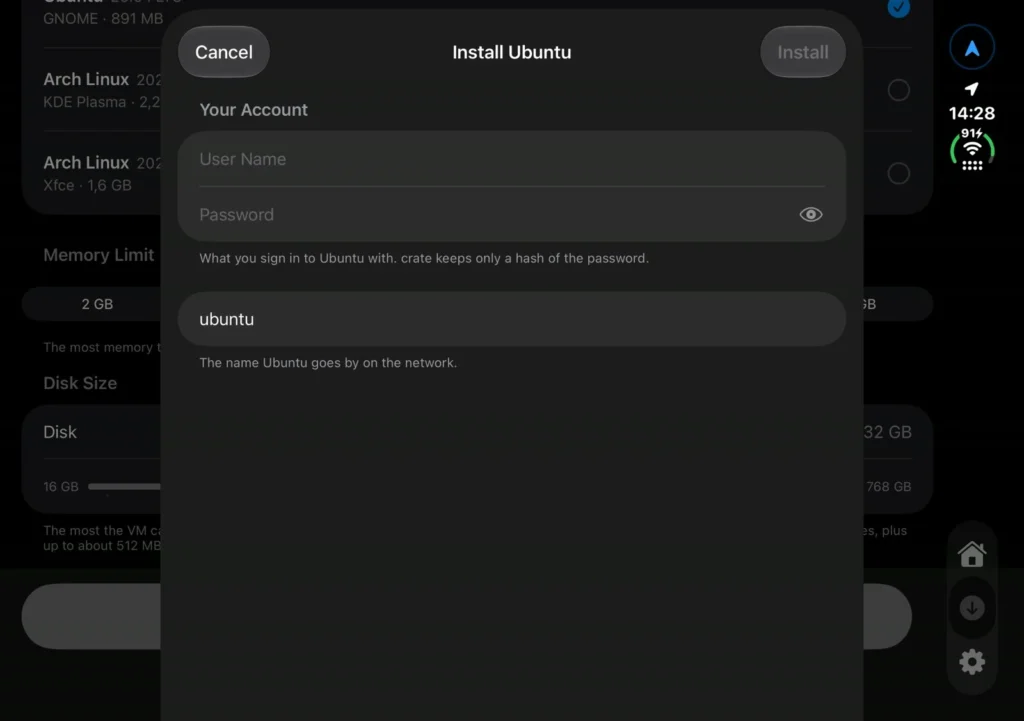
- After you tap Install, crate asks for a user name, a password and a host name for your Linux. The host name is the computer’s name, for example
iphone-linux. Remember the password, you’ll need it in the terminal soon. - crate downloads the image, checks every file and unpacks it. Keep crate open while it does.
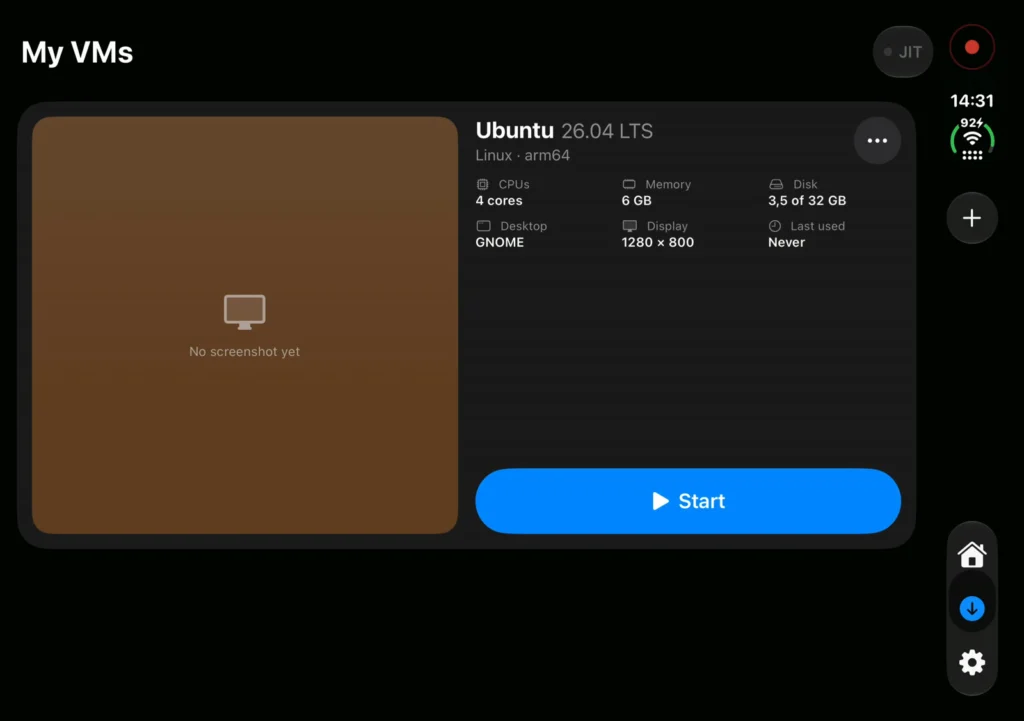
- Your VM shows up as a card in the Home tab. Tap Start. Once it has booted, you’re looking at the desktop.
First things to try in Linux
You control the desktop by touch, with the screen acting like a drawing tablet. Above the on-screen keyboard, crate adds a key row with Esc, Ctrl, Super, Tab, function keys and arrows. Super is Linux’s version of the Windows or Cmd key. Turn the iPhone and the desktop turns with it.
More room: set the resolution to 1280 × 800
Open Ubuntu’s Settings: press Super and type “Settings”. Then go to Displays. Set the resolution to 1280 × 800. That fits more on screen than the default.
Install your first program
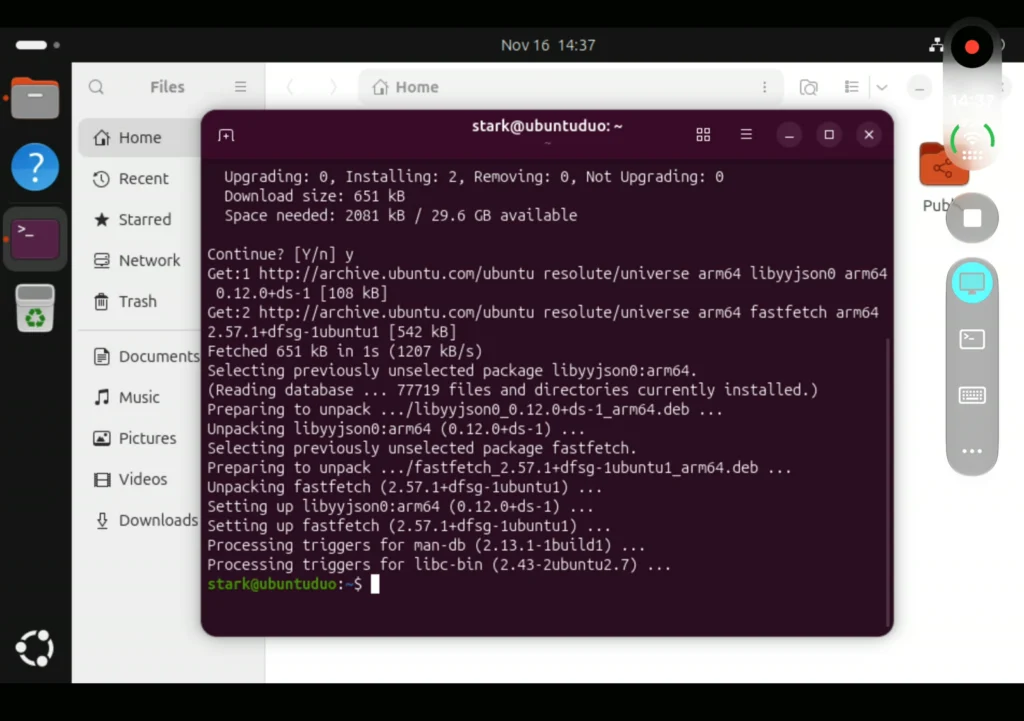
The terminal in Linux works like the one on your Mac. Press Super in the key row, type “Terminal” and open it. On Ubuntu and Debian you install programs with apt, the package manager, which is a bit like an App Store for the terminal. Putting sudo in front runs a command with admin rights, and it asks for the password from step 5. Nothing shows up while you type the password. That’s normal on Linux.
sudo apt update
sudo apt install fastfetch
fastfetch
apt update fetches the current package list, and apt install downloads and installs fastfetch. Then fastfetch prints the overview from the table at the top. On my phone apt downloaded and installed it without any trouble. On Arch Linux ARM the package manager is pacman instead of apt.
After 7 days: sign again
On a free Apple account the profile expires after 7 days, and crate stops opening. Here’s how to bring it back:
- Plug the iPhone into the Mac and click Run again on both Xcode projects from step 2. That renews the profiles.
- In Terminal, in
~/crate, run the command from step 3 again.
Your VMs stay where they are. With a paid developer account you only do this once a year.
Common pitfalls
- “no development profile”: step 2 didn’t make a profile for that bundle ID, or it expired. Run the Xcode project again, and check that the bundle ID in your command matches the one in Xcode exactly.
- The install fails with a provisioning error: the profile doesn’t include your device. Run the Xcode project once with the iPhone connected.
- JIT won’t turn on: it has to be a development profile, because only that lets a debugger attach (the profile calls it get-task-allow).
sign-ipa.shwarns you when it’s missing. - Signed, but crate stopped opening: the profile expired, after 7 days on a free account. Sign and install again as above. Your VMs stay.
- Developer Mode isn’t there: on many iPhones the option only appears after the device has been connected to Xcode once. Plug it in, open Xcode, then look again. After you turn it on, the iPhone restarts and asks you to confirm.
- “Untrusted Developer” when an app starts: on a free account you have to trust your developer profile on the iPhone once. Go to Settings → General → VPN & Device Management, tap your profile and trust it.
- The VM download stops: crate has to stay open until the image has finished downloading.
- Less memory than you picked: normal on an iPhone, where a VM gets about 4 GB at most.
- Installing a different kernel: don’t. crate boots the kernel (the core of Linux) from outside the virtual disk. A kernel you install inside Linux never gets booted, and an upgrade can remove modules the running kernel needs. That’s why the images hold their kernel packages at the version they shipped with.
A word on security
- Check the IPA:
gh attestation verifyfrom step 1 confirms the IPA came from the crate repository’s workflow. The Linux images are built by a separate repository (arm64-desktop-images) with a GitHub workflow, and crate checks every file against its SHA-256 checksum while downloading. - Built-in JIT pairing: crate pairs with your iPhone the way a Mac does when you trust it. That gives crate the same access to the device that a paired Mac has. If you’d rather not give crate that, use StikDebug for JIT.
- Open source: crate’s code is on GitHub under MPL-2.0, so you can read what the app does.
FAQ
Do I need a jailbreak?
No. You sign the app with your own Apple account, and JIT comes through Developer Mode.
Does it work on iPad?
Yes, crate runs on iPhone and iPad, and the steps are the same. The README says a mouse and trackpad work on iPad too. According to the release notes, an iPad Pro with 16 GB gives a VM the full 10 or 12 GB.
Does Linux run offline?
You need internet to download the VM and to use apt. The README says the system itself runs entirely on the iPhone, offline too, and your files stay on the device.
Wrapping up
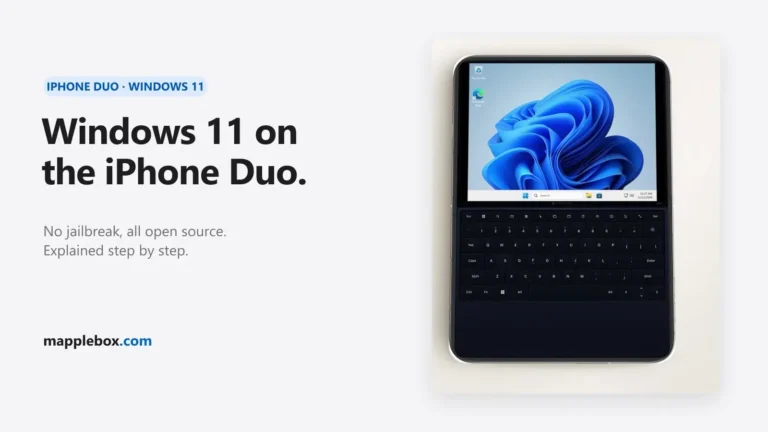
Once crate is signed, you carry a full Ubuntu with a desktop and apt in your pocket. On a free Apple account you sign it again every 7 days, and your VMs stay put. Windows 11 runs on the iPhone too: here’s how to set up Windows 11 on your iPhone. The next guide in this series covers macOS on the iPhone.
Did this guide help you? You can buy me a coffee on Ko-fi. It keeps MappleBox ad-free.