Lightroom API Portfolio: A Photo Site That Updates Itself
Does every new photo in your portfolio mean exporting, uploading, dragging it into the gallery and typing alt text? Then you probably do it as rarely as I used to. In this guide you build a static Astro site that pulls its photos straight from a Lightroom album on every rebuild, including camera data, categories and alt text. My own photography portfolio runs this way. Before that it was WordPress with a premium theme and Elementor for years. The idea came from a tip on r/photography.
Quick summary
- A sync script uses the Lightroom API to read an album from your Lightroom cloud, downloads the photos and rebuilds your static website from them.
- You get the finished script from my GitHub repo lightroom-portfolio-sync. This guide walks you through setup, config and the pitfalls step by step.
- It’s meant for photographers with their own Astro site (or another static site generator) and a Linux server that can run a cron job.
- OAuth is Adobe’s login method. You sign in once, and after that the script uses a refresh token (a long-lived key) to fetch short-lived access tokens on its own.
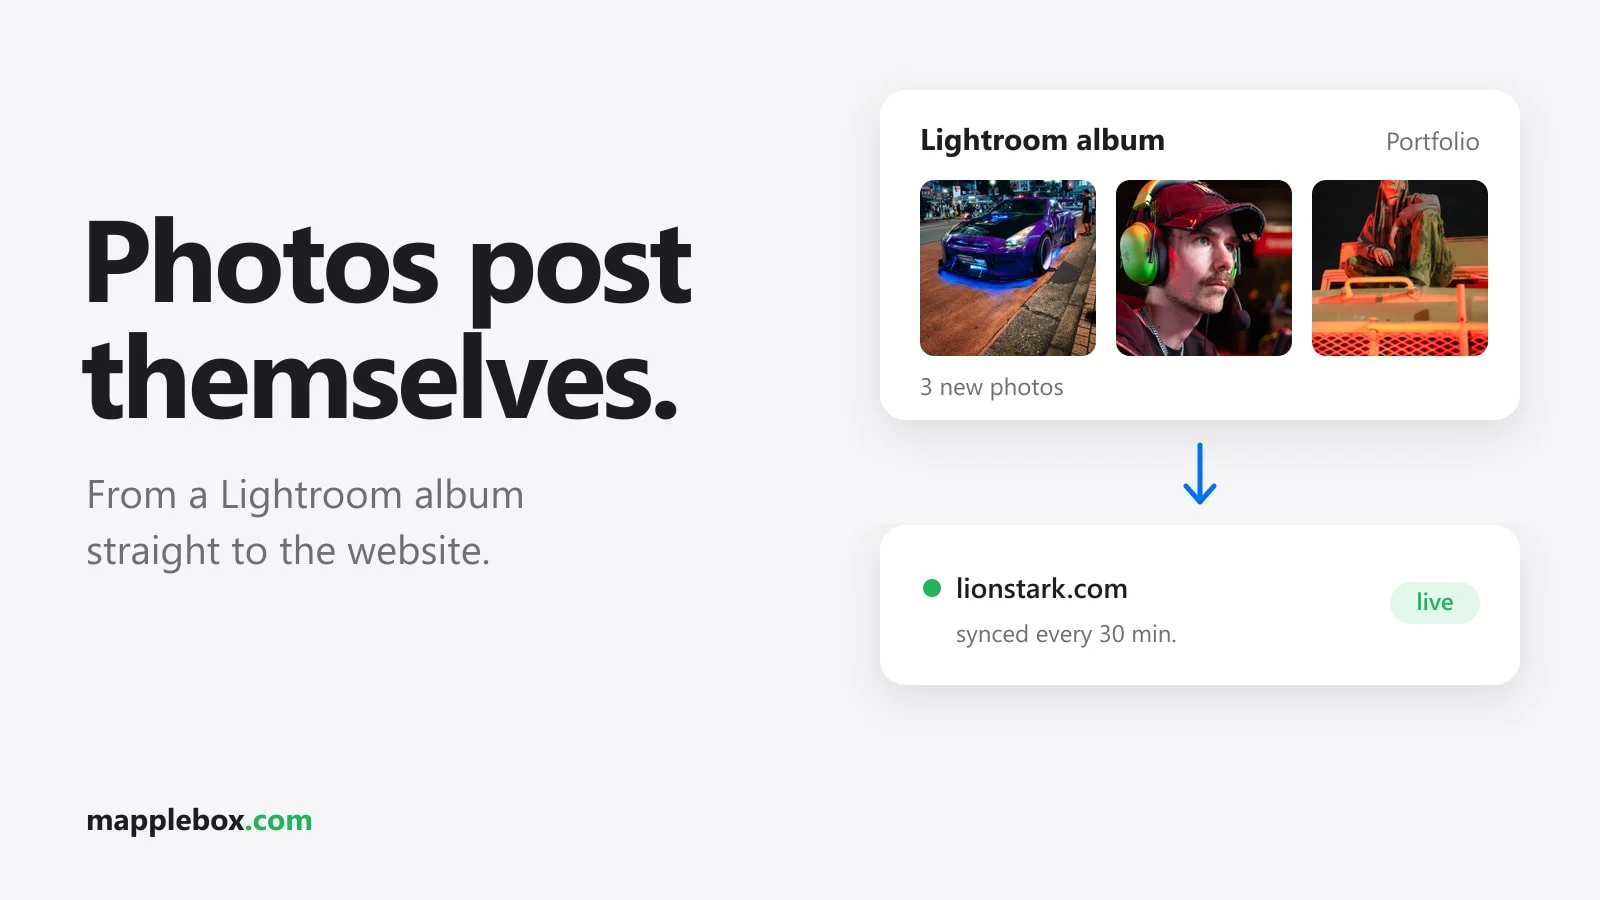
Here’s the idea. The source of truth is an album called “Portfolio” in Lightroom (cloud). Whatever is in that album appears on your website, in the same order. If you remove a photo from the album, it disappears from the site too.
What you need
- A Creative Cloud subscription with Lightroom (cloud), not just Lightroom Classic. Your portfolio photos need to be in the cloud. From Classic this only works through a synced collection.
- An account in the Adobe Developer Console (your normal Adobe login works).
- Node.js 18 or newer. The script uses the built-in
fetchand doesn’t need any npm packages. - An Astro project and a Linux server with cron or systemd that does the build and is allowed to write to your webroot.
- Optionally, an API key from the Anthropic Console for auto-tagging with Claude, and optionally an ntfy server for push notifications.
How the workflow works
A sync script runs on your server every 30 minutes via cron. It does the following, in order:
- Renew the access token using the stored refresh token
- Read the “Portfolio” album in the order you set in Lightroom
- Download only the renditions (the rendered JPEG versions) that are new or have changed
- Have Claude tag new photos once (optional)
- Rebuild and publish the Astro site
- Send a push notification via ntfy (optional)
It only builds and publishes when something has actually changed. All of this lives in a single file, lr-sync.mjs from the repo. You don’t have to rebuild any of it, you just set up the script.
Step 1: Create a project in the Adobe Developer Console
In the Adobe Developer Console, create a new project, click “Add API”, add “Lightroom Services” and choose “OAuth Web App” as the credential type. For the Default Redirect URI, enter an HTTPS address on your domain. The page doesn’t have to exist. You only need the code from the address bar later. Watch out with the Redirect URI pattern: it’s a regex, and you have to escape the dots with a double backslash. My first attempt failed with “API configuration failed” for exactly this reason.
Redirect URI pattern:  https://example\\.com/connect/.*
Default redirect URI:  https://example.com/connect/
The Default Redirect URI has to match the pattern. Mind the trailing slash. Without it, /connect/.* won’t match.
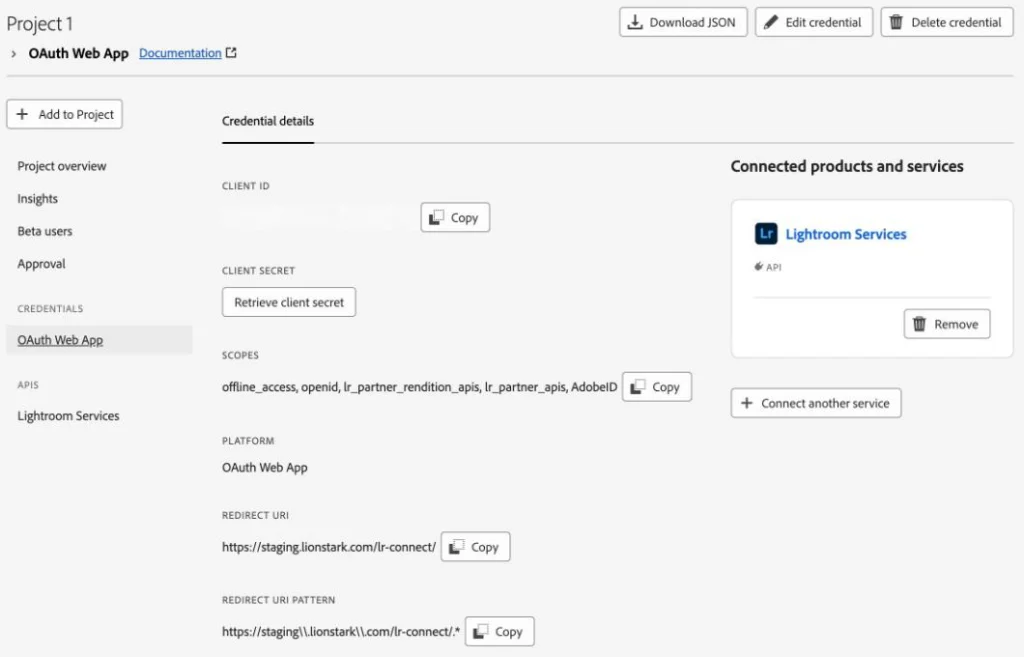
Then note down the Client ID and Client Secret from the credential. The Client ID is also your API key. When you log in, the script requests these scopes, meaning the permissions you grant the app:
openid,AdobeID,lr_partner_apis,lr_partner_rendition_apis,offline_accesslr_partner_apis and lr_partner_rendition_apis give access to the catalog, albums and renditions. offline_access makes Adobe send a refresh token at all. Without it, the script can’t run unattended.
There’s one limitation you should know about. Adobe officially describes the Lightroom APIs as an interface for approved partner apps (Lightroom Partner APIs). Accessing my own catalog with my own project worked for me at the time I wrote this guide, but there’s no guarantee that Adobe keeps it that way. If the console doesn’t offer “Lightroom Services” at all, the login fails with invalid_scope, or the API calls return 403, your API key isn’t enabled. Then your only option is to contact Adobe through the Developer Console or the partner program and describe your use case. The script can’t work around that.
Step 2: Add the script to your Astro project and configure it
Download lr-sync.mjs and lightroom.example.json from the repo. The script goes into scripts/, and you put lightroom.example.json directly into the project folder your-site/, where the command below copies it from. The script resolves all paths relative to the folder above scripts/:
your-site/
├── lightroom.example.json     # template from the repo
├── scripts/lr-sync.mjs        # the sync script
├── private/lightroom.json     # config + tokens, never in Git, never in the webroot
├── src/data/lightroom.json    # written by the script
├── src/photos/lr/*.jpg        # renditions, written by the script
└── dist/                      # Astro build output
The config holds your Client Secret and, later, the refresh token. So only the user the sync runs as should be able to read it:
cd /path/to/your-site
mkdir -p private && cp lightroom.example.json private/lightroom.json
chmod 700 private && chmod 600 private/lightroom.json
echo "private/" >> .gitignore
Then fill in your values. Empty fields turn off the optional features:
{
  "client_id": "YOUR_CLIENT_ID",
  "client_secret": "YOUR_CLIENT_SECRET",
  "redirect_uri": "https://example.com/connect/",
  "refresh_token": "filled in automatically by --code",
  "album": "Portfolio",
  "target": "/var/www/example.com/htdocs",
  "build": "npx astro build",
  "anthropic_key": "",
  "ntfy_url": "",
  "ntfy_token": ""
}redirect_uriis exactly your Default Redirect URI from step 1.albumis the name of your album or folder in Lightroom.targetis your webroot. On every publish, the script deletes everything there except.well-knownand copies the new build fromdist/into it. So use a folder that contains nothing else. Create it beforehand and give it to the user the sync runs as (deployin this example):sudo mkdir -p /var/www/example.com/htdocs && sudo chown deploy: /var/www/example.com/htdocs. If the folder is missing, the script tries to create it and stops with an error if it lacks the permissions.buildis the build command. The default isnpx astro build, and it has to write todist/. If you installed Node through nvm, enter the full path here, for example/home/deploy/.nvm/versions/node/v22.x.x/bin/npx astro build, otherwise the cron job won’t findnpx(more on that in step 9).
All other fields (custom categories, fallback alt text, staging mode) are described in the README in the repo.
Step 3: Connect once and save the refresh token
You do the OAuth login exactly once. You don’t need a separate connect page for it, because the script has two commands for this. The first one builds the login URL for Adobe’s authorize endpoint:
node scripts/lr-sync.mjs --auth-urlYou get an address that follows this pattern:
https://ims-na1.adobelogin.com/ims/authorize/v2
  ?client_id=YOUR_CLIENT_ID
  &scope=openid,AdobeID,lr_partner_apis,lr_partner_rendition_apis,offline_access
  &response_type=code
  &redirect_uri=https://example.com/connect/
  &state=random-value
Open it in your browser, sign in with the Adobe account that owns the photos and allow access. Adobe redirects you to https://example.com/connect/?code=…&state=…. It doesn’t matter if you get a 404 page there. Copy the value after code= and exchange it for the tokens right away, because the code is only valid for a short time:
node scripts/lr-sync.mjs --code 'PASTE_THE_CODE_HERE'The script sends the code via POST to https://ims-na1.adobelogin.com/ims/token/v3 with grant_type=authorization_code, with the Client ID and Secret sent as HTTP Basic Auth. It saves the refresh token from the response in private/lightroom.json. From then on, the sync script fetches its own access tokens, on every run with grant_type=refresh_token at the same endpoint. The official details are in Adobe’s IMS docs.
Step 4: The refresh token and the 14 days
According to Adobe, refresh tokens expire after 14 days by default. If Adobe sends a new refresh token during a refresh, the script saves it immediately and uses the new one from then on. That’s why it matters that the cron job runs regularly and that the config stays writable for the sync user. Whether a new token actually extends the lifetime depends on your API key. The Lightroom docs say that renewing refresh tokens needs extra setup on the API key, which you have to request from Adobe.
Without that, expect to repeat step 3 about every two weeks. If the refresh fails, the log shows token refresh failed and you get a single ntfy notification, if you’ve set up ntfy. Then just run --auth-url and --code again. Adobe also recommends storing tokens encrypted. At the very least, the config should be chmod 600, outside the webroot and never in Git.
Step 5: Create the album in Lightroom
The script recognizes three layouts, and the first one that matches wins:
- A “Portfolio” folder with albums inside: each album becomes a category.
- Albums like “Portfolio – Portraits” or “Portfolio – Street”: the category is the text after the hyphen.
- A single “Portfolio” album: everything goes into the “Work” category, and with auto-tagging Claude sorts the photos into real categories.
A number in front of the name sets the order of the categories and is left out of the label, so “1 – Portraits” becomes “Portraits”. You set the order of the photos in the album with the custom sort order. In the API, each photo in the album carries its position as a sort string in the payload.order field, and the script keeps the order in which the API returns the photos.
Step 6: API pitfalls you should know about
The script handles everything below. This overview helps if you want to change something or wonder why your own test call fails. All requests go to https://lr.adobe.io and need two headers:
X-API-Key: YOUR_CLIENT_ID
Authorization: Bearer ACCESS_TOKEN
These are the endpoints the script uses:
GET /v2/catalog
    → your catalog, its id is the catalog_id
GET /v2/catalogs/{catalog_id}/albums?limit=500
    → all albums and folders, more pages via links.next
GET /v2/catalogs/{catalog_id}/albums/{album_id}/assets?embed=asset&subtype=image&order_after=-&limit=500
    → the photos in an album in album order, including XMP metadata
GET /v2/catalogs/{catalog_id}/assets/{asset_id}/renditions/2048
    → JPEG with 2048 px on the long edge, your edits already applied
Responses start with while(1){}
The Lightroom API puts while(1){} in front of every JSON response as protection against JSON hijacking. JSON.parse fails on it. So strip the prefix first:
const text = await res.text();
const data = JSON.parse(text.replace(/^while\s*\(1\)\s*\{\s*\}\s*/, ""));
When your filter finds 0 albums
The docs talk about albums with the subtype project. If you filter for that, you get zero albums, like I did. In Lightroom (cloud), albums have the subtype collection, and folders are collection_set. With the right filter, “Portfolio” shows up right away:
const album = data.resources.find(
  (a) => a.subtype === "collection" && a.payload?.name === "Portfolio"
);
The rendition has no EXIF data
Download the 2048 px rendition. It already includes your edits, so you don’t need to export anything separately. It has no EXIF data, though. So you get the camera, lens and settings from the asset metadata under xmp: the camera model from tiff (Model), the lens from aux (Lens) and the exposure values from exif. The aperture comes as a fraction there, for example [28,10], and has to be converted:
const frac = (v) => (Array.isArray(v) ? v[0] / v[1] : v);
const aperture = frac(xmp.exif?.FNumber);   // [28,10] -> 2.8
Step 7: Auto-tagging with Claude (optional)
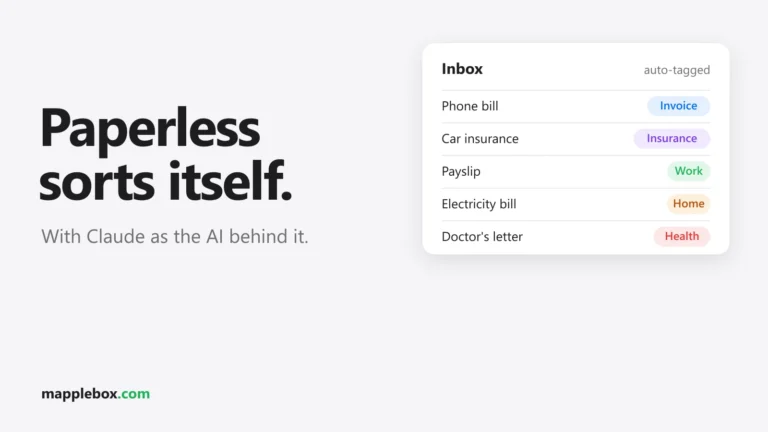
Maintaining categories and alt text by hand rarely works. In my case they were usually missing. Instead, send each new photo to Claude Haiku once, scaled down to 800 px first. You get back 1 to 2 categories, an English alt text and a location if it’s clearly recognizable. Cache the result per photo version. If you don’t change the edit in Lightroom, the photo isn’t sent again. For me it came to roughly a tenth of a cent per photo. The exact amount depends on the model and on current API prices.
In the repo you turn this on by setting anthropic_key in the config. The default model is claude-haiku-5-5, and you can enter a different one with ai_model. Models get replaced eventually, so check Anthropic’s model overview to see whether the ID is still current. Only photos without their own caption in Lightroom, or in the catch-all “Work” category, get tagged. Your captions from Lightroom always take priority. The image is only scaled down if the npm package sharp is installed in the project, which Astro usually includes already. Otherwise the 2048 px rendition is sent as is. The model’s response looks like this:
{ "categories": ["portraits", "street"], "alt": "Woman in a red coat crossing a wet street at night", "location": "Tokyo" }You’ll find the full prompt in the aiTag function in lr-sync.mjs. You can set your own categories with ai_categories in the config, for example {"wedding": "Weddings", "portraits": "Portraits"}.
One thing I ran into: for some photos the model simply returned nothing. It had used up its whole token budget on reasoning before writing an answer. My tip: turn off thinking for this call and raise max_tokens. Since then I get a result for every photo. Both are already set this way in the script.
Step 8: Add the photos to Astro
The script writes src/data/lightroom.json with the categories and a list of photos. Each photo has file (for example lr/ASSET_ID.jpg), categories, alt, location, taken and an exif object with camera, lens, focal length, aperture, shutter speed and ISO. The images are stored in src/photos/lr/ so Astro can optimize them during the build. A minimal gallery page looks like this:
---
import { Image } from "astro:assets";
import data from "../data/lightroom.json";
const images = import.meta.glob<{ default: ImageMetadata }>("../photos/lr/*.jpg", { eager: true });
---
{data.photos.map((p) => (
  <Image src={images[`../photos/${p.file}`].default} alt={p.alt} widths={[640, 1280, 2048]} />
))}
So the site builds even before the first sync, start by creating an empty src/data/lightroom.json containing {"synced":"","categories":[],"photos":[]}. If you use a different static site generator, read the same JSON file and put your build command under build.
The website itself
I wanted the look to change very little. The gallery is dark again, with a justified layout like on the old site. With Astro, though, you can easily build a few features I never managed with Elementor:
- The lightbox opens with a zoom out of the thumbnail.
- A “Shot on” panel shows camera, lens and settings from the EXIF data.
- On a phone, you hide the panel with a tap and swipe between photos.
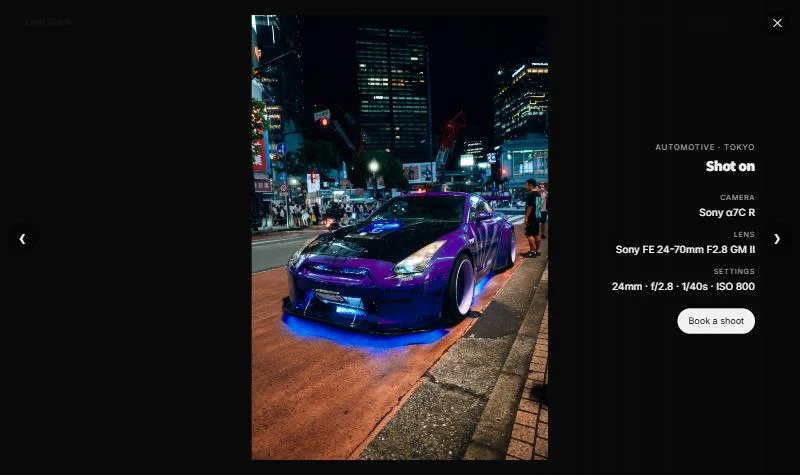
My panel usually shows the Sony α7C R* and one of two lenses, the FE 24-70mm F2.8 GM II* or the FE 70-200mm F2.8 GM OSS II*.
Step 9: Build and publish automatically
Run the sync as a normal user, not as root. In this example the user is called deploy. It needs write access to the project folder and to the webroot from target. Before the first cron run, test by hand:
cd /home/deploy/your-site
node scripts/lr-sync.mjs --dry-run   # reads Lightroom, shows the data, writes nothing
node scripts/lr-sync.mjs             # downloads photos, builds, publishes
If that works, add the job with crontab -e as the deploy user. Every 30 minutes is enough:
*/30 * * * * cd /home/deploy/your-site && /usr/bin/node scripts/lr-sync.mjs >> private/lr-sync.log 2>&1The script publishes by copying the contents of dist/ to target. If your web server runs on the same machine, point target straight at its document root. If your website lives somewhere else, set target to a local folder, /home/deploy/public in this example (create it as described for target above), and push it to the web server with rsync afterwards, for example as the second line in a small wrapper script:
rsync -a --delete /home/deploy/public/ deploy@<your-server>:/var/www/example.com/htdocs/You’ll find a template for a systemd timer instead of cron in the README in the repo.
Common problem: the cron job never runs
The sync script runs fine by hand, but nothing happens in cron, and there’s no error message either? That’s exactly what happened to me. If you start the script from root’s crontab via runuser like I did, so it doesn’t run as root, this is the cause: cron has a very short PATH that’s missing /usr/sbin, so runuser is never found. Use the full path, for node too:
*/30 * * * * /usr/sbin/runuser -u deploy -- sh -c 'cd /home/deploy/your-site && /usr/bin/node scripts/lr-sync.mjs >> private/lr-sync.log 2>&1'command -v node shows you where node lives on your system. With nvm installs it’s a path in your home directory, for example /home/deploy/.nvm/versions/node/v22.x.x/bin/node. In that case you also need the full path in the build field of the config (/home/deploy/.nvm/versions/node/v22.x.x/bin/npx astro build), because the build runs in the same short PATH. Alternatively, set PATH=/home/deploy/.nvm/versions/node/v22.x.x/bin:/usr/bin:/bin at the very top of the crontab.
After that, you get an ntfy push notification after every run with changes, if you’ve set ntfy_url and ntfy_token. How to self-host ntfy is covered in the guide on Uptime Kuma and ntfy.
Check that it works
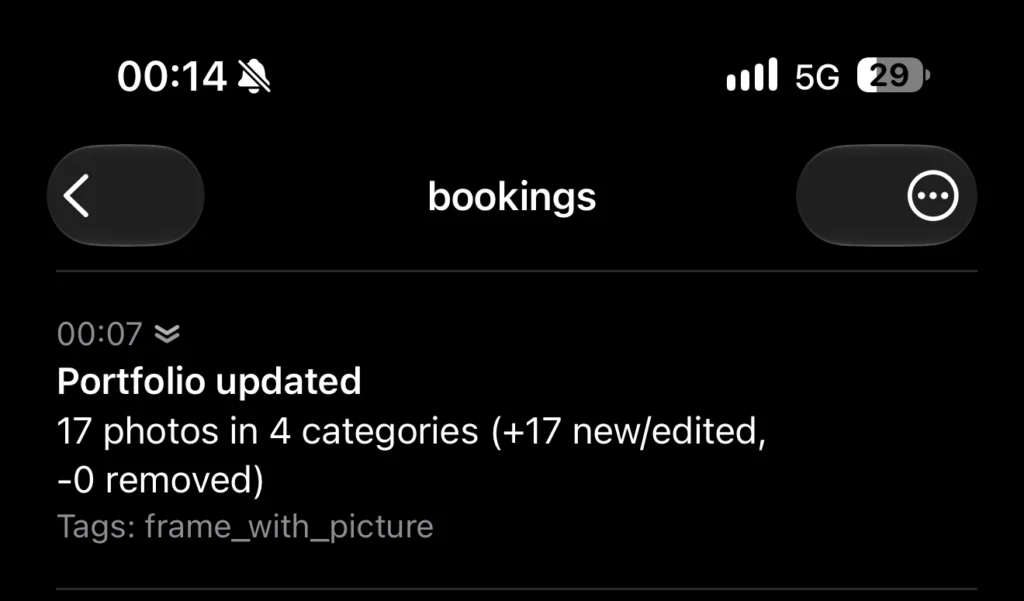
node scripts/lr-sync.mjs --dry-runshows you the categories and photos from Lightroom without writing anything. If you getno Lightroom album/folder "Portfolio" foundhere, the album name in the config is wrong.- The log
private/lr-sync.loghas one line per run like2 categories, 17 photos, 1 downloaded, 0 removed, followed byno changesorpublished to …. - Drag a photo into the album, wait for the next run (or start it by hand) and check that it appears on the website. Take it out again, and it’s gone after the next run.
- If the log says
token refresh failed, the refresh token has expired. Repeat step 3.
Wrapping up
With this setup, your workflow is: edit the photo in Lightroom, drag it into the “Portfolio” album, done. Within 30 minutes it’s on your website, with category, alt text and camera data. My own portfolio runs exactly like this. You’ll find the script on GitHub at mapplebox/lightroom-portfolio-sync.
Questions about the Lightroom API, or a similar setup with a different tool? Let me know in the comments.
* Affiliate link: As an Amazon Associate I earn from qualifying purchases. It costs you nothing extra. More info
Did this guide help you? You can buy me a coffee on Ko-fi. It keeps MappleBox ad-free.